The Self Employed Uniform

The Self Employed Uniform

I was getting dressed, cleaning up this morning, and making the bed, the usual routine, when it occurred to me - I wonder what other self-employed people actually reach for and tend to wear on a daily basis. 

The Architect

Previously I've worked as an Architect in an office so I had to look both professional and also wear clothes that I would pop out onto site in. This meant a cheap-ish wardrobe of smart trousers and layered tops, usually from Primark or whatever. There was never anything cool or trendy about my work wardrobe - I mean I was in a hard hat and steel top-capped boots 50% of the time. 

The Lecturer

Then, moving into Academia at a private design school, my wardrobe got a lot more fun - the fact the school was in India meant I could experiment with what I wore a lot more and never felt judged or unprofessional. I could express myself more, try Indian outfits on our 'cultural days', and wear what I really felt like 'me' in. 

be comfortable, be yourself

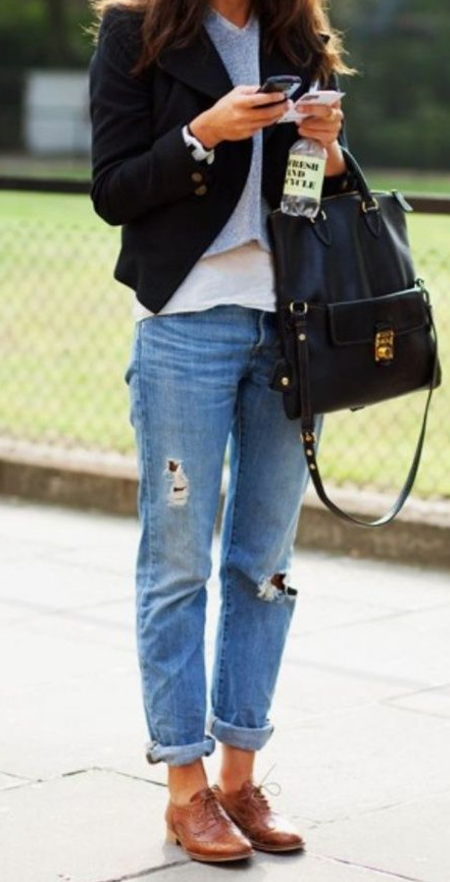
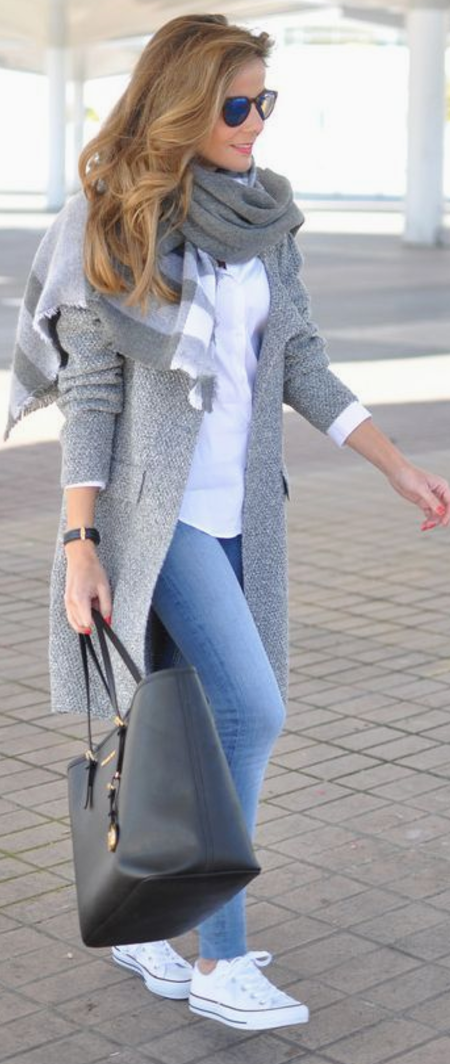
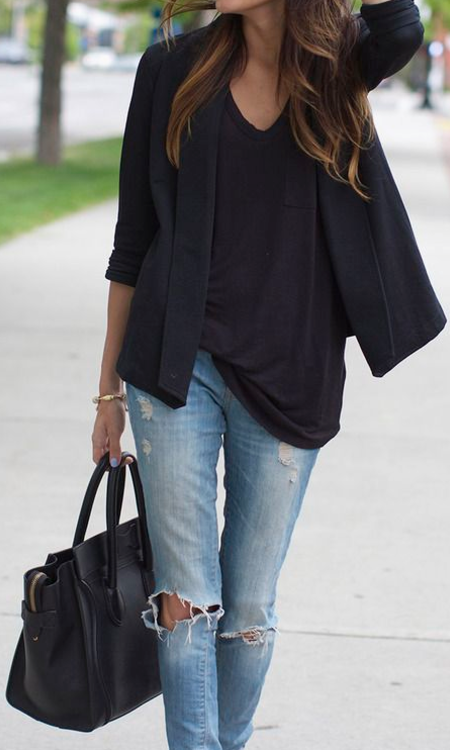
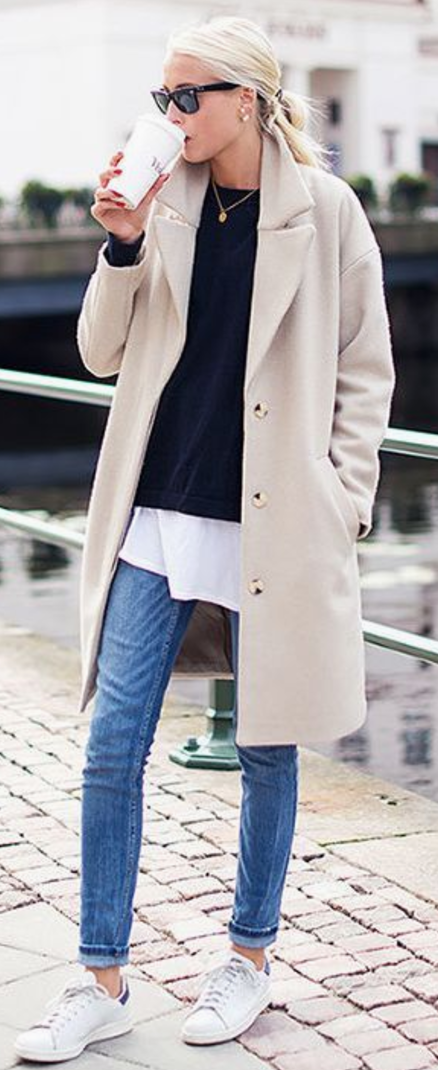
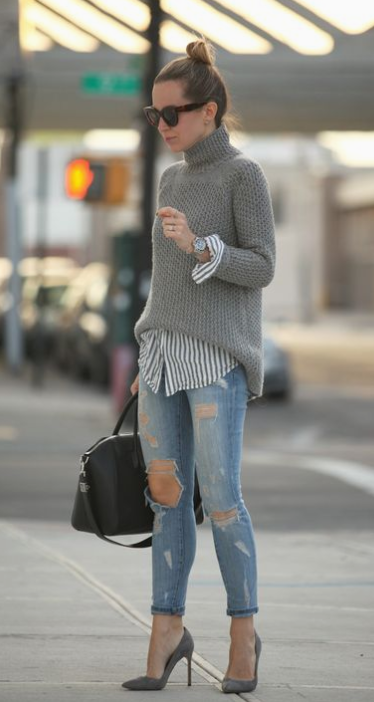
This idea of feeling like 'me' is an interesting one, something that I thought would have developed over time and I would have my own style but in reality, I maybe dress up into the style but I live in and spend most of my time in my jeans and a simple top. I think it’s more about the material; the soft worn-in feeling is just so comforting. I tend to wear Zara skinny straight-legged blue wash jeans and a simple top. The top never matters much but I'm so lazy in my hunt for comfy clothes in the mornings that I also tend to live in sports bras. Maybe that’s TMI??

an identity

A uniform to me is something that helps present you in the role you have. A Doctor, a Firefighter, a Bus Driver, a Sale Assistant, etc. But if we don't work in professional or service-related jobs then the 'uniform' is more a perception thing, perhaps the way we dress is more about the way we think we should dress for that role or be seen as that employee. 

Dress the part, for success

I dress for comfort but also to feel more confident, to empower myself. I vlog looking, however, I do at that time but I make more effort for a sit-down video. I want to be seen at my best and my best is neat and presentable - teeth brushes, hair done, make-up on, thoughtfully selected clothes. My jeans are comfortable and they make me feel good, so I am more confident. I'm sure you'd agree, I don't want to wear something I'm not comfortable in as I'll feel self-conscious. 
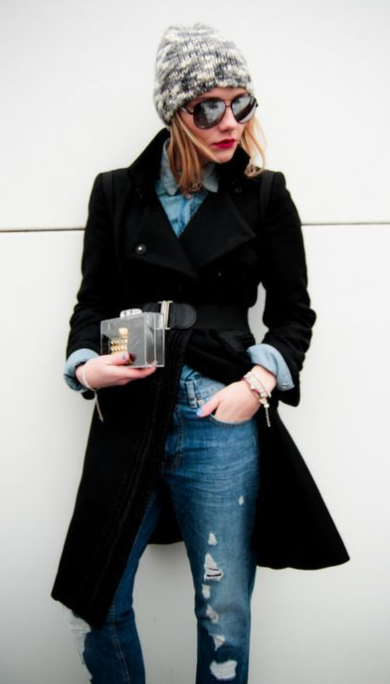
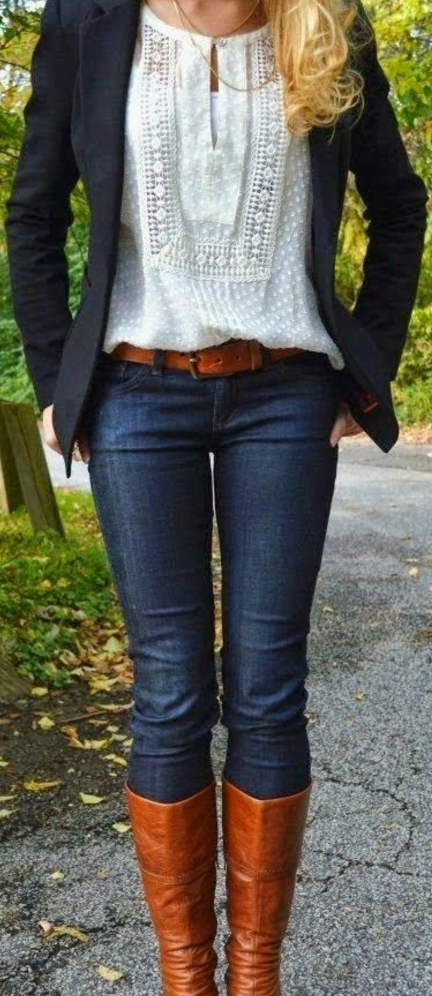
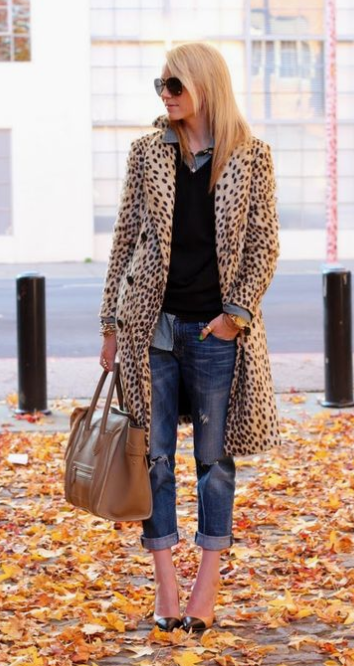
inspiration

Don't get me wrong, I completely appreciate a good pair of PJs or leggings - I'm often wearing PJ bottoms when I sit down to film - but I thought I'd put this out there and see what you guys tend to reach for, what are your "comfies" and if you're also self employed, what do you consider your uniform. 


what's your Self Employed Uniform?

FREE Mini Course #RockYourDegree

FREE Email Course #RockYourDegree

It's almost a year since I left my role as Senior Lecturer back in the UK to move to Iceland. In that time I've achieved so many goals that were on my To-Do list but there was a 'Student Advice'. I wanted to form an output, a way of offering my answers to all those questions previously asked to me and pass on the same advice to other students. So I got typing and created my first email course. 

It simple. You sign up for the FREE emails and you will immediately be sent Day 1 of the 5 Day email course. The course runs over 5 days so you'll get an email each day. Each email focuses on a different topic and they're packed with information and useful links. I hope you get loads out of this email course so let's get started and #RockYourDegree


DAY 1 - Clear Your Space, Clear Your Mind

  • How to be organized and focussed

  • How to best storage equipment and materials

  • How to store stock for online shops, i.e. Etsy

  • The importance of storing and keeping all student project work

  • What to do with physical models, saving and backing up digital work

  • Online Portfolio

DAY 2 - Inspiration + Motivation

  • How to stay focussed, inspired, and motivated

  • How to create moods boards and sketchbooks

  • The importance of evidencing your design process within the sketchbook

  • How to get in the habit of using the Library

  • Sorting your Instagram feed to reflect you as a designer

  • Pinterest

  • The benefits of teamwork and a study group

  • How to look after number 1

DAY 3 - Plan + Prepare + Present

  • How to be organized so stress doesn't get the better of you

  • Staying onto of dates and deadlines

  • The Library

  • Apps to help you stay organized in project management

  • How to prep your mind, space, supplies, and food ready for any project or challenge

  • Presentation tips for before, during, and after your presentation

  • What is professionalism

  • What to do if you fail

DAY 4 - Communication, Connections, Collaborations

  • Communication and note-taking

  • How to contact faculty (your lecturers)

  • Writing academic work

  • LinkedIn

  • Your online presence

  • Networking

  • How to get the most out of Uni social events

  • How to approach an office for help, internship, or employment

DAY 5 - Let’s Get Real

  • The course finishes with a bit of perspective on studying and graduating

  • And...ideas on how to show off your skills and stand out from the crowd

Project Brief: My Room, My Interior

Looking to boost your Art & Design Portfolio content for College or University application? Using found objects and materials you are going to build a scale model of your bedroom

For those looking to study spatial design - interior, architectural, model making - making a model (especially to scale) is an important skill in communicating and developing ideas.

This project is ideal for students applying to:

  • ModelMaking

  • Interior Design

  • Interior Architecture

  • Architecture

What is ModelMaking?

Modelmaking is a skill in itself. Model makers study a degree lasting typically 3 years where they learn everything it takes to create 3D models both physical and computerized.

ModelMakers go on to a wide range of roles from freelance work, to in-house at Architecture firms, with product designers right the way up to special effects on movie production.

ModelMaking takes a great deal of time and patience but can be a lot of fun, and if you can show your ability in your portfolio then it’ll set you ahead of the competition as this is not something taught at school level.

What you’ll need:

  • Time and patience!!

  • Good craft knife, the sharper the better but be careful, for obvious reasons. If you are using a scalpel and blades, change the blade often and dispose of it correctly.

  • Cutting matt so as not to cut your parent’s dining table.

  • Glue, and not tape. ModelMakers use superglue and a whole range of different glues but for this exercise UHU is good, PVA can be used but might not dry flat.

  • Metal ruler, do not use plastic as your blade will hack into it and may slide off and into you. Safety first.

  • Material, any. Try to stick to one colour, I recommend using white. Yes, it seems boring but it looks professional. Don’t spend a lot of money on material, reuse and recycle. Cardboard from boxes and packing is absolutely fine.

  • A bedroom, or room.

Assignment: Build a Model of Your Bedroom

You are going to try to build a 3D model of your bedroom. So your model will likely have four walls, a floor, door, and windows (or whatever your room looks like).

First, sketch out the outline of your room - this is the floor plan and will help you build the overall structure (walls). Mark where the door is and then cut the walls to fit the right length, then cut the door and windows into the correct walls. This is the basic model of your room.

Next, start to plan out the furniture and create miniatures of your bed, cupboard, desk, chair, mirror, etc until the room feels complete.

Don’t be lazy here - try to recreate as many details within the room as possible.

It gets fun and the more you add to it, the better it will look. And whoever is looking at your model and portfolio will notice.

Start with fabric items such as your bedding (fold paper), curtains (curl or bend paper), and move on to items such as dressing gowns (get super creative with your paper and fabric, add thread, etc) model items on your desk or bedside table like a computer, books, and so on.

If you have time and are able to, try to cut a little silhouette of yourself as a scale person. Look at the door to help you draw out what height you should be compared to the door opening and then stand yourself up in your model.

TOP TIP: Architects and other spatial designers do this all the time in the office. Try building your model in only white materials and mount it on a larger board than the floor, so there’s a kind of frame around it. White (or all one colour, could also be black or cardboard brown) is more forgiving to mistakes and looks a lot more finished - even if it’s not.

How to present your model in your portfolio

Now take photographs of your model to include in your portfolio as carrying around the actual model is a little impractical and could damage it.

It’s also a good idea to place something beside it to show a scale for the model (if you aren’t happy with your silhouette person) and the detail you have put into it. Use something obvious like a pencil or ruler. Something that would naturally be on hand and not distract from the model itself.

Try out different angles for your photos (front for elevation, top for plan, side on for perspective). You can also consider doing a step-by-step page showing how you constructed your model.

Now either print these out or create a layout on A3 paper (or as a PDF) and add some text explaining the model.


Project Brief: Handmade Sketchbook

Looking to boost your Art & Design portfolio content for College or University application? Using recycled materials you are going to make a unique and creative sketchbook

For those looking to study Art and Design at University or College then making and filling sketchbooks is something you will become all too familiar with.

What is a Sketchbook?

Artists and designers use sketchbooks in their everyday work and life both to record research, and to communicate and develop ideas. You might go through hundreds of sketchbooks and document many projects and ideas in them so let’s start out with the very basics - making one.

This project is ideal for students applying to:

  • Any Art & Design Subject

  • ModelMaking

  • Interior Design

  • Interior Architecture

  • Architecture

Save money and get creative - how to make your own sketchbook

The sketchbook we are going to make will be creative and unique. You will reuse and recycle different materials for its creation and it will be a great addition to your project or portfolio.

Plus, it’s a good conversation piece for your interview.

What you’ll need:

  • A bunch of materials that can be reused - cardboard, packaging, cereal boxes, newspapers, etc. These will be used for the outer cover of your sketchbook and the inner pages. Mix materials to add interest - old newspaper, wrapping paper, paper bags, etc (the more variety, the better).

  • Thread, wool, wire, or cord to bind the pages together

  • A large needle

Assignment: Handmade Sketchbook

First, start off by selecting the outer cover and designing the size and shape of the sketchbook. Fold it in half so there’s a front and back cover, and cut into it as your design requires.

Next, consider how many pages there will be and mix up the paper you plan to use - you can always add in extra pages by simply sticking them in, and folding them out.

Pick the thread you will use to bind the book together. Line everything up and, using your large needed, start to make holes in all the pages from the front cover to the back, binding them into a book.

Don’t worry if it looks messy, it’s all part of the fun.

Now cut into the pages to reflect your design, i.e. if the front cover has a front door and windows cut into it then create this. As you flick through the pages, you see other doors and windows which connect one page to the next. The same could be created for letters, logos, or figures for fashion, etc. 

TOP TIP: Your work should always be a reflection of you so personalize your sketchbook and consider branding or brand colours.


How To Use A Scalpel, Cut Material + DIY Sharps Box

How To Use A Scalpel, Cut Material + DIY Sharps Box

Cutting materials by hand is an important skill for a student or young designer, especially in Interior, Architecture, and Model Making. You should learn how to use a surgical blade, craft knife, or scalpel properly to create clean cuts and neat edges to your material, but also to make sure you are not causing yourself any injuries in the cutting, storing, and replacing of your knife and blades. 

1. Always use a cutting mat

The surface of any table is not adequate and you may damage it. This will then cause cut lines in the surface so when you come to draw, the surface is no longer smooth. 

2. Invest in good knifes

There are many to choose from such as Xacto knife, craft knife, surgical knife, etc. Don't just pick up a cheap packet, invest in a good knife and a few packets of replacement blades. 

3. Rulers & Cutting edges

Make sure to always use a metal edge, a long metal ruler is best. I have a few metal rulers of differing lengths. When model making, I use a ruler which will be longer than any material I am cutting. I also tape a length of masking tape to the underside to help give it a grip on the material I am cutting. Do not use a plastic ruler as the blade can slide into it leading to you cutting yourself or the ruler’s straight edge being damaged.

4. Safety first

Keep your fingers back from the edge of the ruler when cutting. Try to stand up when cutting your material and make sure to always be looking at your work. Press firmly on your ruler to hold it in place on the material. Press down on each stroke when cutting with the knife. Never cut through the material is one cut, use 2-3 strokes (a thick card, foam core, etc) to get a cleaner edge. Don't rush. 

5. Fresh blade and often

Replace the blade often to ensure clean cuts and dispose of the old blade in a sharps box. Either wrap in masking tape or better yet, make a DIY sharps box.


Job Interviews and Dealing With Rejection

Job Interviews and Dealing With Rejection

Getting a job interview can be exciting but also pretty nerve-wracking. I just found out that I didn't get the job I had interviewed for here in Reykjavik so I wanted to write out some points to help anyone else who is going through the stress of job searching, applications, and the interview process. 

watch the video

ASK FOR FEEDBACK

If you’ve gotten through a few rounds of interviews, the interviewer(s) have probably gotten to know you well so there’s no harm in asking for feedback at the end of your follow-up email. There is always a chance that they won’t provide feedback because it might be seen as a liability or they are short on time.

REFLECT on the interview

Maybe the interview didn't go as well as you hoped (were you on time, dressed appropriately, prepared, or too nervous, did you research the company, understand the position, or ask good questions?)

You had a glaring typo in your resume or cover letter (mistakes happen but this is the no 1 reason employers don't call people back)

Take some time to reflect on your experience and think about what went wrong. This will allow you to avoid making the same mistake in the future. Think of it as a learning opportunity, to be a better candidate next time.

MAYBE the job or company WASN'T A GOOD FIT

Sometimes it's not about you or anything you could have done (or done differently). One thing I learned from hiring people is that there are so many great candidates and there are also a lot of behind-the-scenes decisions that go into each hire. Sometimes the decision to not hire you truly has nothing to do with you.

If you reflect on your experience, and can't find anything that went wrong, it's possible that nothing did. There could have been someone with one more year of relevant experience or knowledge of one more computer program.

LET IT GO

Don't be hard on yourself. Don’t take it too personally - everyone goes through this at some point. Move on to the next application - the job that is right for you is out there. Realize that the hiring process often takes time

Keep Applying

  • You'll be able to focus better on the next application if you can get excited and motivated for it.

  • The job search can be very stressful…

  • Keep a positive attitude

  • Remain optimistic

  • Apply for multiple jobs within the same area

  • Approach companies even if they aren't advertising

  • Focus on continually learning and improving

  • Keep your CV and LinkedIn up to date

  • Practice makes perfect so do mock interviews

  • Network - it’s often who you know!!

Remember, there are a lot of things in life you can't control but do your best at what you can. Be prepared and present yourself to the best of your ability. Good luck and feel free to comment below with your stories.


are you currently job hunting or about to start a new job?