Working From Home Guide

Working From Home Guide 2020

It’s a crazy time right now and, as we all settle into working from home for the foreseeable future, I thought I’d share a Working From Home Guide. Here are my top tips for working from home and how to make the most of your space to create a ‘home office’. 

Working from home seems like the dream to many and, though it does come with many more pros than cons, it can be filled with distractions and motivation zappers. After all, your bed is warm and cozy, and your sofa is comfortable and only a few steps away…and you’ve almost finished binge-watching [insert series]. 

Get The Right Desk

Ok, so back in your office you might have one of those adjustable desks so you can stand more but in reality, at home, you’ll probably just sit. Try to use a good chair and be aware of your posture, the right chair for your new ' workstation is so important. Think of your back and look after it. If you can order a new one then do that but it might not be an option right now. If you plan to have a home office then it’s worth investing in a good setup. If you have the budget for it then look into an adjustable desk and make sure it’s one that can be raised and lowered easily so there’s more chance you will actually adjust it. Look at where and how you work - do you actually work at your desk, where it currently is? If not then rethink the space, turn things around and face a different direction. Get your set upright and you will be more productive.

Avoid All The At-Home Distractions

That super comfy sofa, Netflix, a full fridge, kids, argh. Try to be strict with yourself and treat your work/office like you would if you were going out to work. I try to start my day by 9-9:30 am and finish by 4-5 pm. I have my breakfast before I get to my desk and keep a lunch hour where I try to take a walk, move my body and enjoy some fresh air. I start dinner prep at 5 pm but if I’m still finishing tasks then I will keep working until 6 pm. Sometimes I work in the evening, depending on my workload and deadlines but I try to keep weekends work-free, where possible. Working from home becomes a habit, and if you get good at it then it can be hard to walk away from. Be strict but fair with yourself.

Sit Near The Window

Expose yourself to as much natural light as possible as this will help you focus, concentrate and can promote a happier mood - plus you’ll have access to fresh air. Natural light is better for photography so grab those Instagram shots. If you don’t have large windows or live in a country with long dark winters, like here in Iceland, invest in a daylight light - this can also help with waking up in the mornings.

Avoid getting hit by Seasonal Affective Disorder (SAD) a form of depression related to the change in season. Don’t brush this off as the winter blues it can get serious. Symptoms usually start showing around autumn/fall and continue throughout winter. It can zap your energy, mood, and motivation. Make sure to move your body, go for a walk and get some fresh air, be social (if you can). Fuel yourself, eat well and go easy on yourself - often we can be our own worst critics.

Become A Plant Lover

Don’t sigh, it’s not just a trendy interiors thing but plants are both pretty and practical - they clean the air helping with co2 levels so what’s not to like. I’m a sucker for succulents, and house plants like ivy and spider plants which are easy to look after (seemingly). My love pottering with my plants and looking after them - yup, I’m a plant lady.

Get An Essential Oil Defuser

This is the one we love, add a few drops of lavender oil to the water and it will relax you. I did this in our bedroom whilst I was breastfeeding Mia and have continued to have it on in the room as I get ready for bed or whilst I enjoy some me-time. A defuser is a great gadget to have at home and you can add different oils to help with your mood.

Surround Yourself With Pictures

These can be of your family, friends, happy times, inspirational quotes, pretty artwork, etc. Post-it notes might not look cool but they’re useful and can be great for covering your screen with ideas, notes, to-do items, and so on. I use them when planning my online courses to help structure lessons as I can easily move topics around and stand back from the course to really see the overview.

I’m a list-lover, lists on my phone and in my bullet journal (what did we do before bullet journals, have random lists everywhere?!).

Pinboards are back and make great physical mood boards, brand, or vision boards so why not try this to help keep you visually stimulated and on-brand. I am currently making a vision board which I’ve never done before. Try making one by looking through magazines and cutting out anything that “sparkes joy” as Marie Condo would say. Write words or quotes relevant to you, print images, add text, textures, and materials, flowers, or whatever works for you. Keep it somewhere you will see it every day as a reminder of what you want in your life.

Music

I use Spotify on our Sonos to play playlists or just listen to the radio. I’m pretty bad with music and would honestly listen to whatever - I’ve been known to listen to the same CD in my car for months without bothering to change it. Having playlists set up where I can easily stick them on in the background is good for me. I like chill, coffeehouse kind of playlists.
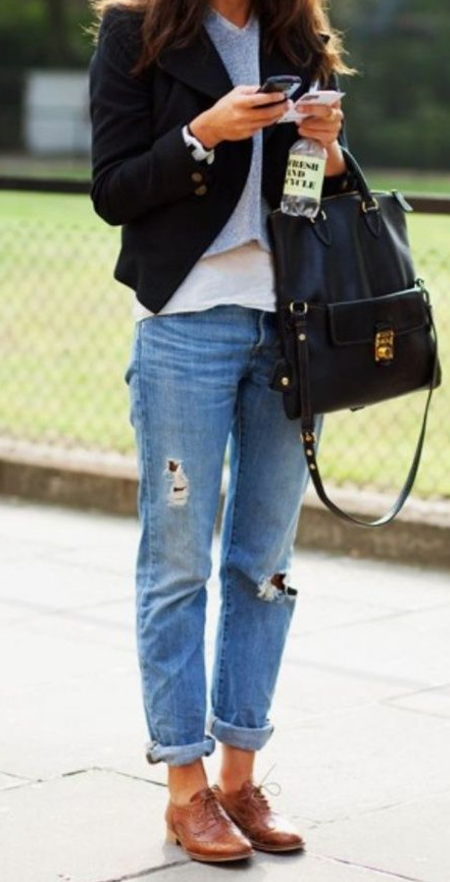
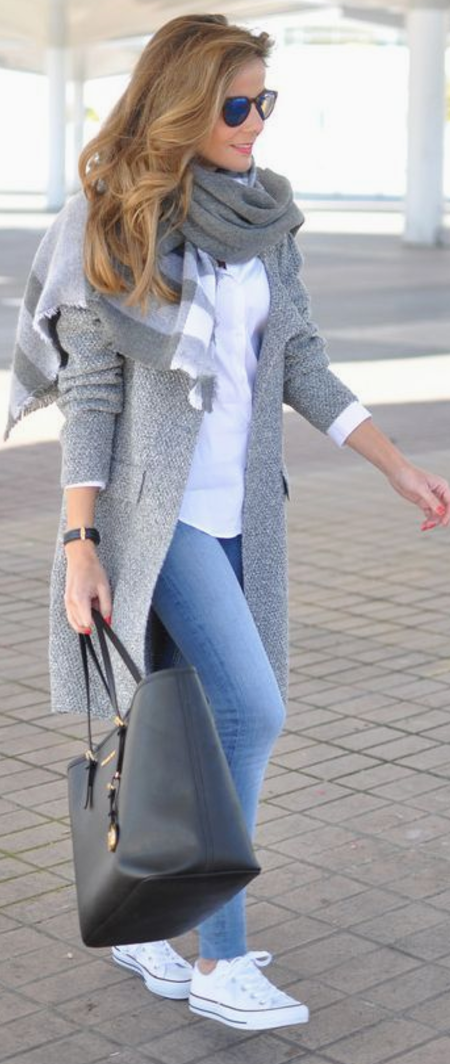
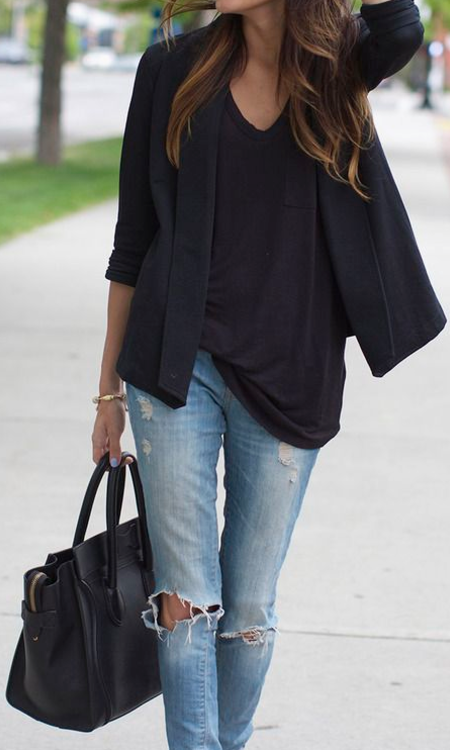
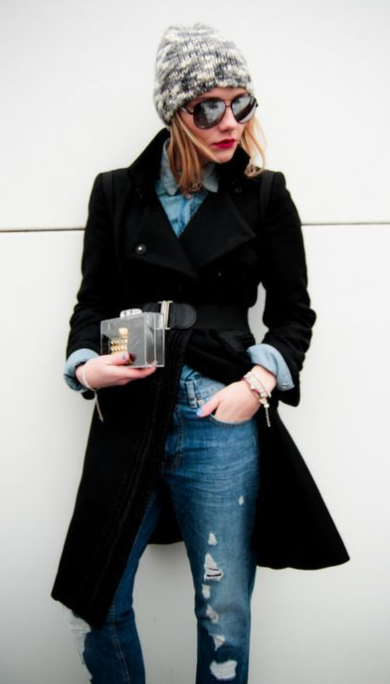
Dress For Work

This helps with the point above and will help you take working from home more seriously until you find your flow. I recommend you dress comfortably but not too comfy or you’ll just lounge around the house. Working from home comes with the big advantage of being in PJs but I find I work more productively if I actually get up and dressed, ready for the day. This might mean hair brushed and makeup - some mascara and lippy - to feel a bit more put together.

READ: My Self Employed Uniform

Work Outside The Box (when you can)

Not that your home is a ‘box’ but I really recommend trying this. Change up where you work once a week by heading to your local library, a coffee shop (though coffees can really add up), try a friends place (also great for collaborating and bouncing ideas around), an open office space (check Facebook to see if there’s a place like this in your area) or if your budget allows, rent a desk in a shared office space (great for networking and collaborations). I do have what I call a ‘soft office aka my bed where I often edit photographs, plan my Instagram feed, and download clips for my YouTube videos. Road trips are a great place for thinking, I love to dream up new projects and discuss them with Ingimar. My favorite place for planning and daydreaming is in a hot tub (lucky me, I know). Escape from behind your laptop - get some space and distance for good perspective. 

The True Gem Of Working At-Home

…that you can have your office assistant/motivator with you, aka baby Mia (can also be your pet).

Becoming a Mum has motivated me on an entirely different level, something I didn’t expect. Though my time, energy, and focus are so precious now, and my brain is still a bit baby brain blurry, I have a bigger reason, purpose, and even more, drive to succeed.

I feel like I’m creating my legacy, I’m building my dreams not just for me but for Mia and our family. Mum guilt plays a huge role in my day and I often feel like I can’t win. If I’m working, I should be playing with her and if I’m playing with her, I should be working. It’s hard but I want her to be proud of her Mummy, to see me working, and to know why it’s important.

She is 21months old now and that time has flown by. She has taught me that time is precious and you can’t get it back - every minute away from her has to count. Time is a precise commodity. I have to work smarter, not harder - now more than ever.

I used to work as an Architect, in a very stressful and highly male-dominated, competitive environment. It was a classic case of the last one in the office meant you were the hardest worker. It’s nonsense. Busy doesn’t mean successful. The hardest worker doesn’t make them the best. The self-employed Mum-life is far busier and I probably get more done now. I don’t want to work a 10, 12hour day building someone else’s dreams when I can work on my own dreams.

Be Proud Of Your Accomplishments

Working from home takes a bit to get used to so don’t be too hard on yourself. You have to manage your time, juggling things, be your own boss and possibly look after the kids too. Celebrate the wins, even if they are small. Keep track of them in your journal, stats, income, clients, projects, and look back on the last 30 days.

I did this recently with my Etsy shop and compared it to last year and was so surprised at our growth. I now keep track of all my social media accounts and following. It puts less pressure on to see the slow and steady growth other than just looking at the actual numbers. It makes it easier to be more realistic about growth and targets and on yourself.

Learn to look back often on what you are building, and have already accomplished and celebrated it. 


this post was originally written in 2020 and has been updated

My Iceland Bucket List

For all my friends, or friends of friends or people that contact asking for my recommendations of things to do in Iceland  - I've put together an Iceland Bucket List to share with you. These are places, sites, restaurants, and hotels that I recommend or, yup, still want to try. Click the names for links. I recommend self-driving so you have the freedom to come and go as you please but there are lots of wonderful tours on offer too. 

Near Keflavik (Iceland International) Airport

access is limited due to volcanic activity - check with local authorities

  • Blue Lagoon - book tickets in advance, go for the option with marks and drink at the swim-up bar

  • Gunnehver Geysir - near Blue Lagoon, amazing but smelly landscape


Reykjavik, Iceland

  • Harpa - concert venues, worth looking at inside and out, a tour of the building on offer

  • Hallgrimskirja - view from the top, service in English last Sunday of every month

  • Perlan - ice cave exhibition, view from the top - still to do (newly opened)

  • Seabarren / Sægreifinn - lobster soup

  • Íslenski barinn - Meat soup, shark, beer

  • Cafe Loki - rye bread ice cream

  • Laundromat - a great breakfast, I love the pancakes

  • Fish Market - for a special meal, try the epic taster menu

  • National Museum - still to do

  • Icelandic Phallological Museum - still to do

  • Reykjavík Art Museum, Hafnarhús - still to do

  • Settlement Exhibition - still to do

  • Reykjavík Art Museum - a great big space with some mad exhibitions

  • National Gallery of Iceland - still to do

  • Nauthólsvík Beach - hot pool, nice walks, cafe

  • Grotta Lighthouse - great for Northern Lights spotting, small hot pot, beach walks


the Golden Circle

  • Pingviller National Park - tectonic plates, amazing landscape

  • Geysir - erupting every few minutes, the cafe is good here (free soup refills)

  • Efstidalur - farm serving homemade ice cream, eat a steak in the restaurant overlooking the barn

  • Gulfoss Waterfall - powerful waterfall, wrap up as can get wet

  • Fontana - geothermal spa - outdoor spa on the side of a lake, go from steam and hot pool to lake!!

  • Secret Lagoon / Gamla Laugin - fab hot pool, walk around the site after

  • Mika Restaurant - a lovely family-run place with lobster and handmade chocolates

  • Fridheimar Greenhouse - eat tomato soup amongst the plants in this greenhouse - still to do

  • Bruarfoss Waterfall - still to do

  • Kerid - Walk around the edge of a crater


Hveragerdi, Iceland

  • Reykjadalur hot river - roughly a 1hr hike but well worth it to bathe in the hot river at the top


the South Coast trail

  • Seljalandsfoss Waterfall - walk behind the waterfall

  • Gljúfrabúi - 2mins walk after Seljalandsfoss

  • Seljavallalaug Natural Pool - amazing pool, can be cold if it's been raining/snowing

  • Skogafoss Waterfall - huge waterfall, not worth the stairs to the top

  • Skogafoss Bistro - soup and a view

  • Sólheimajökull - Glacier, you can walk up to it but you'd need to join a tour to go on it, amazing experience

  • Plane wreck - a long walk, only do if you really want to

  • Reynisfara / Black Sand Beach - be careful of the waves

  • Dyrhólaey - dramatic coastal landscape

  • Vik - Service Station burgers to tide you over

  • Skaftafell - Glacier + Ice Cave tour

  • Jokulsarlon / Glacier Lagoon - stunning, enough said

  • Diamond Beach - just over the road from Jokulsarlon, epic for photography


Snaefellsnes Peninsula, Iceland

  • Snæfellsjökull National Park - self-drive and see some amazing landscape

  • Djúpalón Beach - the beach where fishermen lifted stone weights to show their strength

  • Snæfellsjökull - glacier

  • Kirkjufell - the most photographed mountain in Iceland but stunning

  • Norska Húsið - traditional houses, architecture

  • Súgandisey - orange lighthouse, a lookout point

  • Helgafell - mountain

  • Malarrif - coastline and lighthouse

  • Saxhöll Crater - drive into a crater

  • Stykkishólmskirkja - futuristic church here


Accommodation in Iceland


…and on my bucket list:

  • The West Fjords

  • Landmannalaugar

  • Fjaðrárgljúfur

  • Vestmannaeyjar (Westman Islands)

  • Akyreri

  • Myvatn Nature Baths

  • An Ice Cave

  • The Ring Road


what's on your iceland bucket list?

The Self Employed Uniform

The Self Employed Uniform

I was getting dressed, cleaning up this morning, and making the bed, the usual routine, when it occurred to me - I wonder what other self-employed people actually reach for and tend to wear on a daily basis. 

The Architect

Previously I've worked as an Architect in an office so I had to look both professional and also wear clothes that I would pop out onto site in. This meant a cheap-ish wardrobe of smart trousers and layered tops, usually from Primark or whatever. There was never anything cool or trendy about my work wardrobe - I mean I was in a hard hat and steel top-capped boots 50% of the time. 

The Lecturer

Then, moving into Academia at a private design school, my wardrobe got a lot more fun - the fact the school was in India meant I could experiment with what I wore a lot more and never felt judged or unprofessional. I could express myself more, try Indian outfits on our 'cultural days', and wear what I really felt like 'me' in. 

be comfortable, be yourself

This idea of feeling like 'me' is an interesting one, something that I thought would have developed over time and I would have my own style but in reality, I maybe dress up into the style but I live in and spend most of my time in my jeans and a simple top. I think it’s more about the material; the soft worn-in feeling is just so comforting. I tend to wear Zara skinny straight-legged blue wash jeans and a simple top. The top never matters much but I'm so lazy in my hunt for comfy clothes in the mornings that I also tend to live in sports bras. Maybe that’s TMI??

an identity

A uniform to me is something that helps present you in the role you have. A Doctor, a Firefighter, a Bus Driver, a Sale Assistant, etc. But if we don't work in professional or service-related jobs then the 'uniform' is more a perception thing, perhaps the way we dress is more about the way we think we should dress for that role or be seen as that employee. 

Dress the part, for success

I dress for comfort but also to feel more confident, to empower myself. I vlog looking, however, I do at that time but I make more effort for a sit-down video. I want to be seen at my best and my best is neat and presentable - teeth brushes, hair done, make-up on, thoughtfully selected clothes. My jeans are comfortable and they make me feel good, so I am more confident. I'm sure you'd agree, I don't want to wear something I'm not comfortable in as I'll feel self-conscious. 

inspiration

Don't get me wrong, I completely appreciate a good pair of PJs or leggings - I'm often wearing PJ bottoms when I sit down to film - but I thought I'd put this out there and see what you guys tend to reach for, what are your "comfies" and if you're also self employed, what do you consider your uniform. 


what's your Self Employed Uniform?

FREE Mini Course #RockYourDegree

FREE Email Course #RockYourDegree

It's almost a year since I left my role as Senior Lecturer back in the UK to move to Iceland. In that time I've achieved so many goals that were on my To-Do list but there was a 'Student Advice'. I wanted to form an output, a way of offering my answers to all those questions previously asked to me and pass on the same advice to other students. So I got typing and created my first email course. 

It simple. You sign up for the FREE emails and you will immediately be sent Day 1 of the 5 Day email course. The course runs over 5 days so you'll get an email each day. Each email focuses on a different topic and they're packed with information and useful links. I hope you get loads out of this email course so let's get started and #RockYourDegree


DAY 1 - Clear Your Space, Clear Your Mind

  • How to be organized and focussed

  • How to best storage equipment and materials

  • How to store stock for online shops, i.e. Etsy

  • The importance of storing and keeping all student project work

  • What to do with physical models, saving and backing up digital work

  • Online Portfolio

DAY 2 - Inspiration + Motivation

  • How to stay focussed, inspired, and motivated

  • How to create moods boards and sketchbooks

  • The importance of evidencing your design process within the sketchbook

  • How to get in the habit of using the Library

  • Sorting your Instagram feed to reflect you as a designer

  • Pinterest

  • The benefits of teamwork and a study group

  • How to look after number 1

DAY 3 - Plan + Prepare + Present

  • How to be organized so stress doesn't get the better of you

  • Staying onto of dates and deadlines

  • The Library

  • Apps to help you stay organized in project management

  • How to prep your mind, space, supplies, and food ready for any project or challenge

  • Presentation tips for before, during, and after your presentation

  • What is professionalism

  • What to do if you fail

DAY 4 - Communication, Connections, Collaborations

  • Communication and note-taking

  • How to contact faculty (your lecturers)

  • Writing academic work

  • LinkedIn

  • Your online presence

  • Networking

  • How to get the most out of Uni social events

  • How to approach an office for help, internship, or employment

DAY 5 - Let’s Get Real

  • The course finishes with a bit of perspective on studying and graduating

  • And...ideas on how to show off your skills and stand out from the crowd

Project Brief: My Room, My Interior

Are you preparing your Art & Design portfolio for college or university? This creative assignment is perfect for anyone applying to study:

  • Interior Design

  • Interior Architecture

  • Architecture

  • Modelmaking

You’ll be using found objects and recycled materials to build a scale model of your bedroom - a brilliant way to demonstrate your spatial awareness, creativity, and hands-on making skills.

Beige background with a blurred laptop keyboard and bold text that reads “Assignment: Build a Model of Your Bedroom” – student architecture task from Sonia Nicolson’s blog.

Why modelmaking matters

Modelmaking is a powerful skill that helps communicate and develop design ideas. Whether you’re pursuing architecture, interiors, or product design, the ability to physically represent your ideas will set your portfolio apart.

And yes, you can start with cardboard.

What is Modelmaking?

Modelmaking is more than just crafting - it’s a discipline in its own right. Students studying Modelmaking typically complete a 3-year degree learning to produce both physical and digital models.

Modelmakers go on to work in:

  • Architectural and interior design studios

  • Product development and prototyping

  • Museum exhibitions and installations

  • Film and TV (think set design and special effects)

It takes time, patience, and precision, but it’s also a lot of fun. And showcasing this in your portfolio proves you’re serious about spatial design.

What You’ll Need:

Don’t overcomplicate this - reuse materials and keep it simple. Here's your checklist:

  • Time and patience (this is not a rush job!)

  • Craft knife (sharp blade = cleaner edges; always cut safely)

  • Cutting mat (protect your surfaces)

  • Glue (UHU works well; PVA is okay but may warp)

  • Metal ruler (plastic ones split and slip, ouch)

  • Material (ideally cardboard, mountboard, or cereal boxes - stick to one colour if you can. White or neutral looks more professional.)

  • A bedroom (yours, or one you’re familiar with)

Step-by-Step: Build a Model of Your Bedroom

You’re going to build a 3D model of your bedroom in miniature. This is how spatial designers bring ideas to life.

Start with a sketch | Draw your bedroom’s floor plan - this will guide the scale and placement of your walls, windows, and doors.

Build the basic structure | Cut and assemble the walls to match your sketch. Add windows and doors by cutting them out of the wall panels.

Furnish the space | Now build miniature furniture - your bed, wardrobe, desk, shelves, chair, mirror, etc. Use simple shapes and stick to scale.

Add details | This is where your model shines. Fold paper to mimic bedding, curl it for curtains, create tiny books, electronics, rugs, or even a dressing gown on a hook. Be imaginative.

Include a scale figure | Cut out a small person (you) to stand in the room. Use the door height to guide the proportions.

Pro Tip: Use only white or one colour of material and mount your model on a larger base. It gives a clean, architectural look even if it’s made from cereal boxes.

How to Present Your Model in a Portfolio

Since the model might not survive your travels, document it clearly:

  • Take photos from multiple angles:

    Top-down (plan)

    Front (elevation)

    Side-on (perspective)

  • Include an object for scale reference (like a pencil or ruler)

  • Consider making a step-by-step collage or progress page

  • Add a short write-up or labels explaining key elements

Save everything into an A3 layout or digital PDF to include in your portfolio.


Project Brief: Handmade Sketchbook

Create a unique, recycled sketchbook to strengthen your Art & Design portfolio

Looking to boost your Art & Design portfolio for a college or university application? This project invites you to design and make your own handmade sketchbook using recycled materials to create something entirely your own.

Whether you're applying for Interior Design, Architecture, Modelmaking, or any creative degree, showing off your skills in a well-crafted, custom sketchbook will help your application stand out. It's practical, sustainable, and a great conversation starter in interviews.

Assignment cover image with text "Assignment: Handmade Sketchbook" over a faded background of a laptop keyboard. From sonianicolson.com

Why Sketchbooks Matter

Sketchbooks are essential tools for artists and designers. They’re used to record ideas, test concepts, explore materials, and document creative journeys. If you pursue a creative career, you’ll likely fill hundreds of them.

But before you fill a sketchbook with work - why not make one from scratch?

This Project Is Perfect For:

  • Art & Design students

  • Modelmaking applicants

  • Interior Design and Interior Architecture students

  • Aspiring Architects...or anyone who wants to show initiative, creativity, and craftsmanship in their portfolio.

What You’ll Need:

  • Recycled materials: cardboard, cereal boxes, newspaper, old wrapping paper, paper bags, etc. (Tip: Variety adds interest.)

  • Thread, yarn, wire, or cord, anything strong enough to bind the pages.

  • A large needle for stitching the spine.

  • Scissors or a craft knife and adult supervision if needed

Step-by-Step: How to Make Your Handmade Sketchbook

Design your cover | Choose your outer material and decide the size and shape of your sketchbook. Fold it in half to form a front and back cover. Cut into the cover if you’d like windows, shapes, or other design details.

Gather your pages | Mix and match your paper. Use plain, patterned, textured, and even printed materials to add variety. Don't worry about perfection, creativity is the goal!

Bind your book | Stack the pages inside your cover. Use your needle and thread to sew them together through the spine. Punch holes as needed and bind with a simple stitch. Messy stitches are part of the handmade charm.

Add interactive design details | Cut shapes, windows, or doors into the pages so that one layer leads to another, perfect for storytelling, branding, or thematic projects. Think about layering, negative space, and even hidden pages!

Personalise it | Add your name, logo, or brand colours. This is your sketchbook, so let it reflect your style. Be bold. Be intentional. Be you.

Final Tip: Photograph your finished sketchbook from multiple angles and include it in your portfolio. Document the process too, it shows initiative, design thinking, and craftsmanship.