My Wedding Hair and Make Up

Get The bridal Look

I wanted to have my hair up and out of my face, I knew I was now wearing a veil and so we kept the hair simple with a classic but chic loose knot style bun. I love this look, it’s all over Pinterest and I felt that it worked perfectly with my Mum’s, now re-styled, veil. Here are some other examples from my Pinterest board.

Wedding Hair
bride hair

my bridal Hair

I went with local hair and makeup artists and was so happy with the final look. I've not really had my hair or makeup was done by anyone since prom so I was excited. Kirstie sat me down, with a glass of bubbly, and started on my hair. She was so professional and we had a really good laugh. I made sure to not wash my hair the day before so it wasn't completely clean, this makes it easier to work with and your hair will hold the style better. 

bridal make up

Separating my hair into sections, Kirstie curled them with a hot curling wand and then backcombed them slightly. We kept a small section of my fringe out so I had a side fringe framing my face. She then started to create the bun, pinning each curled section, working from the bottom up. It felt very secure and comfortable. She created some height at the crown of my head so this helped add shape and height for when the veil was added. The final touch was to spray with hair spray.

bride up do

a classic Bun

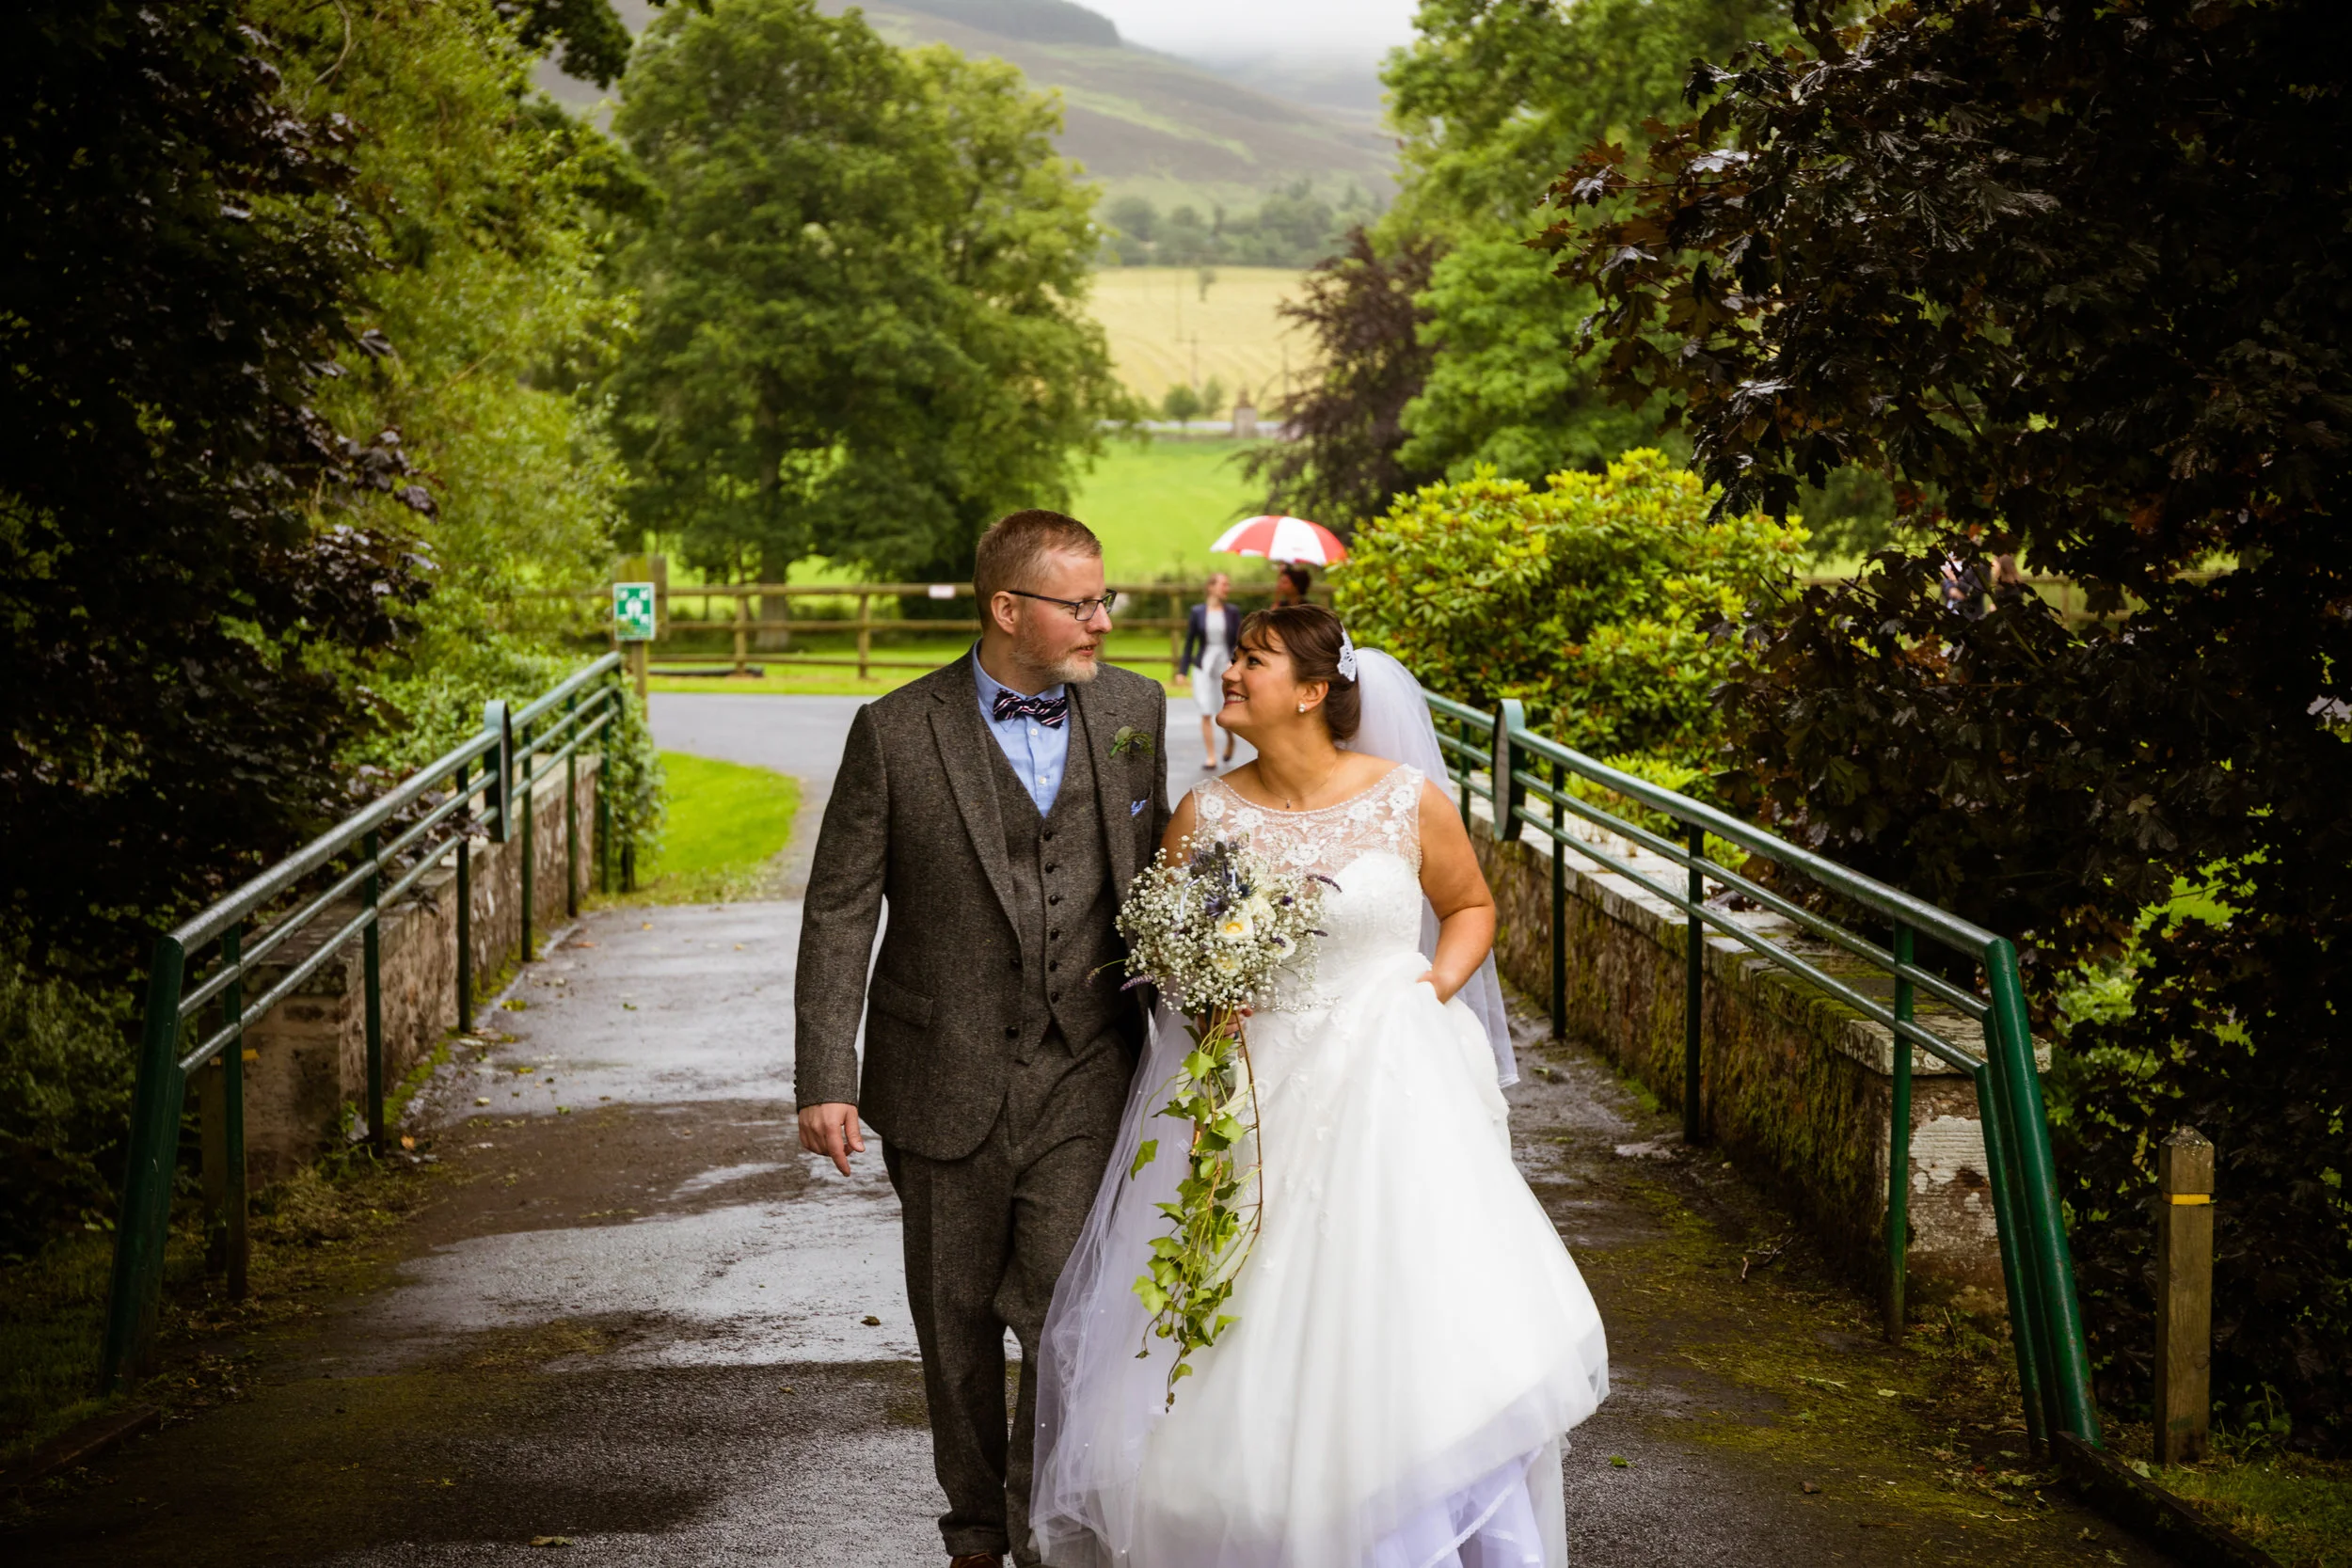
I love the loose, classic style of this bun, it stayed in all day, even with all that dancing. 

veil

my Veil

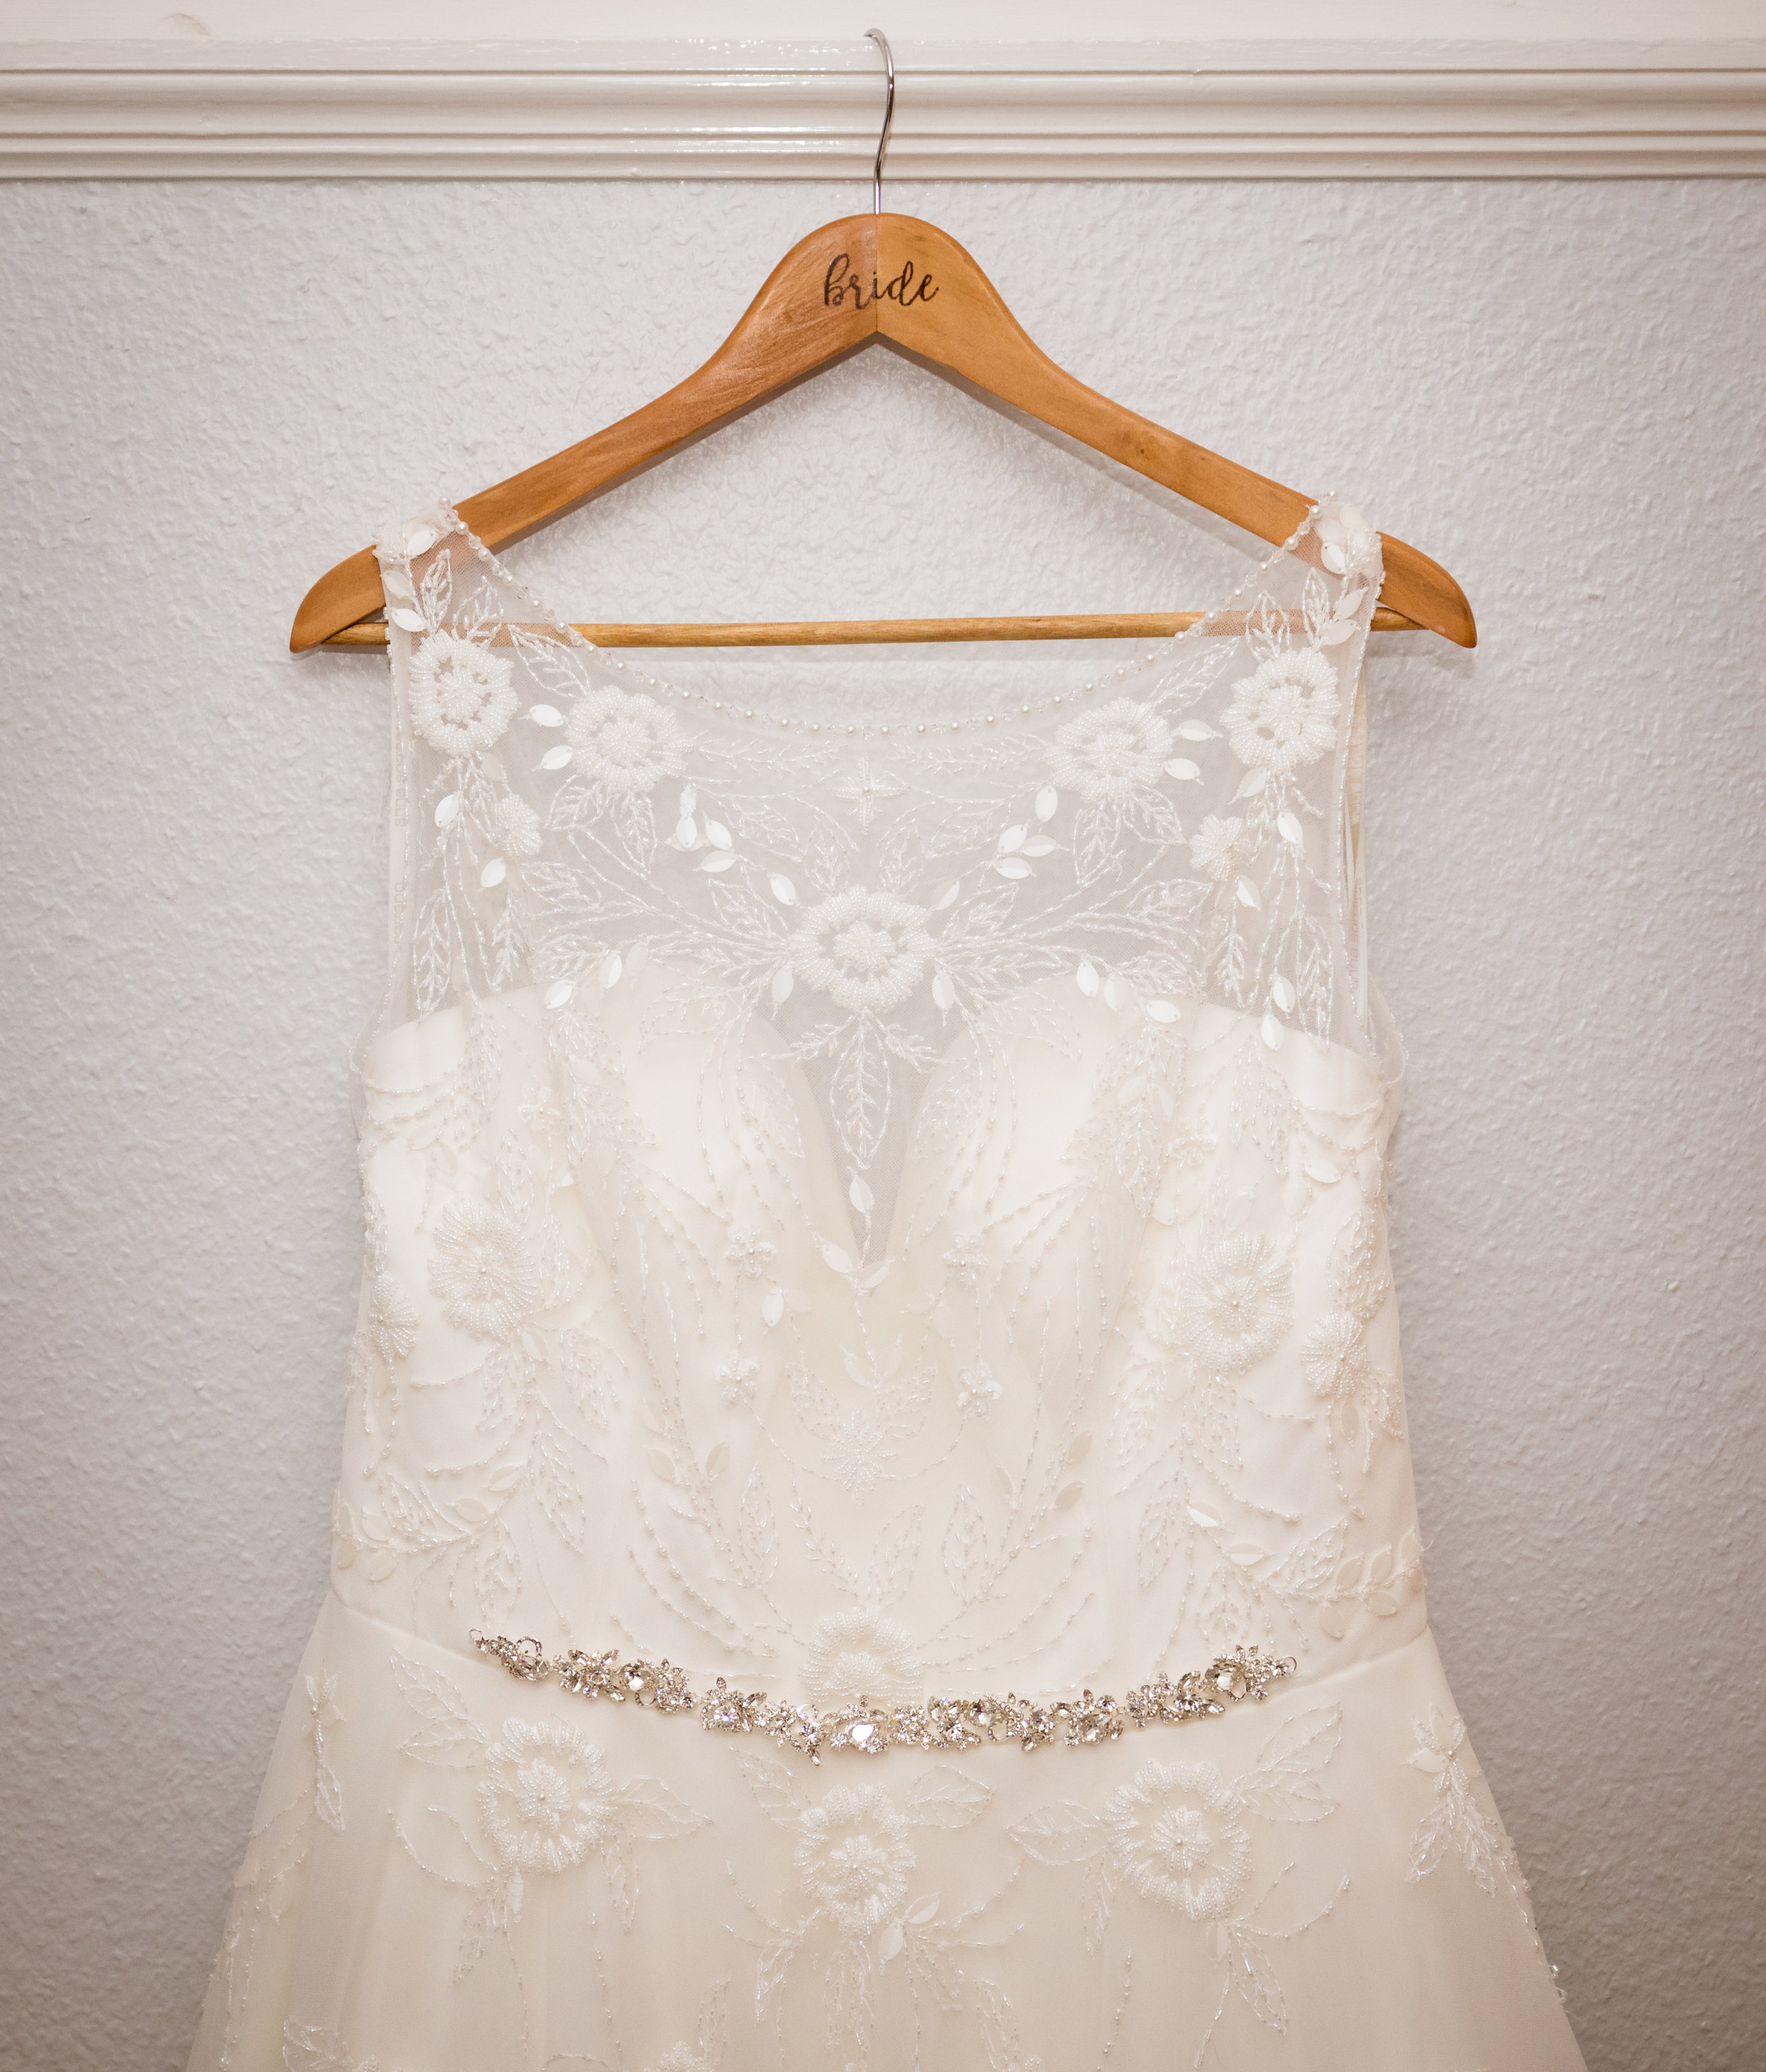
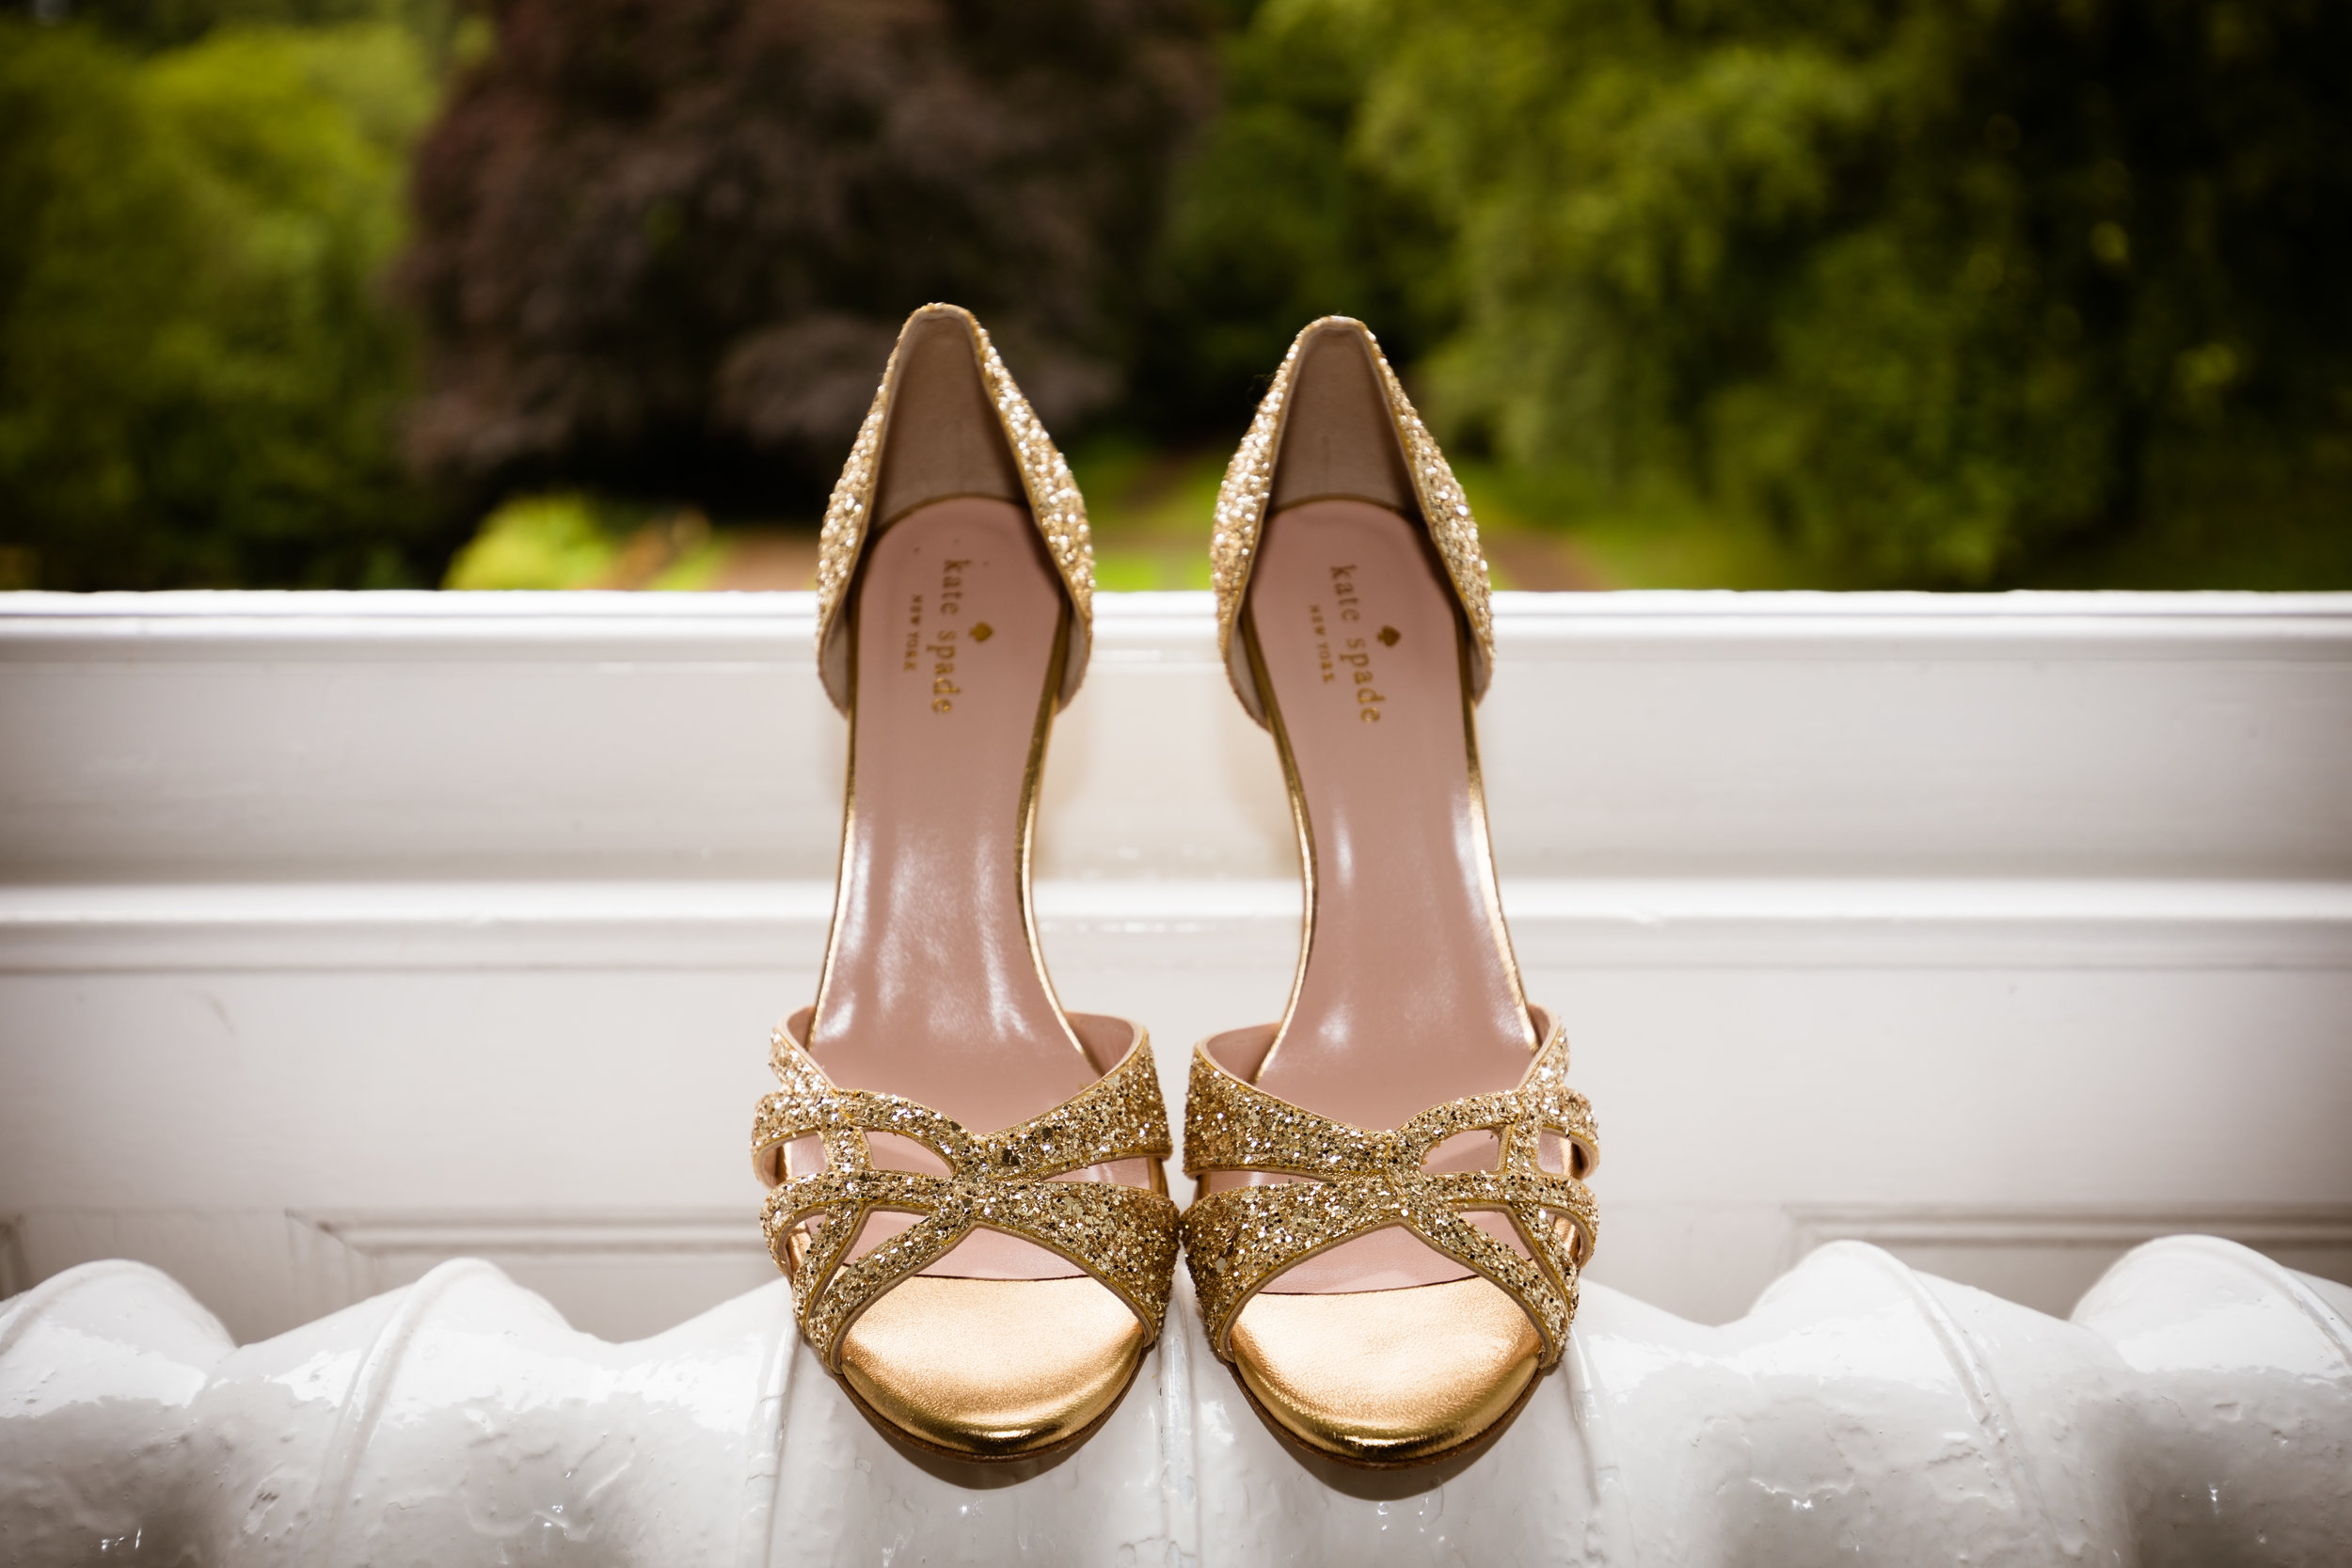
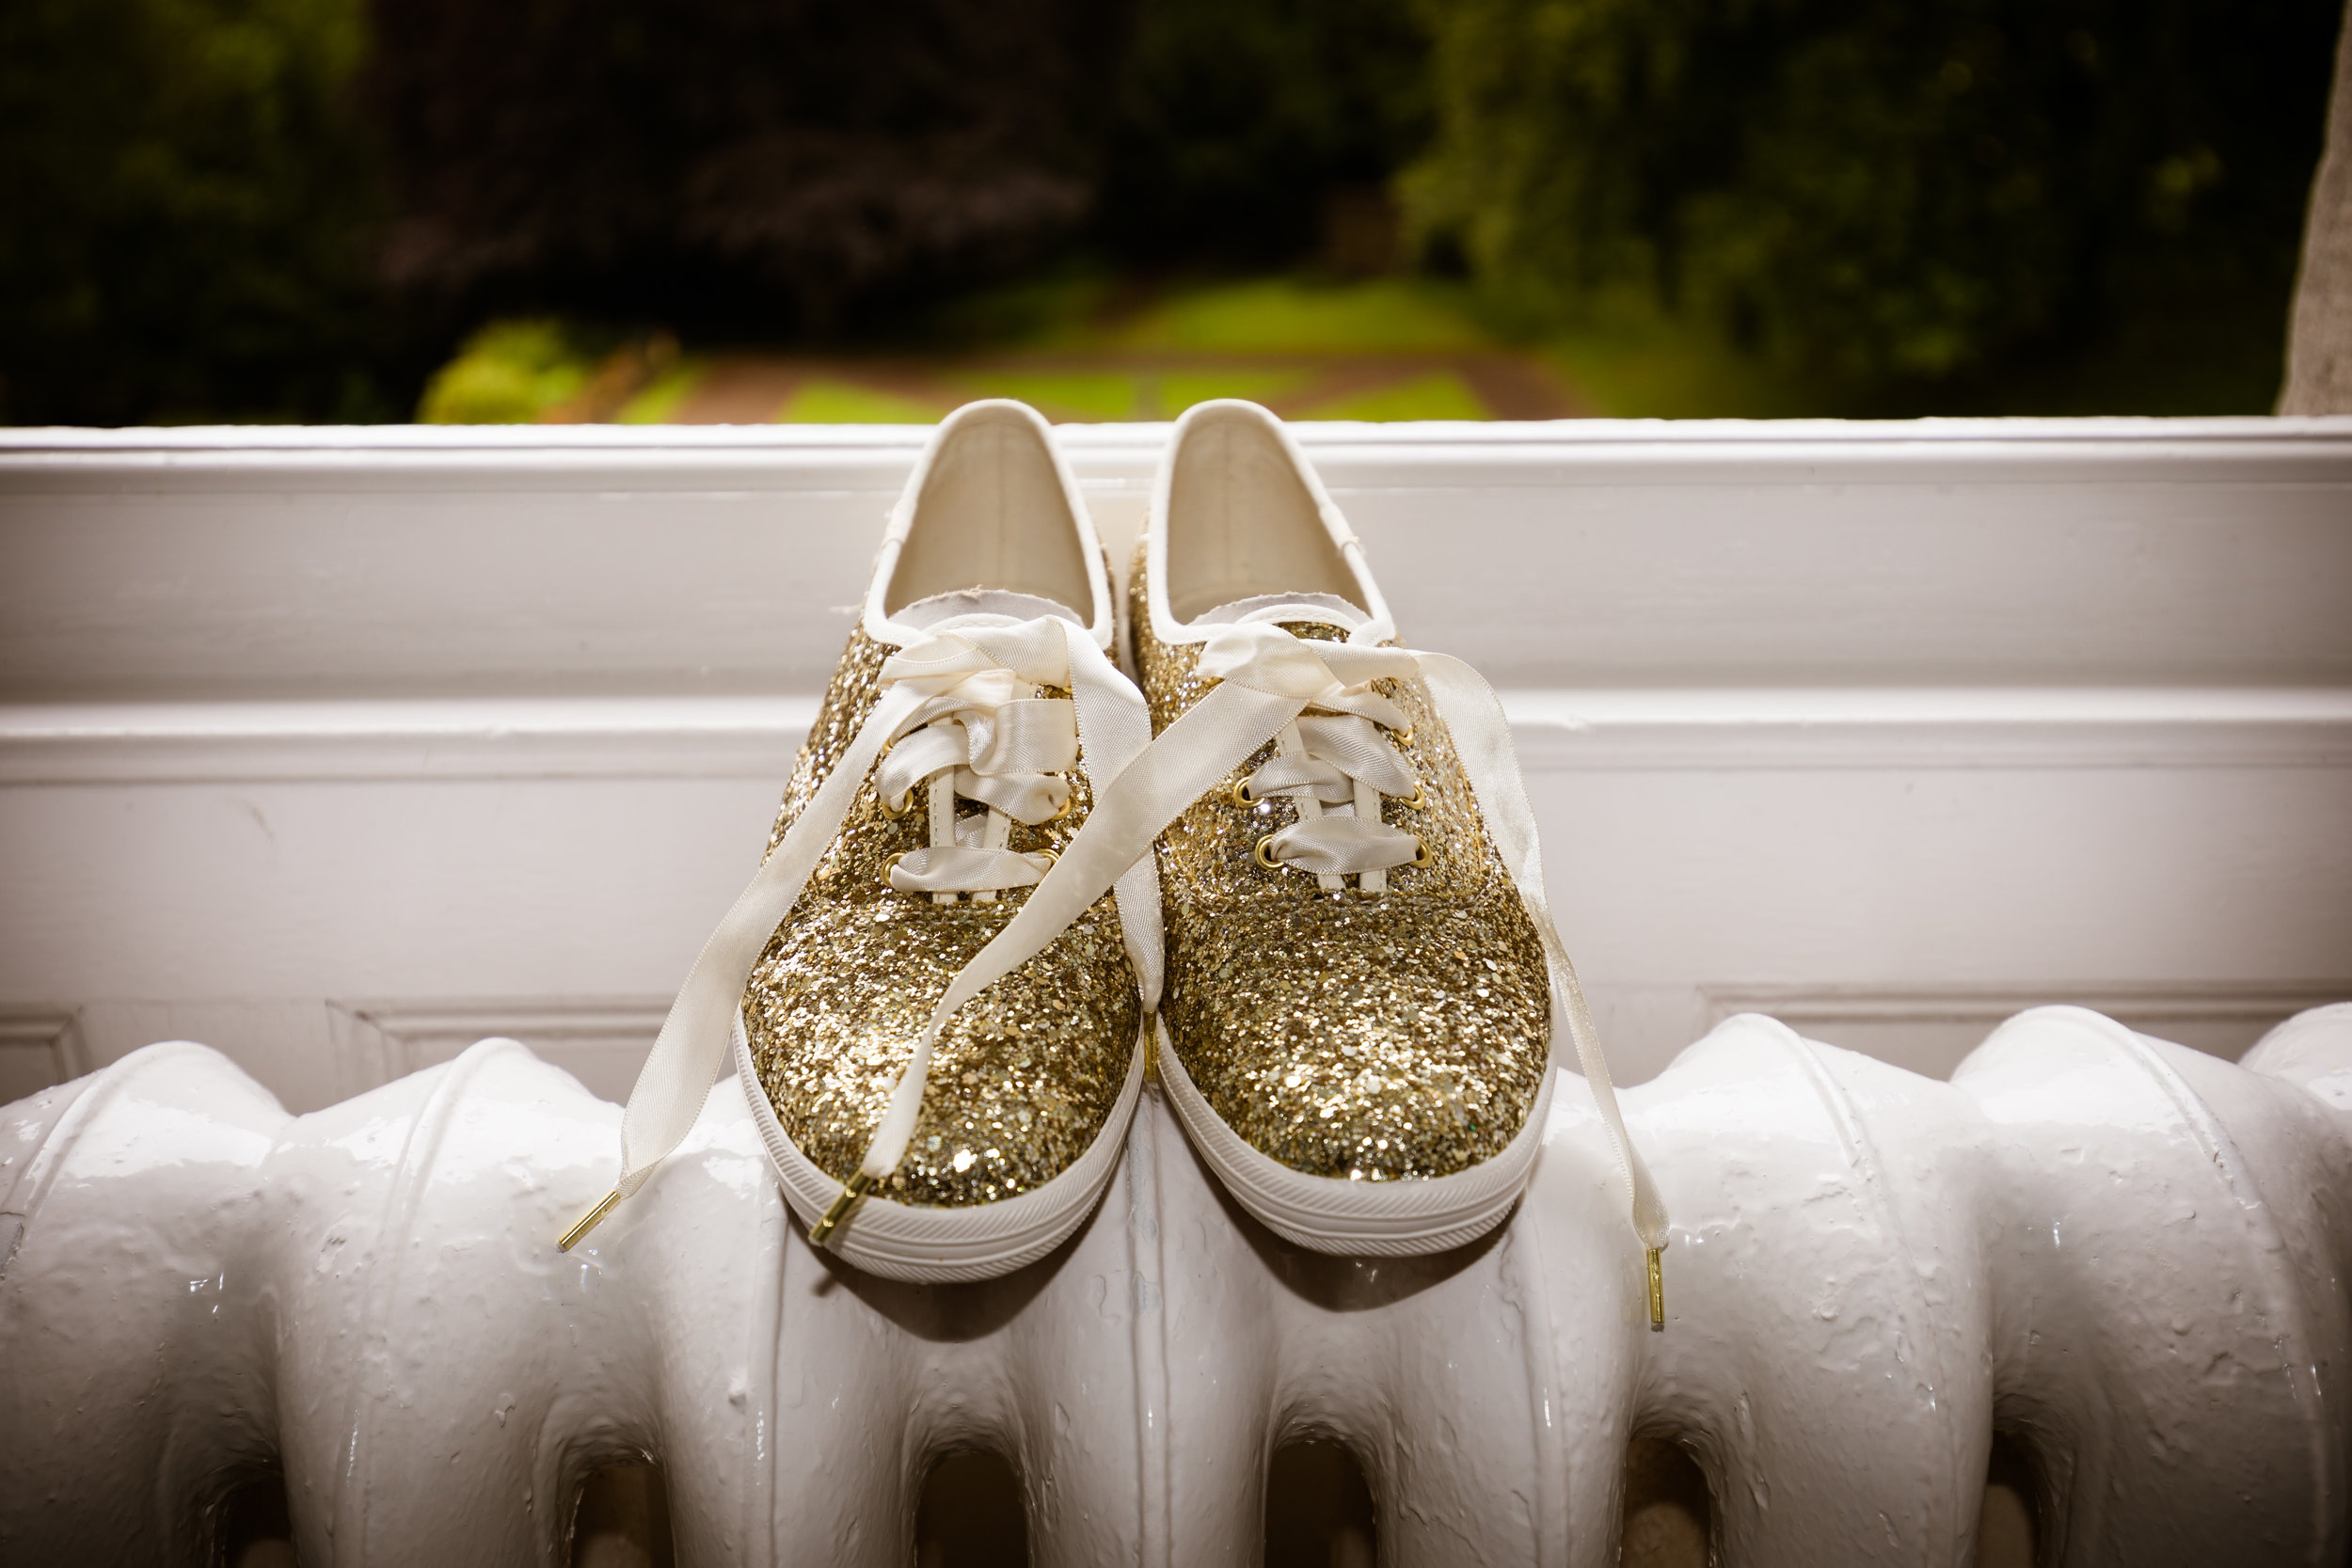
Once my makeup was done, Kirstie then pinned my Mum’s veil in place and I was ready to step into my dress and heels. I felt so calm and ready for this, it was wonderful knowing that I was about to get married to the love of my life - everything felt so right. 

Wedding Make Up.jpg

Makeup

Having never really had my makeup done by anyone before, I wanted to do a trial to see how it felt and make sure I was happy with the look before the big day. I am not someone who wears a lot of makeup on a daily basis, certainly no foundation, so it was important that I felt and looked myself. Danni did my makeup and she was fantastic. After the trial, we only made a few changes to lighten the look but I was really happy with it. I loved my eye makeup and wearing the false eyelashes, which I have not done for at least a decade!! At the trial she made a note of the makeup she was using so I could look it up and buy it if I wanted. I got the MAC lipstick at duty-free on the way home. 

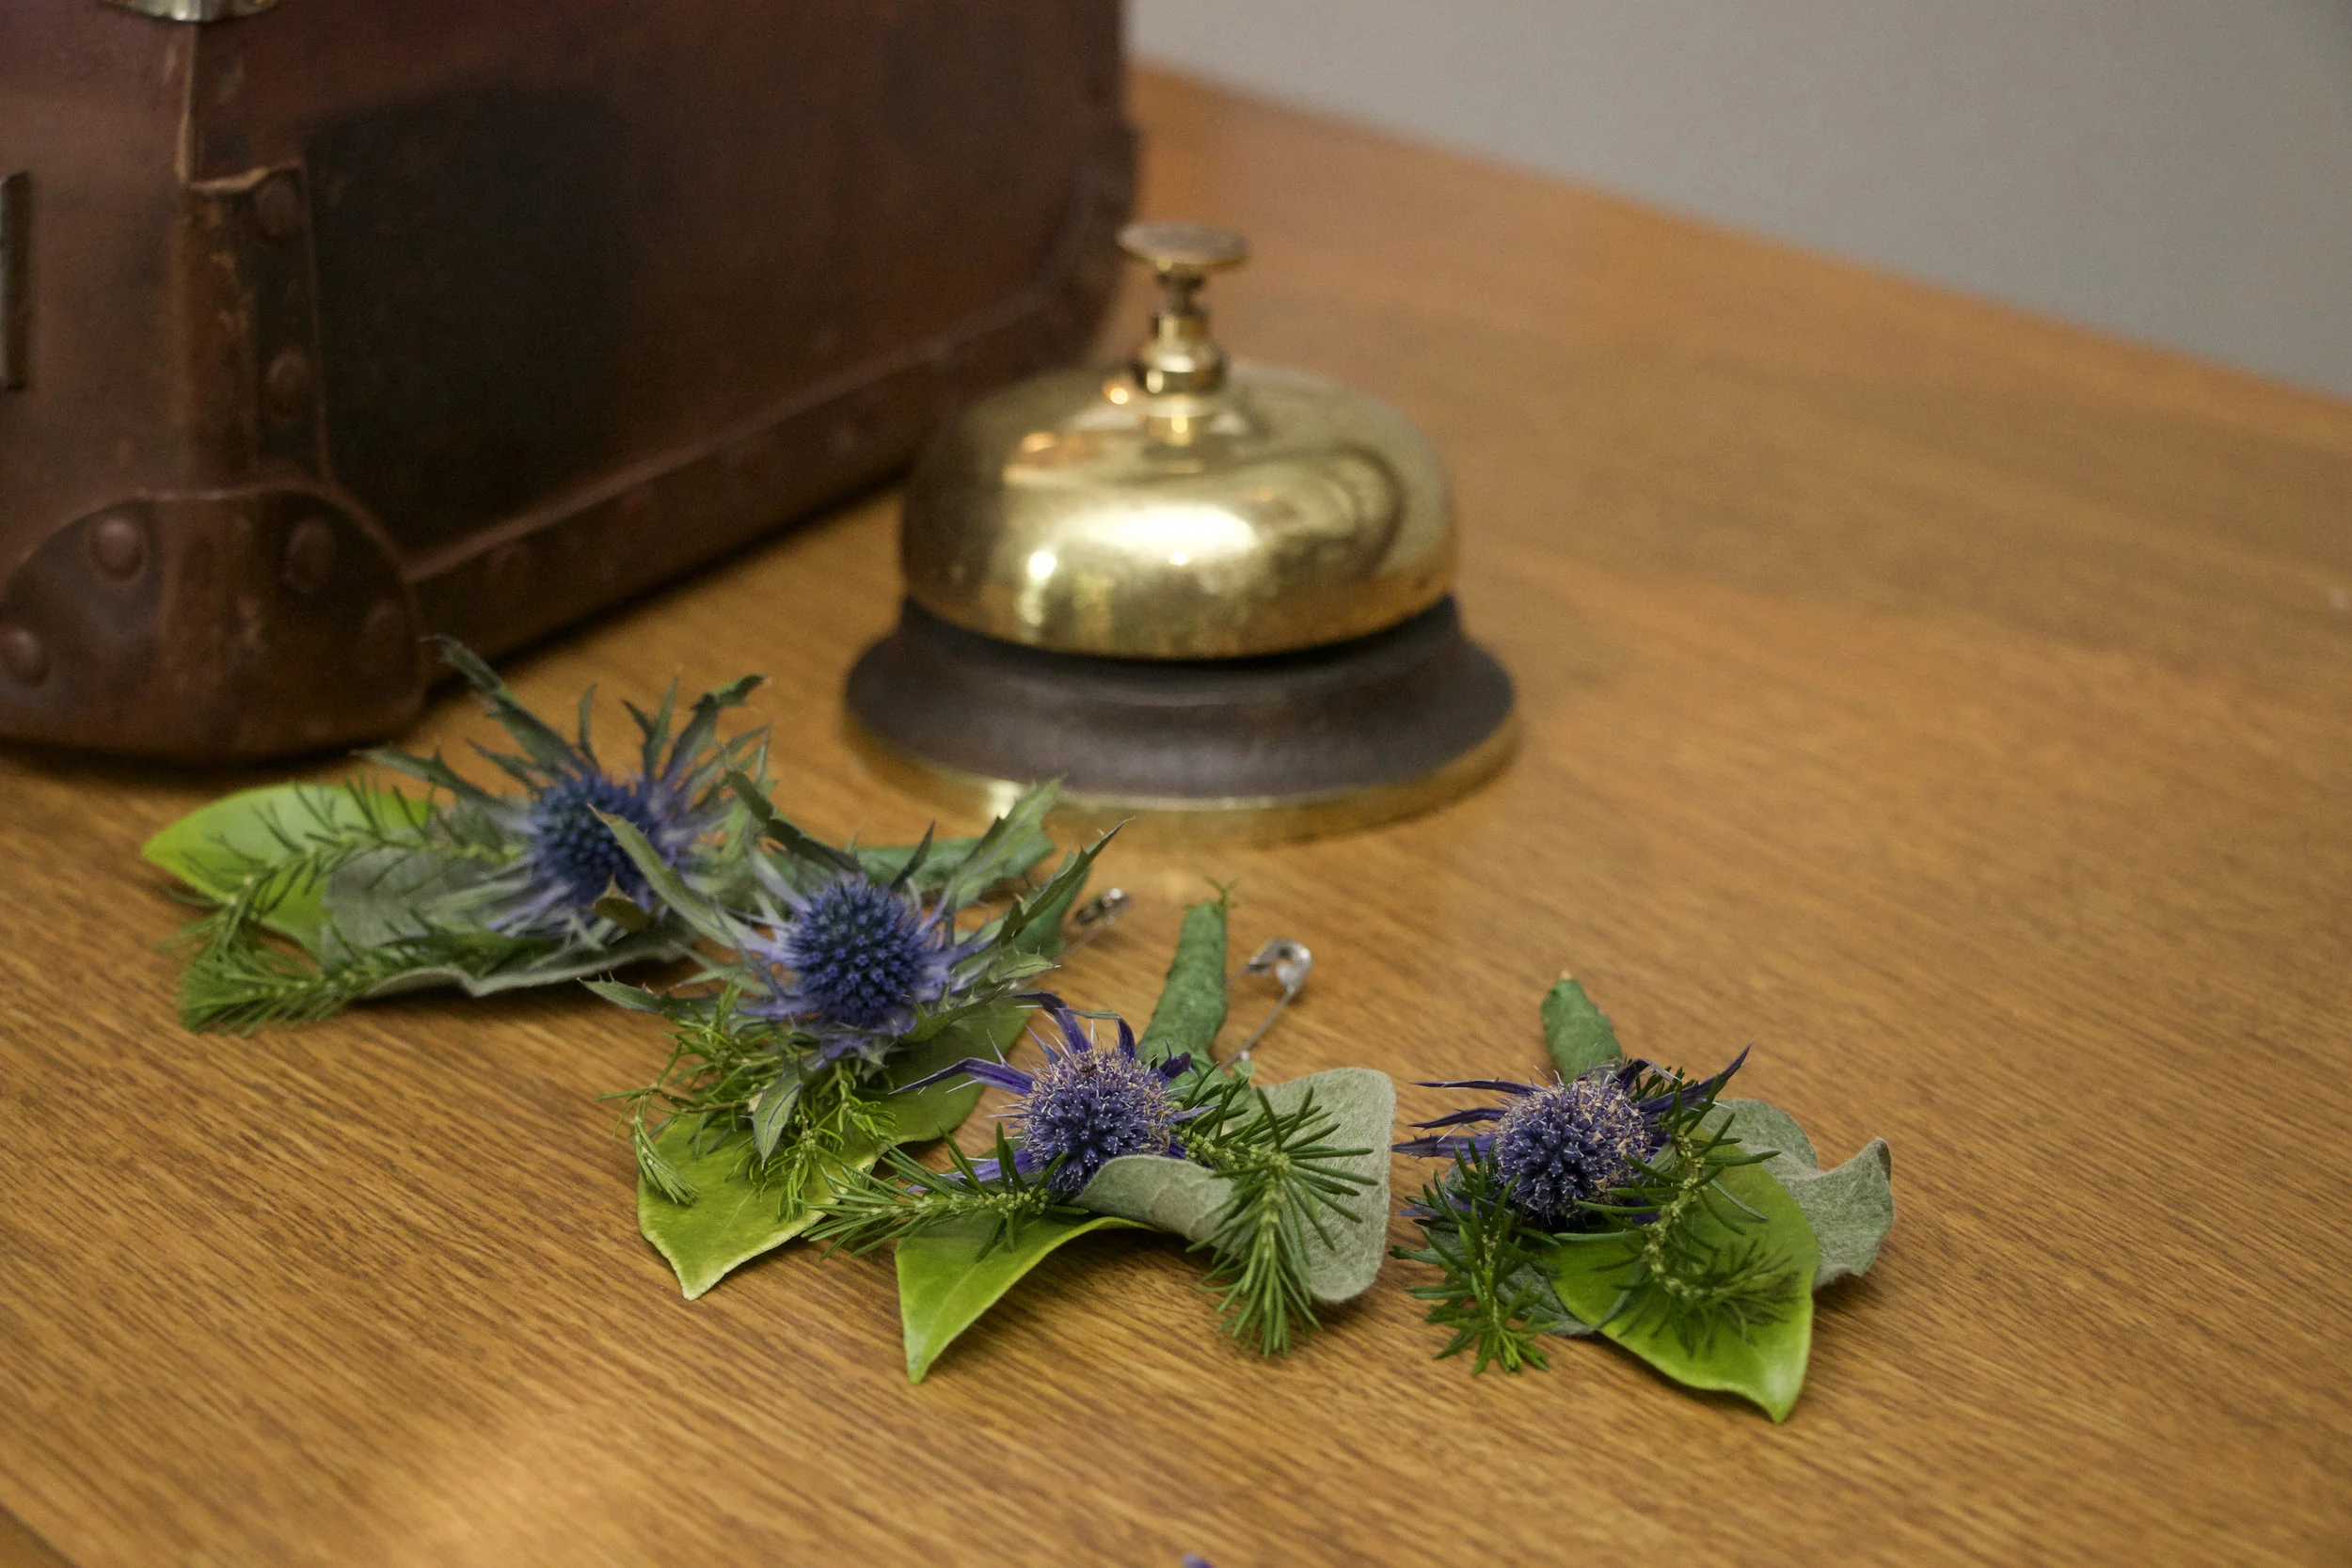
Before she started on my makeup, she treated my skin to a mini Neals Yards facial to moisturize and make sure the makeup lasted all day. The smell of Frankincense was so calming and really hydrating. She then opened her treasure-chest kit and put on her brushes belt - I was a little jealous of all the MAC products.

The make up I wore:

  • Prolong Wear NC25 Foundation, MAC

  • Prolong Wear NC20 Concealer, MAC

  • Virgin, Naked, Buck, Dark Horse, Urban Decay Naked Eye Palette

  • Black Track gel liner, MAC

  • 3D Black Lash, MAC

  • Pinch Me blusher, MAC

  • Soft & Gentle Highlighter, MAC

  • Soar Lip Liner, MAC

  • Twai Lip Stick, MAC

bride

The Final Look

I absolutely loved the final look and so did Ingimar. I felt comfortable and confident, relaxed and I really enjoyed the morning getting ready with my sister and best friend as bridesmaids. It was really fun having my Mum and sister-in-law pop in and share the morning with us too. And impressively we were actually ready a little early so had a little dance party before leaving the room to walk downstairs and down the aisle to become a Mrs. 


photographs by: Maksym Gryshchenko + Robert Hoerenz

Sonia Nicolson

Architect & former University Lecturer turned Entrepreneur. I help female Entrepreneurs successfully Design & Build their Creative Businesses in Interior Design, Architecture & Urban Sketching.

DIY wedding decorations on a budget

Searching Pinterest for some DIY wedding decorations on a budget and endlessly pinning beautiful images? The thought of decorating your venue might be exciting or it might be daunting, but I have some great ideas to share with you that are super easy to recreate and you can shop straight from this post. Here's what we did for our wedding decor, the wedding themes, and I promise you it's budget-friendly. 

those Pinterest hangers

I was in search of pretty Pinterest wedding decorations on a budget, like DIY hangers for the photographs of my dress so we ordered some wooden hangers and my sister, who does pyrography already, used this pyrography kit to write our names on the hangers. We did 'Bride', 'Groom', 'Bridesmaid' or you could do people’s names.

ring box, keepsakes + thank you gifts

To keep our rings safe before they were slipped onto our fingers, I found this little wooden box with a sliding lid which was ideal for the Bestman to hand over and Minister to get into. Again, I asked my sister to help and printed out our wedding crest and date so she could trace it onto the box. She then varnished it and we used it in the ceremony. We were going to pass it around and ask people to bless the rings but there wasn't really enough time on the day. The box is a lovely keep-sake and now sits on my dresser.

For thank you gifts, we stuck to our Iceland and Scottish wedding themes and got a bunch of personalized gifts and cards which we hand wrote. We also wanted to give a little gift to the people who had helped us throughout our wedding preparations, something small but on the theme for our Icelandic-Scottish nuptials. I found these cute golden deer broaches and ordered a load of them. I wrapped them in green tissue paper, matching all the other gifts, and found little wooden boxes to present them in. 

wedding hall decoration + wall hangings

Our wedding hall decoration needed to be done relatively quickly so took a bit of forward planning. For the tables, we kept things pretty simple and used a lot of ivy found on site, this didn't distract from our wedding themes but added simplicity to the decor and didn't cost us anything. The table linen was all white, we hired gold chairs with green cushions and everything was tied together with the wedding calligraphy font. The wedding room decoration had to conceal the large cupboards on all four walls so we looked into easy, budget-friendly ways of concealing them. I wanted to create a wall hanging to cover the cupboards and drape ivy down the sides, framing some calligraphy. The fabric was too heavy and worked out expensive so, after trying a few other options, we opted for paper. I ordered a large flip chart from Amazon and found some garden canes to hang the ivy from. Wedding room decoration is done.

First, the paper was taped over the cupboards concealing them, then we hung the canes from the ceiling on fishing wire and wrapped the ivy around them so it fell to either side, framing it. Using our wedding calligraphy font, I printed out some wedding-themed words and phrases to decorate the wall hangings and we stuck them to the paper. With a few extra pairs of hands, we had them up n no time - so simple, relatively inexpensive but very effective. 

the cake topper

The wedding cake, made by my wonderful sister-in-law, sat on a table at the top of the room with a wall hanging behind it. The three-tier marble cake, Ingimar, and my favorite were simply iced and decorated very with a few flowers to match my bouquet. The cake topper was a simple laser cut 'Mr & Mrs' sign and we added in some artificial thistles too. Around the cake sat my bouquet, the Icelandic drinking horn, ring box, and some horseshoes given for good luck.

our table plan

The table plan was displayed on a table as you entered the reception. Guests’ names were typed onto a list, under their table number, and this was stuck onto small blackboard signs. As an architect and lover of model making, I designed the table plan to look like an abstract landscape of lava rocks brought from Iceland, dried moss from my Mum’s garden, and sticks from Netherurd. Scattered amongst the lava were little scale people tying in my love of architecture - the Icelandic and Scottish landscape - and a little bit of fun. 

table numbers

For the table numbers, we used these blackboard signs on sticks and a chalk pen to write the numbers on. These sat in the middle of the table alongside a lava rock with some dried moss glued onto it, a glass with some fun icebreaker questions or dares in, a circular length of Icelandic knitting, a branch of ivy, a reused wine bottle for water with our wedding crest as its label and a bottle of white and red wine. 

name place cards

As this is something I offer in my shop, I have a lot of experience creating other people’s wedding calligraphy so it was fun to now do my own. Our name place cards were written on kraft gift tags with little scale people glued on. I had written out all of the names and organized the scale people and tags per table a few weeks before the wedding so the day before, all we had to do was glue dots down the scale people to match the names.

Self-taught in lettering, I recommend the Nib + Ink book to help you learn calligraphy and brush lettering. 

polaroids + guestbook

Outside the main room was the bar area where people could gather and chat. This is where we put the guestbook and our 'photo booth' area for polaroid fun. I ordered a Paperchase kraft scrapbook for our wedding guestbook and hand drew our wedding crest onto the front cover and added the date of our wedding. People could take their own polaroid pictures and stick them into the book, signing with their wedding wishes. The props were leftover from my hen weekend so we put them out in glasses and left the FujiFilm camera (with spare film) out for people to use.

our fingerprint tree

Breaking away from the norm of a fingerprint tree, we had a fingerprint wreath which I drew and personalized with names in the middle and the date of our wedding day. Guests could add a leaf to the wreath by stamping their fingerprint and signing their name beside it. I bought two blocks of green ink pads for people to create their leaf - make sure to leave out some baby wipes so people can clean the ink off their fingers. 

a sweetie bar

The current trend at all weddings but we weren't going to say no to sweets. For the kids, and adults alike, we had a sweetie bar where you could pick-n-mix a selection of treats and take them away in a little paper bag. Aside from this, we had wedding cake, dessert, chocolate champagne truffles, and Scottish tablet - we covered all bases. 

It took a few lists, a couple of Amazon orders, a dining room full of boxes, and a few extra hands on deck to pull it all together but the end result was ace, we nailed our wedding decorations on a budget and loved it. It was everything we wanted, full of our own touches - so personal. 


photographs by Maksym Gryshchenko + Robert Hoerenz

Sonia Nicolson

Architect & former University Lecturer turned Entrepreneur. I help female Entrepreneurs successfully Design & Build their Creative Businesses in Interior Design, Architecture & Urban Sketching.

Our Scottish Wedding Venue

Netherurd House

When it came to selecting a venue I knew in the back of my mind where I wanted to get married but Ingimar had never been and it wasn't a traditional wedding venue. We planned a trip back to Scotland and booked a few wedding venue visits. They are felt very much the same to me - planned, organized and easy. But this also felt like we were just selecting a package, a very pricey package, but something everyone else does. We wanted something unique, I guess many Brides do. I wanted to know I would be the only Bride there on the day, that our guests wouldn't have been to a wedding there before to compare it with, and that it meant something to us. We also wanted to feel comfortable there, as if it was like home, where the kids could run around and not be told off. A lot of the venues were very beautiful but they were too picturesque - like you didn't dare touch anything. That just wasn't us. 

After visiting many venues on the outskirts of Edinburgh we decided on Netherurd, a Girl Guiding House in the Scottish Borders. Netherurd is home to many of my childhood and young adult memories and a lot of happy times with family. My late aunt was the first Guider to hold an International Camp here and I have many memories camping in the field, doing crafts in the outbuildings, and staying over in the old Brownie House, now the Garden House. I went through the International selection here and I was selected to represent Scotland in a trip to Prague and then Great Britain in a trip to Uganda in 2002 - which possibly started all my travel bug adventures.

Netherurd house, West Linton, Scotland

I took my mum and sister, we walked around and agreed it was a great venue which meant so much to our family so I now had to convince Ingimar. On our next trip over we drove down to Netherurd. We were met by Janice and her charming hospitality of coffee and freshly baked shortbread - I think she won the Viking over right then!! She talked us through what kind of events they had done before and what they could offer us. Netherurd is a girl guiding venue where a lot of camps, training, and selections are taken place. They host different non-guiding events too but very few weddings, ours was actually the only wedding there this year. The main difference between Netherurd and the other venues we had visited was that they tailored the package to the bride - not the other way around. Walking around, it all felt perfect and I knew it was our venue. 

We decided to book out the entire site and I am so glad we did. We had the main house which slept all of the wedding party. We had the option of being married on the lawn, though the weather meant we married in the Scotland Room within the main house which was beautiful. We used this room for champagne and canapé after and then the Garden House for our Wedding Reception. We had planned games on the lawn and a mini Highland Games for the Sunday morning but Scotland decided to gift us some pretty torrential showers so guests happily stayed indoors and mingled instead.

On our Wedding Day, as our guests arrived, we had Michael Knott a piper (such handy friends we have) piping some traditional tunes which really set the atmosphere. It was lovely getting ready upstairs with my Mum and bridesmaids whilst guests arrived to the sound of the Scottish bagpipes. The rain really brought out the luscious green of the gardens and paths which framed the buildings beautifully. 

As guests walked into the main house, they were met by one of the ushers and given an Order of Service. My Mum had created some stunning flower arrangements and these were dotted around the house and the Garden House. I used this entryway to gather any Wedding Cards and Gifts in my Granddad's old leather suitcase. 

The Scotland Room was set up the week before the wedding and it was so exciting to see it all transformed. Pre-wedding day, walking down the aisle with my sister and best mate, before all the guests were there, was so much fun. We took some silly pictures and had a good laugh, just the three of us. 

On the morning of the wedding, Ingimar and his two best men made their way into the room for the nervous wait. I was still upstairs in the Bridal Suite where we had gotten ready. I was feeling calm, I was ready for this. We were actually 30mins early!! Walking down the wooden stairs in my beautiful - if a little challengingly high - Kate Spade gold glittery heels, I made my way to my Groom. I couldn't wait but also didn't want the day to go by too quickly. 

I met my Brother at the landing and took his arm, ready to walk down the aisle. The Scotland Room was beautiful and it was amazing to see everyone who we know and love, there to support and share on this very special day. I walked towards Ingimar, he lifted my veil and we turned to Alistair the minister for the ceremony to begin. There was a large gold framed mirror in front of us which meant the reflection connected us to our friends and family throughout the ceremony, I loved this. I was beaming, we were so happy. 

The ceremony was about 30 minutes long and it was just wonderful. All that planning, all the to-do lists, and excel sheets, the days counting down, we had done it - Mr and Mrs!! Walking back up the aisle and out onto the landing, we both let out a very excited and happy YAY!! and then looked at each other and laughed a little as we had done exactly the same thing. I can't put into words how happy, lucky and amazing that moment was. It's my favorite moment of the day.

After a few minutes alone, and then joined by our immediate family, we headed out (in between showers) to have our wedding photographs taken. 

Wedding couple

Back to seek shelter from the typical Scottish rain, we were driven the short distance over to our reception in the Garden House. Guests followed, led by our piper. This gave us a few minutes alone to enjoy a little bubbly as husband and wife before joining everyone for the Wedding Breakfast. 

Scottish Piper

We spent the Friday before the wedding decorating the venue both inside and out. I had ordered a load of balloons and we managed to get helium tanks and weights. We covered Netherurd signs with our personalized wedding signs - these were printed and laminated at the graphic printers. We used a lot of ivy pulled from the site and hung it all over the room, lights, and on tables to create a natural woodland theme. I had pre-designed a lot of it using photographs I had taken when visiting the venue and created collages so people could see what I was imagining. This worked really well and meant lots of people could join in and help create the vibe, and I could be buzzing around between them all. 

We still had some wedding signs I made for my brothers’ wedding so I spray painted them white and repainted the correct arrows showing which way parking or the ceremony was. As there is a flag pole it was the perfect opportunity to fly the Scottish and Icelandic flag together. it was so much fun and I think our guests had a good giggle at the little touches we had put into the day. 

The House and its grand staircase were decorated simply. We used white balloons strung with ivy and white ribbon as clusters and tied these to the stair posts. The Scotland Room had ivy hung over lights and paintings, and we used antique candelabras within the flower decorations on the mantelpiece. 

The Reception was held down in the Brownie House, now Garden House. We transformed the room with balloons, ivy, wall hangings and calligraphy. I wanted to keep it simple, easy and bring the outside in. The wall hangings were sheets from a Flipchart, taped together with printed calligraphy words on them - they were then put up over the cupboards to camouflage them. We then hung a length of a bamboo garden cane from the ceiling, with some ivy twisted around it, this framed the wall hanging. We did this around the room so it all pulled together and linked with our wedding signage, menus, the order of service, etc. The stag was already in the hall and gave us some great inspiration for our wedding crest which was on all our wedding stationery. We brought Mums Rudolph from home and put a Viking helmet on him, he stood proudly in the garden, surrounded by fairy-lit trees. 

The Bridal Suite was decorated by my Bridesmaids and their partners with balloons and candles, it was so magical. They even created a four-poster bed by tying helium balloons to the corners of the bed frame. On the bed, they had written out our initials with a love heart, arranged using the knitted lengths of the Icelandic wool that were on the table centerpieces. We switched off the artificial candles, crawled into bed, and dreamt the night away. 

Netherurd Brownie House
Wedding reception

The venue was ideal and gave us a lot of space for kids to play and adults to sit and chat or to get on the dance floor and party. We partied into the wee small hours, with a ceilidh and then a disco with my good friend as DJ playing a playlist made up of songs our guests had pre-requested. The day flew by but I took a few minutes to myself to just stop and take it all in, that definitely helped. What an amazing day!!

I have to add that I'm loving being married - it's true that not much changes but I feel so much more settled and I'm loving life with my soulmate. 


Find out more about Netherurd here

Sonia Nicolson

Architect & former University Lecturer turned Entrepreneur. I help female Entrepreneurs successfully Design & Build their Creative Businesses in Interior Design, Architecture & Urban Sketching.

Our Wedding Outfits

Working our way through our wedding photos, sending out Thank You cards, remembering the big day, and reliving all the happy moments. That's what we have been doing recently and it's been the push I needed to sit down and write a few more wedding-related posts. Today is all about our wedding outfits, the gifts we gave each other (how Ingimar spoilt me), and the traditions of 'something old, something new, something borrowed and something blue.

Check out those handsome Vikings

IMG_0547.jpeg

groom

Starting off with the Viking himself, Ingimar. He wore an Icelandic tweed suit bought here in Reykjavik from Herrafataverzlun Kormáks og Skjaldar. After visiting the shop a number of times, we (yes, I went along and we sorted his suit as a couple but I kept my dress a secret) decided on the colour, and the suit was altered to fit. He bought brown brogue shoes and a light blue shirt in Edinburgh and added some personal touches with his late Fathers cufflinks and an Icelandic flag bowtie. 

details

With photography in mind, I asked my sister to make the hangers we hung our outfits on and we used them as photo props on the day. She does pyrography so I ordered a set of wooden hangers on Amazon, printed out the names we needed hangers for in our calligraphy wedding font and she did a wonderful job - Thanks Steph. Then my very talented Mum, who did all our flowers, made some boutonnieres for the wedding party from Eryngium and garden foliage and left a few spares at the entrance of the venue for guests to enjoy wearing too - Thanks, Mum.

bride

Wedding Dress by Wed2B| Solstice Belt by Wed2b

sonia and ingimar

My wedding dress was from Wed2b, a fabulously affordable chain of bridal shops throughout the UK. I found them after skimming bridal forums in a bid to seek a shop or boutique which was friendly and approachable after some pretty snooty Edinburgh experiences. We drove through to their Glasgow branch (they now have an Edinburgh branch too) and I bought and brought home my dress that same day. I was so excited and relieved, I genuinely couldn't wait to wear it again. After taking it to get altered by a local tailor, Amelia, I decided to add a little more bling and purchased this diamante belt which we hand stitched on. 

Comfort was key for both of us and we wanted to be happy and confident in our outfits, which we both were. I think Ingimar looks just the part and very handsome (of course) and I adored my final look. I felt amazing walking down the aisle and enjoyed partying the night away. 

shoes

I'm a huge fan of Kate Spade, you will probably tell, and so when I started looking at wedding shoes, I just had to treat myself. I never thought that I would go for such a girly look but - a girl's only a bride for a day so why not shine. Ingimar insisted and treated me to my shoes, he ordered them online via the States as a colleague was coming back to Iceland. They arrived a week before the wedding so I have not had time to wear them in, I was lucky on the day - but I don't think any blister could have spoilt my day. 

My heels were Kate Spade, gold, glitter-covered leather pumps and I adore them. They have a 3.5" heel which was a little more challenging when you are already shaking with nerves but they were super comfortable and I just slipped into them. I wore them all day until right after our first dance at which point I changed into my party shoes. My evening party shoes were the gold, glitter-covered trainers which were a collaboration between Kate spade and KEDS a few seasons ago. 

Wedding heals by Kate Spade | Evening trainers by Kate Spade + KEDs

Sadly there are a few people very dear to my heart who are no longer with us, and it was important for me to have a little piece of them with me on the day. We got a little sentimental.

Something Old

I wasn't sure about wearing a veil, it was much more something my Mum saw as important. I tried a few on but they didn't feel right, it just felt like I was playing dress-up. As this was something important to her, I asked if she still had hers and she did. We climbed into the attic and found an old leather case. Inside was her hand-stitched, white veil, still in almost perfect condition. I put my hair up into a bun and we added the veil. It felt so right. Not convinced, she wanted to add a little something. In our search for the veil, we had come across a piece of old, hand-crochet lace which was my Grans. With a little alteration and starched it, it looked perfect. This lace (which was living in the garage, unused) now formed a beautiful crown at the top of the veil and perfectly framed the look - my gran would have loved it. She then added a few sticky pearls randomly on the veil to match my dress - a very creative and talented Mum.

Something New

On the morning of our wedding, Ingimar sent his sister and nephew over to my room with a Morning Gift. This is not something we tend to do in the UK so I was not accustomed to this. Before we left for Scotland I had given him some gifts including a pair of whiskey glasses but he truly spoilt me on our wedding day. Not only did he treat me to my wedding shoes but he also gave me the 'Heart of Gold' bangle I had (subtly) shown him and a beautiful pair of pearl and diamanté earrings which I wore on the day. And, to top it all off, they came in a Kate Spade black 'Cameron Street Havana' tote bag - spoilt rotten!!

Something borrowed

In the run-up to our wedding, I called my Uncle and asked if he had any of my late Godmother's jewelry that I could borrow and wear on my wedding day. He told me it had been handed onto my cousin, so we met up and went through the collection. I chose my 'something borrowed' to be my aunt’s gold bracelet and wore it with love and pride.

Something blue

My mum and I set out all the items to be brought to the venue in the days before the wedding. Just for fun, we ran through the list "something old, new, borrowed..." and realized we didn't have something blue. She left the room and came back a few minutes later with a little jewelry pouch which contained the beautiful sapphire necklace gifted to her by my late Father. She said I could wear it. It meant a lot to her, to me, and to our family friends who knew the story behind it.

My Wedding Dress

post-wedding

The dress is back in its bag, hanging in the wardrobe back home. It sure does take up a lot of space and was pretty damn heavy but I loved wearing it. To be honest, it looked beautiful and you would never have guessed it cost less than Ingmar's outfit!! So with that in mind, and the fact that I'll only ever wear it once, I wasn't concerned about it - I danced, I ceilidh'd, I trapped across a field in the rain after our photographs and I wore it with pride, love and a crazy amount of happiness. The dress now tells this story and I really should get it to the dry cleaners!!


what were your ‘something old, something new, something borrowed, something blue’?

Sonia Nicolson

Architect & former University Lecturer turned Entrepreneur. I help female Entrepreneurs successfully Design & Build their Creative Businesses in Interior Design, Architecture & Urban Sketching.

5 Tips To Grow Your Instagram Fast

5 Tips To Grow Your Instagram fast

We’re sharing our top tips to help you grow on Instagram fast. We all know that being consistent is crucial on social media, but with the removal of Instagram likes, we need to focus more on the shares and saves. Let’s get focused on educating our audience, sharing value, and prepping for launches, new product releases, and sales. We’ve got the best 5 tips to grow on Instagram.

  1. Consistency - post consistently on Instagram

    be consistent in when to post and how often so your followers know what to expect. Find out what time is best for you to post on Instagram and stick to that. Post daily, weekly, or whatever your schedule allows but stick to a plan.

  2. Show more of YOU on your feed

    by you, we mean your face. Don’t be shy, post pictures where you’re in them to help your audience connect with you. Use Instagram stories to capture your normal life and share more of a behind-the-scenes view. Once you feel ready, try Instagram Live to connect with your followers.

  3. Educate

    Share value with your followers and build trust, build a brand, and educate them on what you are doing by sharing more. Prepare them for when you’re ready to launch or sell; the more they know, the more they’ll be ready to support you.

  4. Save and Share

    the save and share options on Instagram are the new likes so you want to create content that your audience is going to save and share with theirs. Write in the caption that you want to be tagged and credited, and do the same if you share someone else’s post. Graphics work well as they often share value and work on other people’s feeds.

  5. Use the DM

    feature to connect, not spam - send genuine messages to people to reach out and build community. Send a friendly message to new followers thanking them for the follow and asking what they like and want to see more of. Connect with people, it is social media after all.


follow us on Instagram @sonianicolson


What are you doing to grow on Instagram?

Instagram Tips For Growth

Instagram is still one of the most popular social media platforms and growing on it takes time and work. The best way to succeed is to plan out what you want to post and have a clear direction for your account - niche down - this will help you understand who your audience is and know your community.

Instagram Tips For Growth 2020

The Algorithm

Possibly the bane of your life if you’re trying to grow your account. The algorithm changes and it’s there for a good reason. Don’t fight it, don’t get frustrated, and don’t blame it. Just get on with it. Yes, they recently removed likes and that made a huge impact on how we quantify success on Instagram. Rumour has it that saves are the new likes.

Posts

Post consistent, relevant, and relatable content which is of value to your audience - bonus if it’s sharable. Instagram will reward you if your posts get an audience to spend more time on the app.

Editing

Yes, you can edit on Instagram itself but there are so many other options to edit pictures. I use the Adobe Lightroom app and have a preset.

Description/Caption

Each post allows for 2,200 characters which is about 300 words of a caption for your post. You want your caption or description to be interesting, relevant to the post, and interactive so that people want to like, save and comment. You’re looking to receive rich comments so that each comment can be built on to feed the algorithm and show it how valuable your posts are.

Hashtags

Do your hashtag research, select 5-10 hashtags that are on brand and are relevant to the image you are posting and its caption. You can use up to 30 but it looks a little spammy and it’s often better to use 5 relevant hashtags than 30 mediocre ones.

Location

To attract a potential new audience, tag your location. Tag real locations, not just random trending locations. This too can be flagged as spam.

Tags

Do your research, don’t just tag randomly. Tag yourself, tag brands, etc.

When To Post

Use the ‘when to post’ app as it tells you the 3 times a day when you get the highest engagement on your account, this is when you should post. As you build your feed, people will come to expect a post from you at whatever time or however many times a day so try to stick to it. Consistency is key. The more active you are, the more the algorithm will favour you.

Be Social

Engage. Don’t just expect people to comment and interact on your posts, do so on theirs too. Be active within your niche and interact with accounts similar to yours and with an audience you want to attract. Engage with their followers’ comments and start a conversation. Answer questions, add value, and show them that you can help and that you are of interest to them. Do not spam. The more engagement your post gets in the first 30 minutes, the higher you will rank and the more reach you will get. For comments to count they need to be 4 words or more and not just emojis. The more comments, likes, and saves, the more the algorithm is triggered. Instagram is smart, don’t try to fool it.

DMs

Your DMs are your messages within the Instagram app. This can get annoying and build up but they are a good place to build a community and speak to your followers or potential followers. Use them to reach out and build an audience. To thank new followers, send them a DM of a message, voice message, or video. Make it personal and intentional. The aim is to build actual relationships.

Switch To A Business Account

Once you switch, you get access to your analytics, pay attention to these as they will help you know your audience and what they are looking for.

Reach

Your reach is the new way to measure how well you are doing, your reach is your audience (total number of people who have seen your content) not just your following.

Instagram Stories

Use this feature to show your latest post, ask people to click on it and it will take them to your feed where they can like and interact. Post to your stories every time you post to your feed, this helps with distribution and drives your audience (and potentially new eyes through location and hashtags) to your post and feed.

Shadowban

Shadowban is when your account is not favoured in the algorithm or is flagged up because you are doing something dodgy and against the system; i.e. using the same hashtags on every post, using bots, using comment pods, etc. If you get a shadowban then you can be banned on Instagram, without necessarily knowing what has happened. If you get a shadowban, leave your Instagram account alone for a few days. Don’t post, and don’t be active. Check over the hashtags you use and make sure they’re still active and relevant - better still, use fresh ones.

Avoid Comment Pods

Comment pods are when a group of people posts to a group chat with a link to their post in the hope that all members of the pod will go like and interact with their post, in exchange for doing the same for the members’ posts. This is seen as spam and playing the system and is not worth risking a shadowban. The algorithm is intelligent and will suss you out. It’s not worth it.

Plan Your Feed

Planning will help you develop an aesthetic, stay consistent with it, and in posting to a schedule (posting often). Planning out the appearance of your feed is a personal preference. Have a look around and see what style of feed you like.

I use the app PLANN which allows you to plan out days, and weeks ahead of time. I sit down once a week or fortnight and plan out my content. This means I know what is going live, and when, and have the caption written ahead of time with hashtags ready to go. This is great beautiful it saves me time in the long run and, on the days when I am just not feeling it, I don’t have to find something to post and write about because it’s already in my planned feed. PLANN lets you upload pictures, add captions, and hashtags, and save lists of hashtags to easily copy and post when needed. You can also move posts around to plan the layout and look of your feed so you never post similar pictures beside each other or similar colours together.

READ: 5 Tips To Grow Your Instagram


Follow us on instagram @SoniaNicolson

Gallery Block
This is an example. To display your Instagram posts, double-click here to add an account or select an existing connected account. Learn more