

How to Draw Two-Point Perspective: A Step-by-Step Guide for Architecture & Interior Design Students
/Quick Summary
In this guide, you'll learn:
What two-point perspective is
When to use it
How it differs from one-point perspective
How to draw it step by step
Common mistakes to avoid
A Comprehensive Guide for Interior Design and Architecture Students
If you've already learnt one-point perspective, two-point perspective builds on the same principles - you'll simply be working with two vanishing points instead of one. Two-point perspective is a drawing method that uses two vanishing points on the horizon line to create the illusion of depth. It's commonly used to draw buildings, streets and objects viewed from a corner, making it one of the most important perspective techniques for architecture and interior design students.
If you’re working on building your overall skills, start with my complete guide on improving your architecture drawing skills, where I break down the foundations step by step.
Why I Teach Two-Point Perspective Early
After introducing two-point perspective to hundreds of first-year architecture and interior design students, I've found that this is often the lesson where perspective finally starts to feel logical rather than intimidating. Students begin to understand that perspective isn't about memorising rules - it's about understanding how we see space. Once they grasp that idea, their confidence usually grows very quickly.
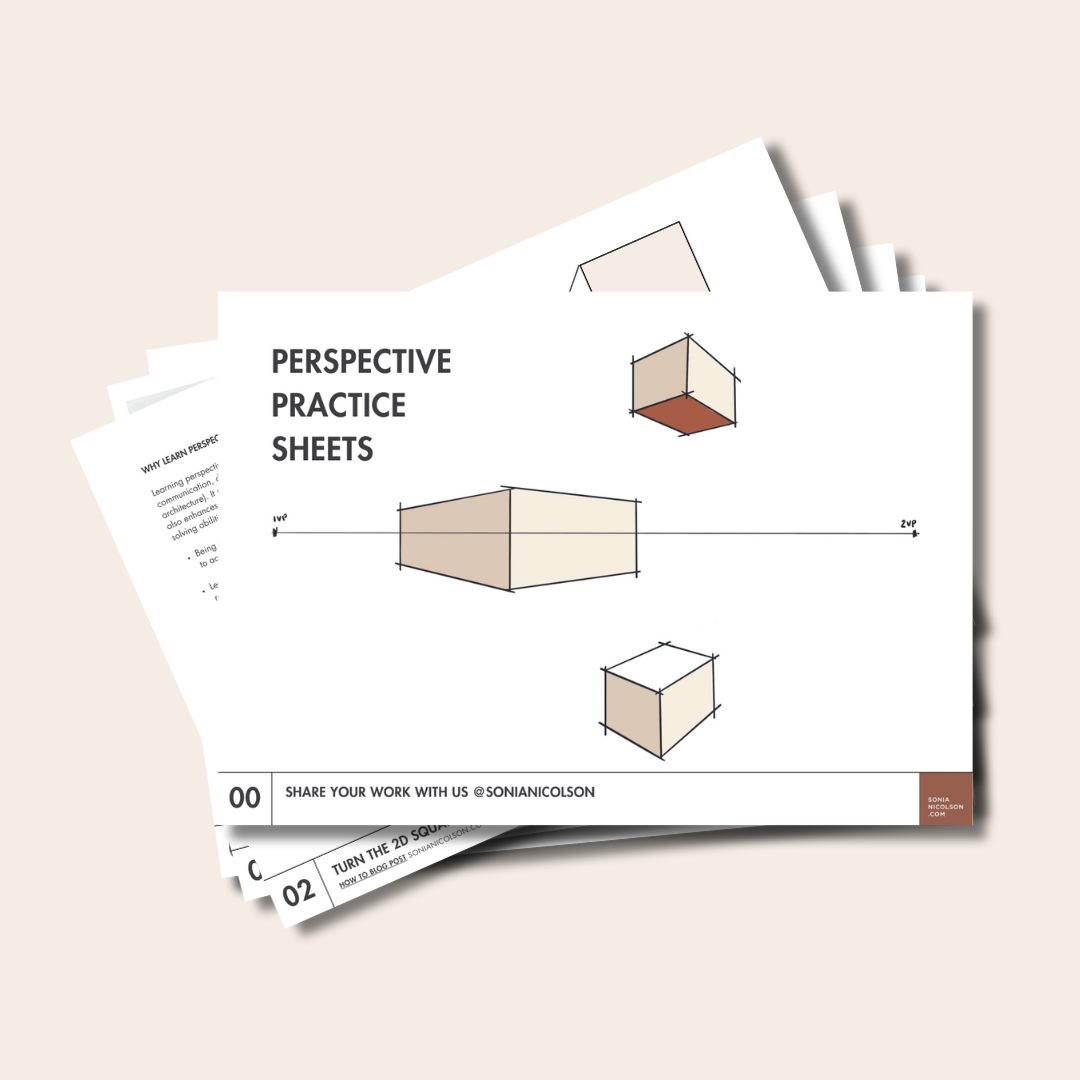
If you’d like to practise as you learn, I’ve created a set of free Perspective Practice Sheets that you can download and work through alongside this tutorial.
Type | Vanishing Points | Best Used For
One-point perspective | 1 | Interiors, corridors, straight-on views
Two-point perspective | 2 | Corners of buildings, exterior views
Three-point perspective | 3 | Looking up or down at tall buildings
When Architects Use Two-Point Perspective
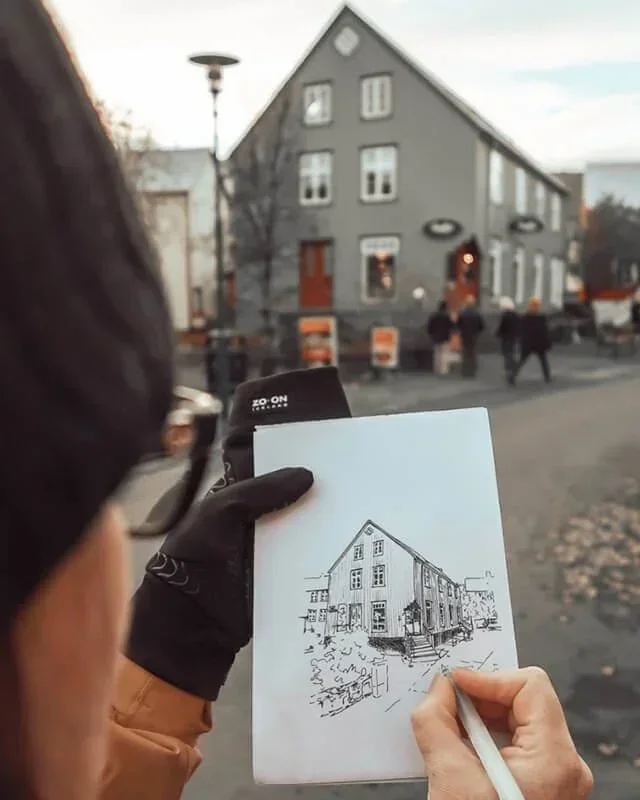
As an architect, I love hand drawing, and urban sketching is particularly fun. Sketching a street corner, a house exterior, or an urban scene, I almost always opt for two-point perspective, while interiors often begin with one-point perspective.
How to Draw a Two-Point Interior Perspective
Mastering a two-point perspective is a valuable skill for any interior design or architecture student. With practice and dedication, you can create realistic perspective drawings that communicate your design ideas. Let’s get started.
Step 1: Gather Your Drawing Tools
A pencil
A ruler
An eraser
Paper - tape down your paper if needed
About 20–30 minutes
Step 2: Draw the Horizon Line and Two Vanishing Points
The first line we draw is the horizon line. Draw this in the centre of your paper, going along it. Now mark your two vanishing points on the left and right-hand sides at the end of the horizon (eye level) line.

Step 3: Sketch the Basic Shapes
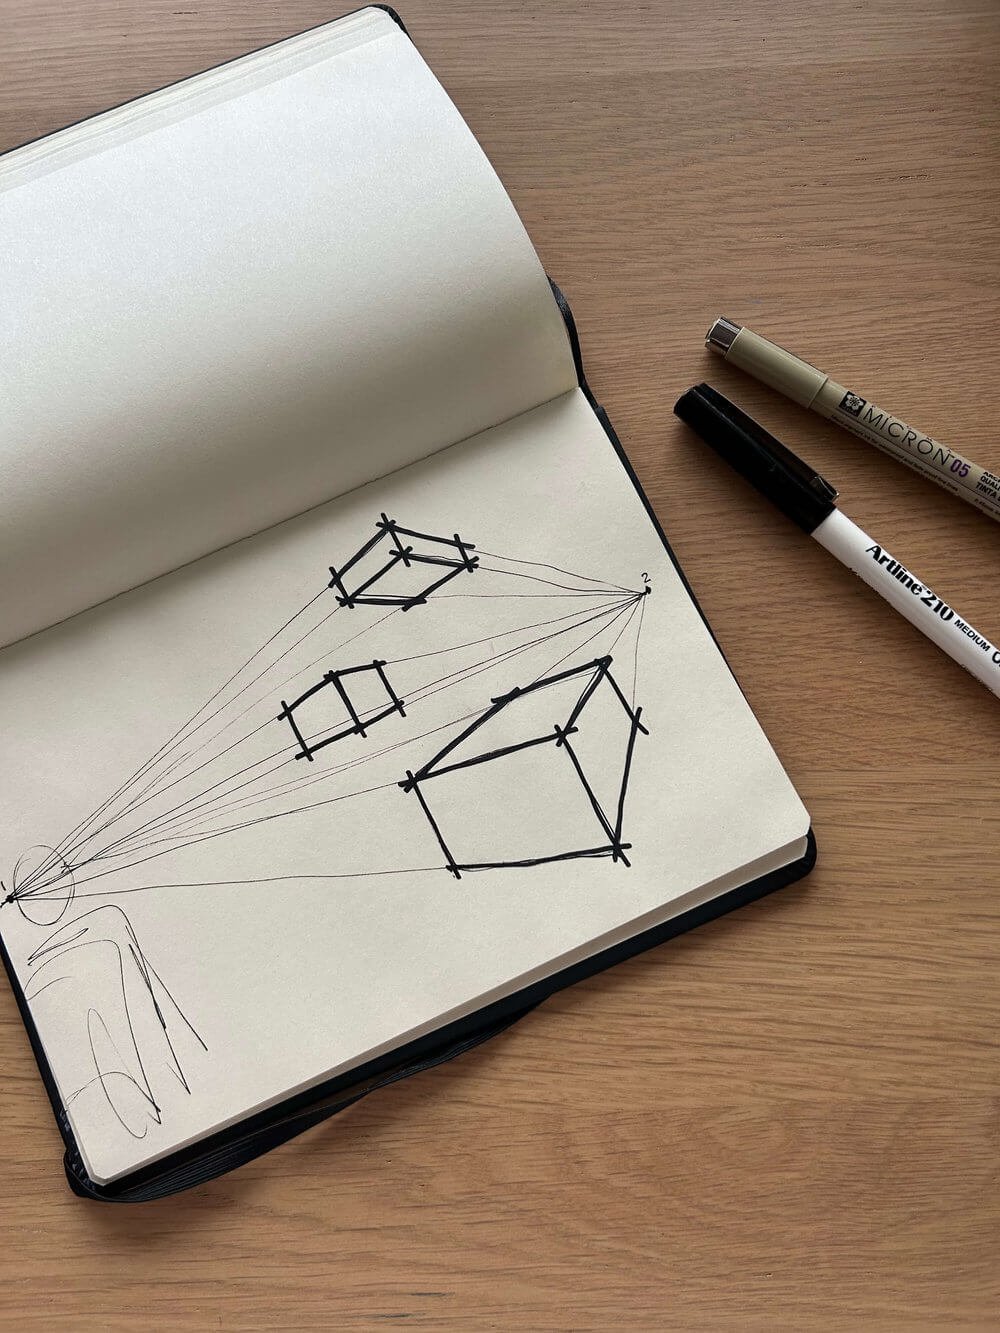
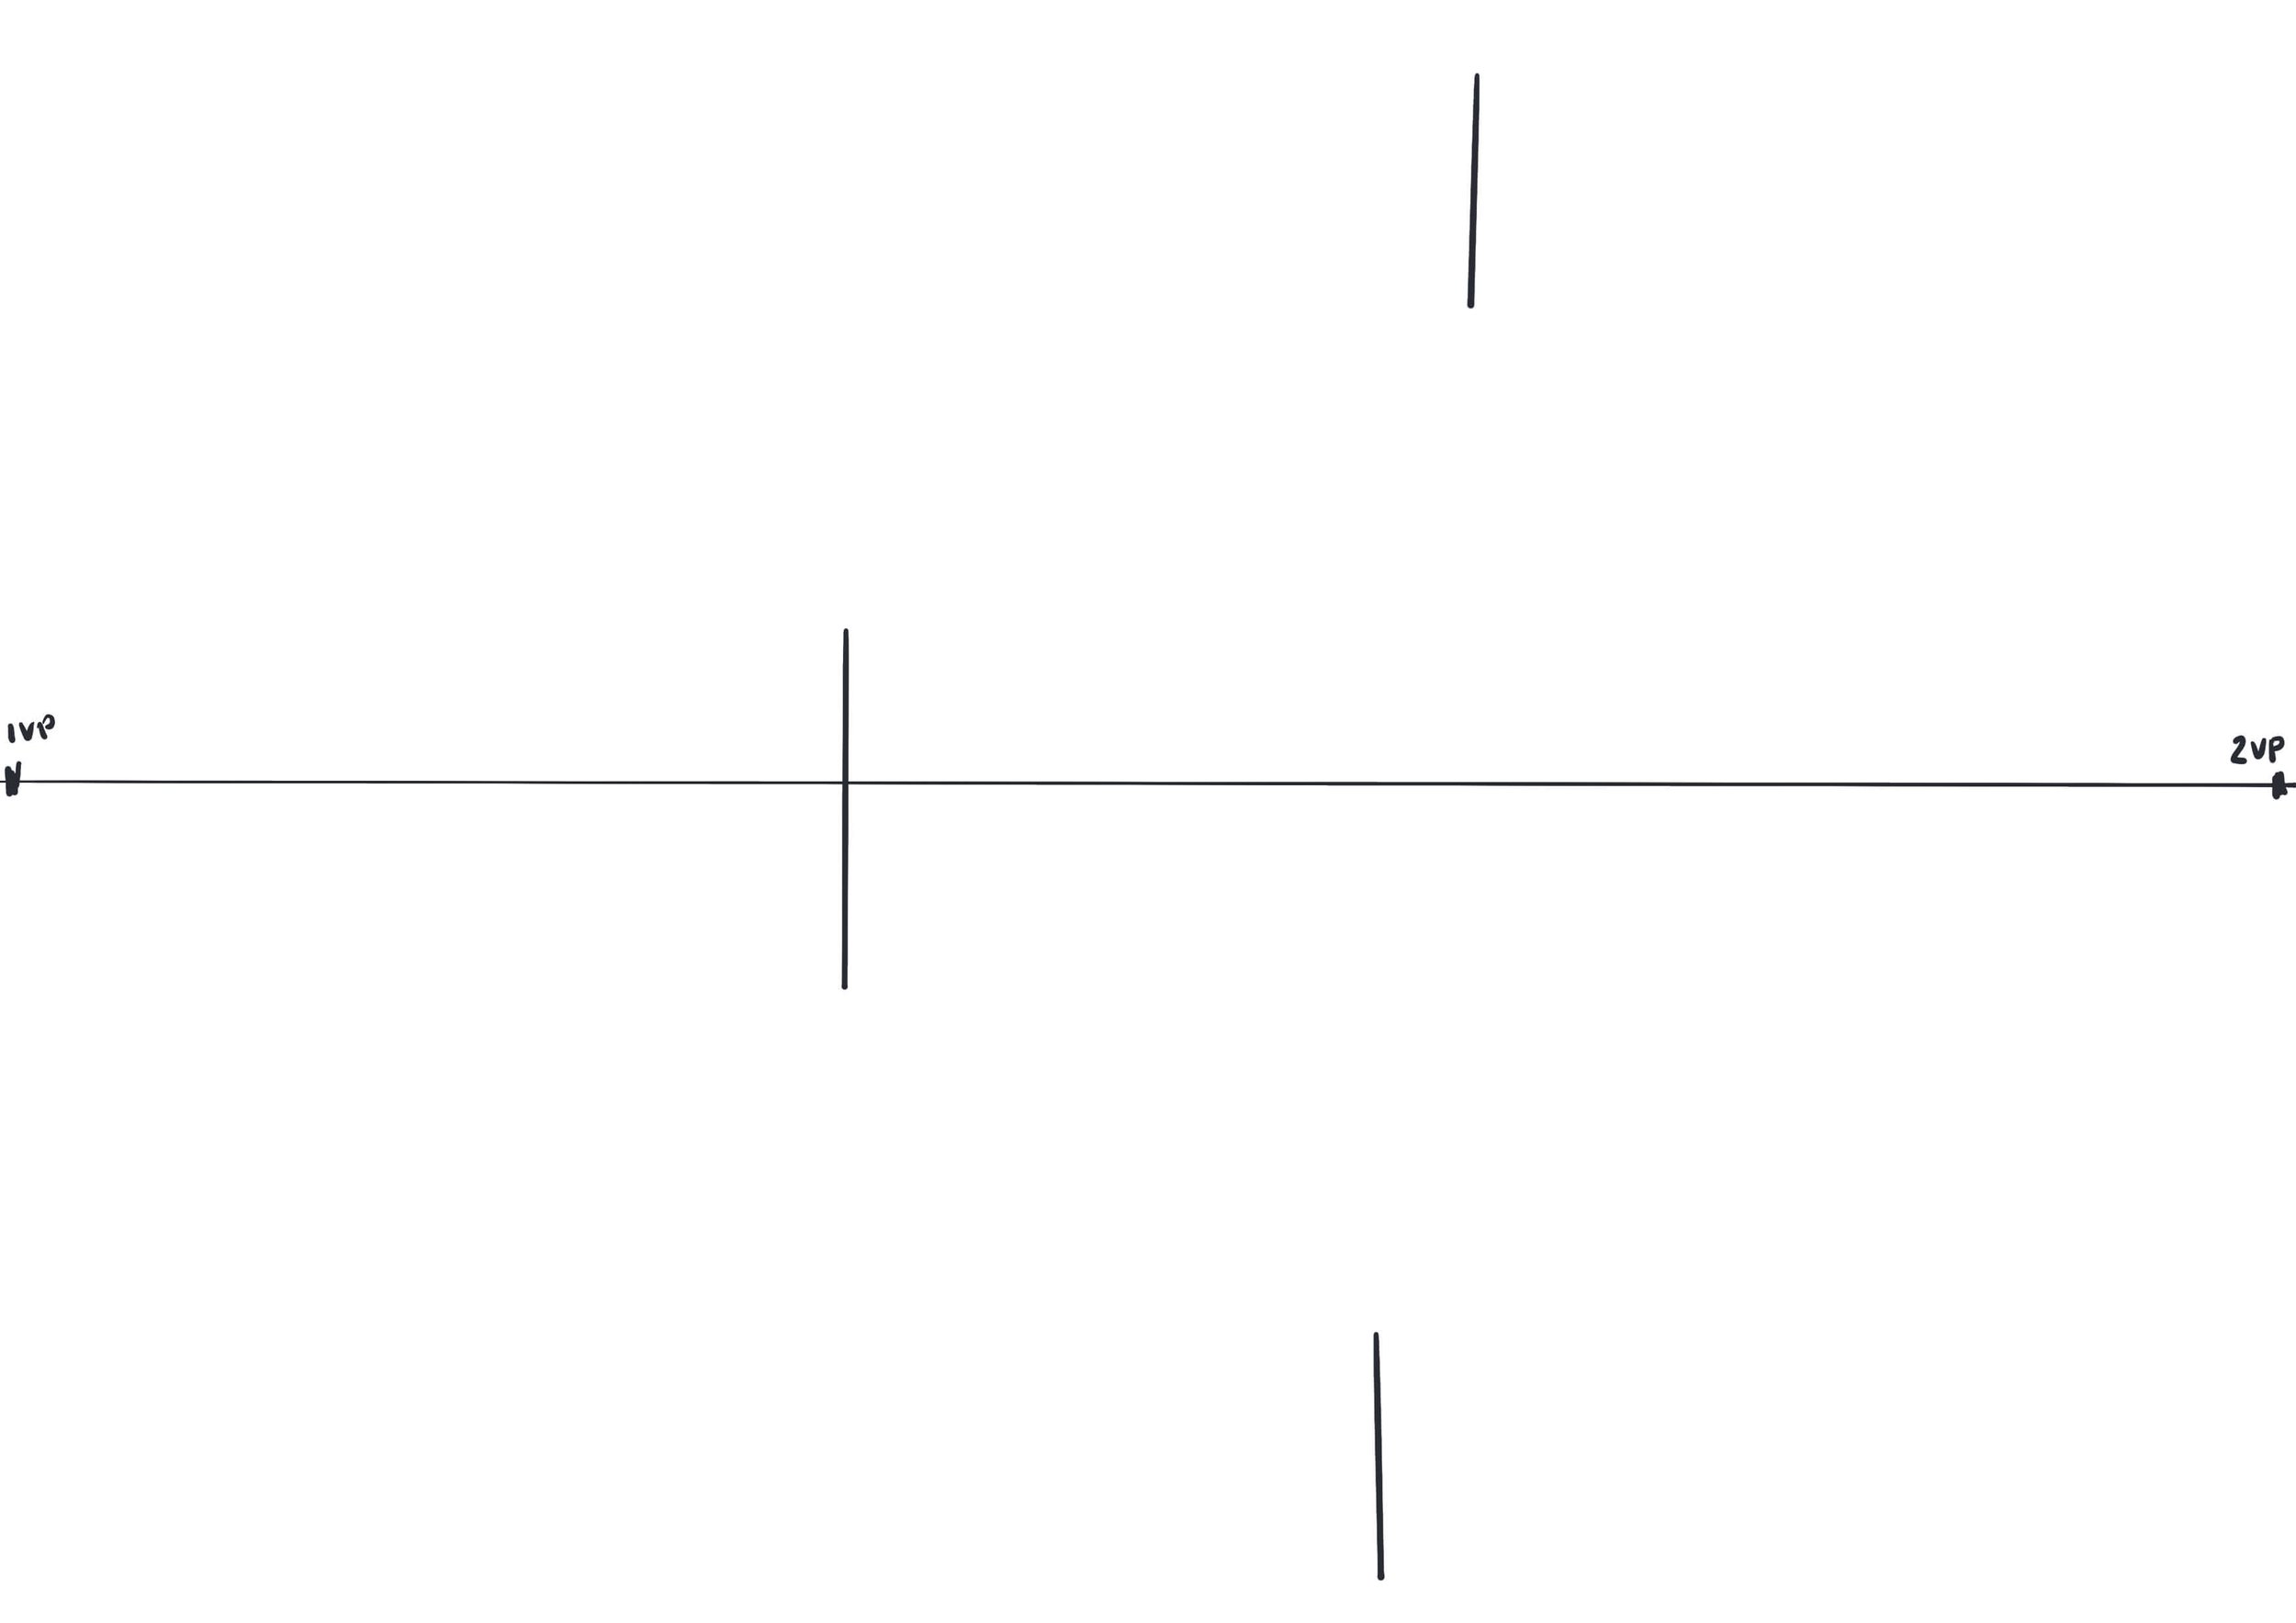
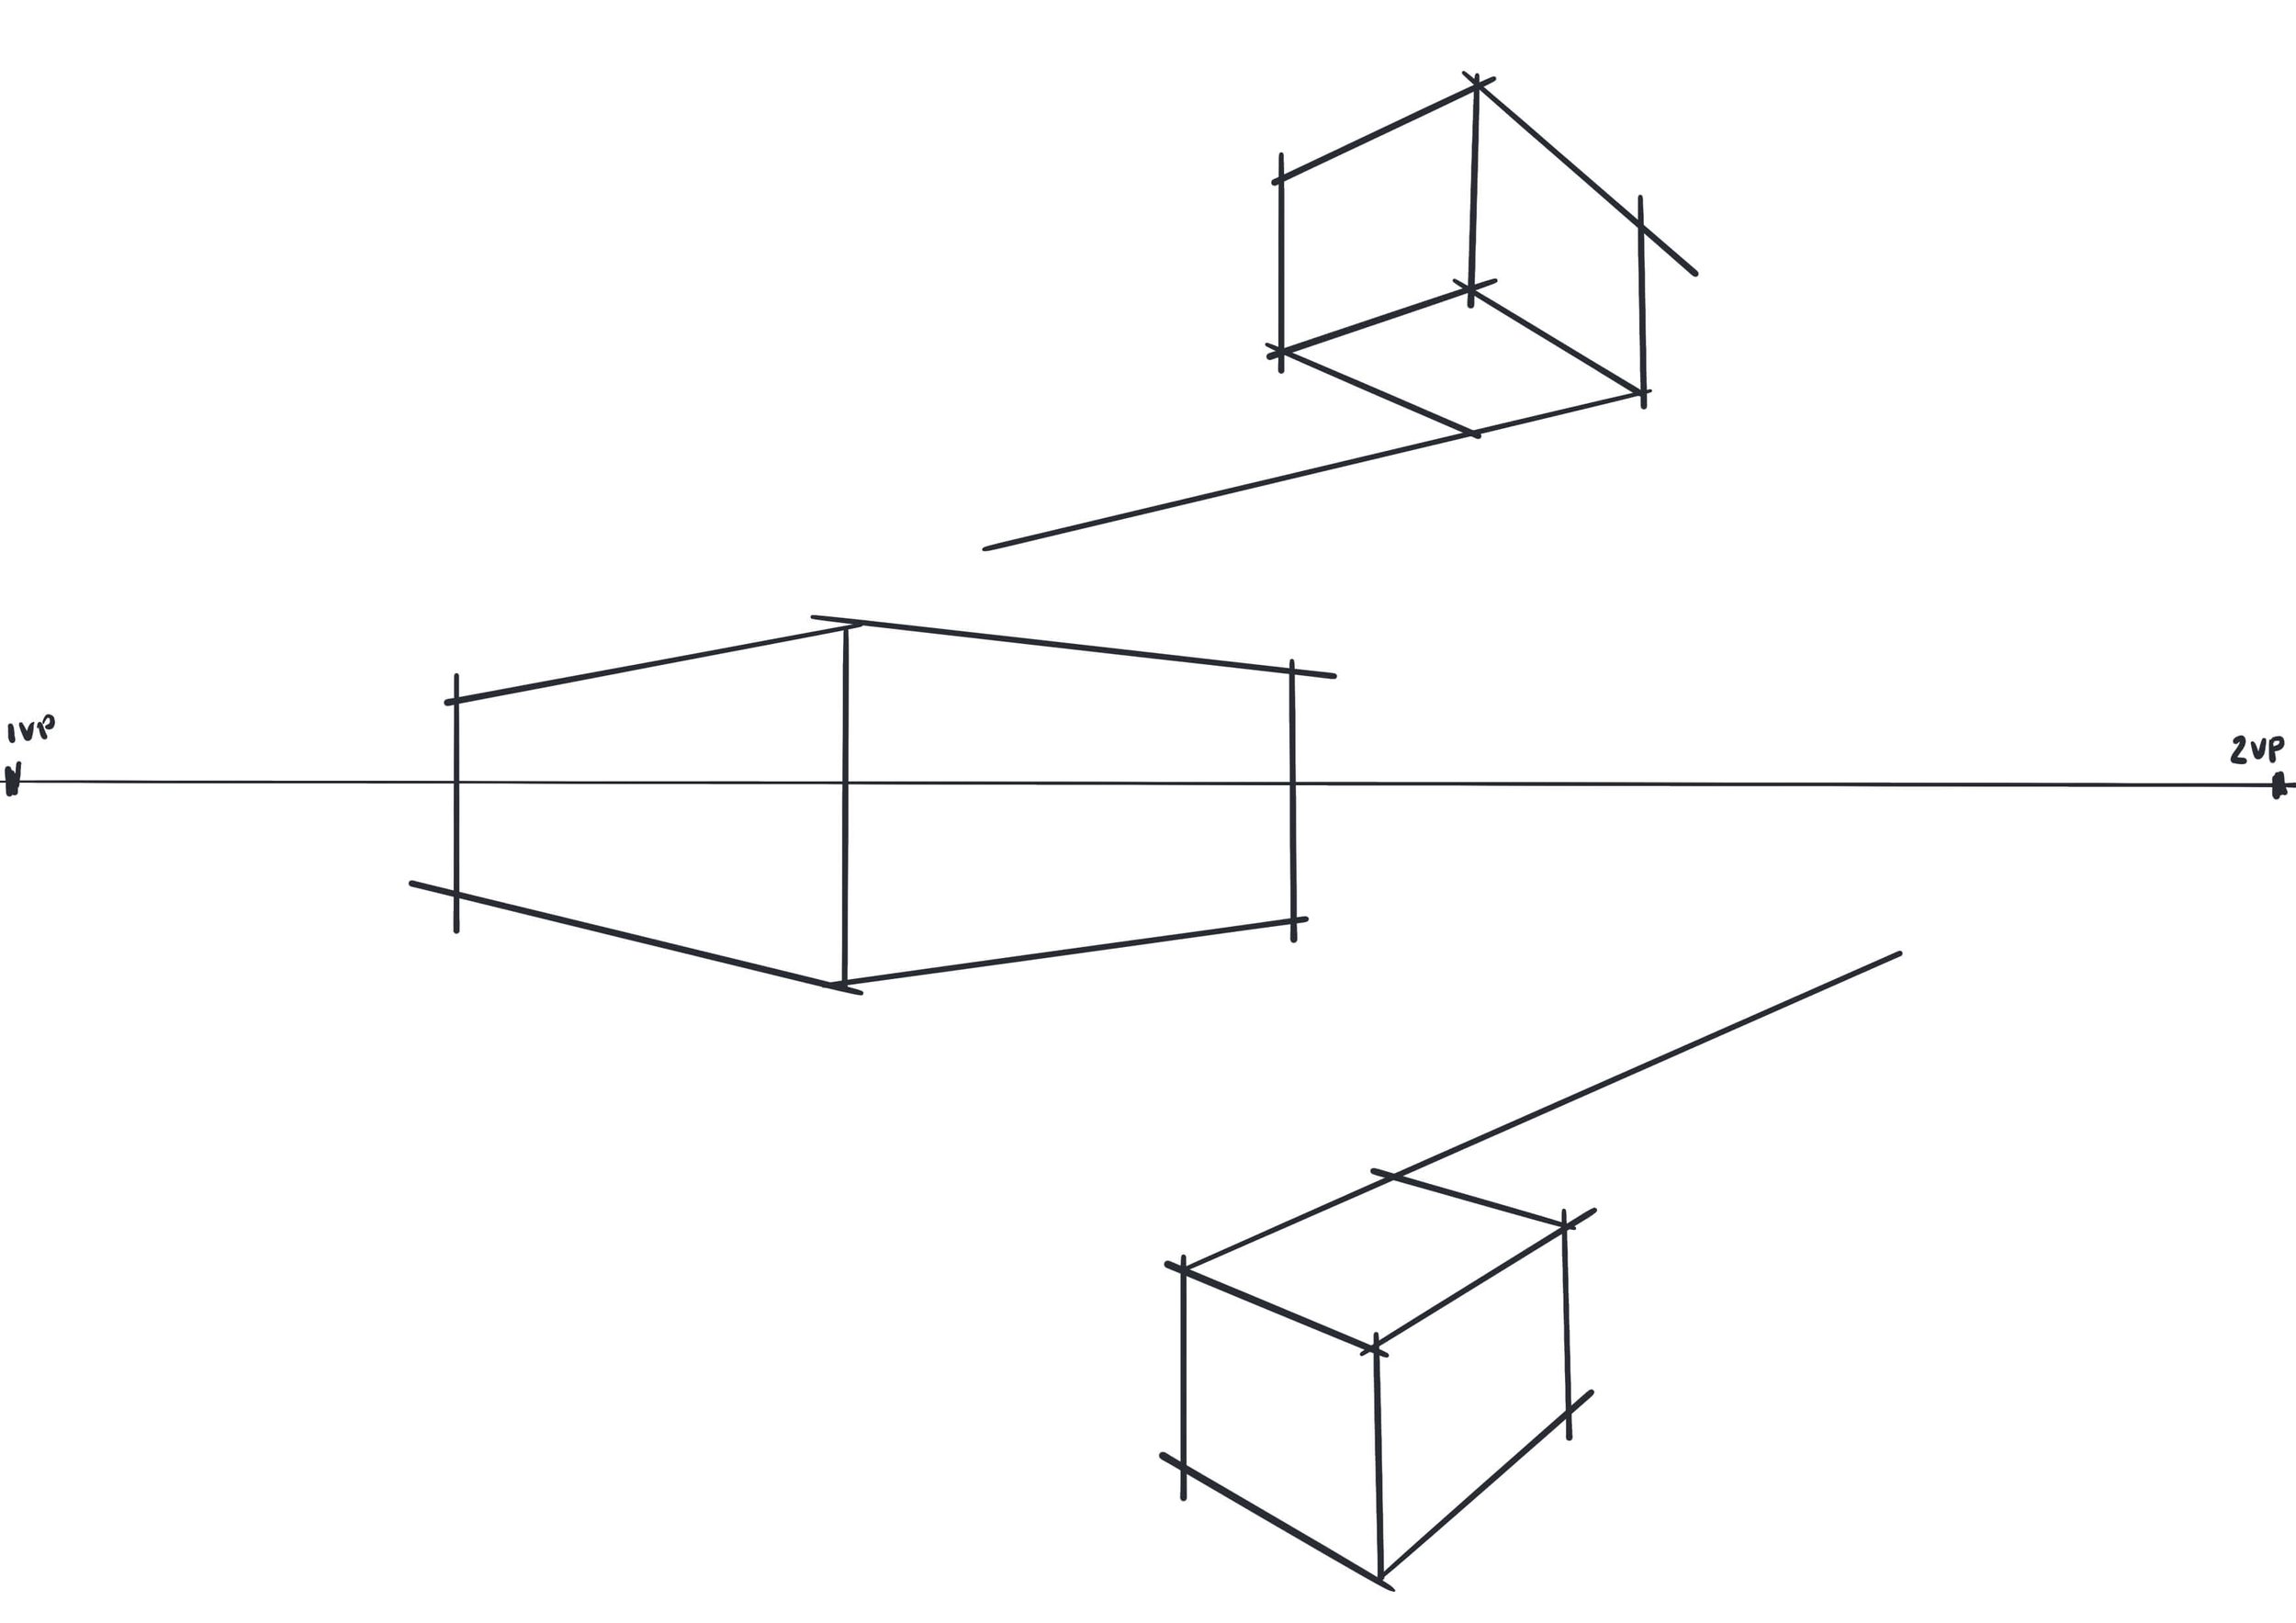
Draw the basic shapes of the elements in your scene - buildings, walls, furniture, etc. (Use light lines initially, as you will likely draw a lot of lines, and it can get confusing. For example, we are just drawing some blocks, so draw the corner which is turned closest to you.

Step 4: Connect Your Lines to the Vanishing Points
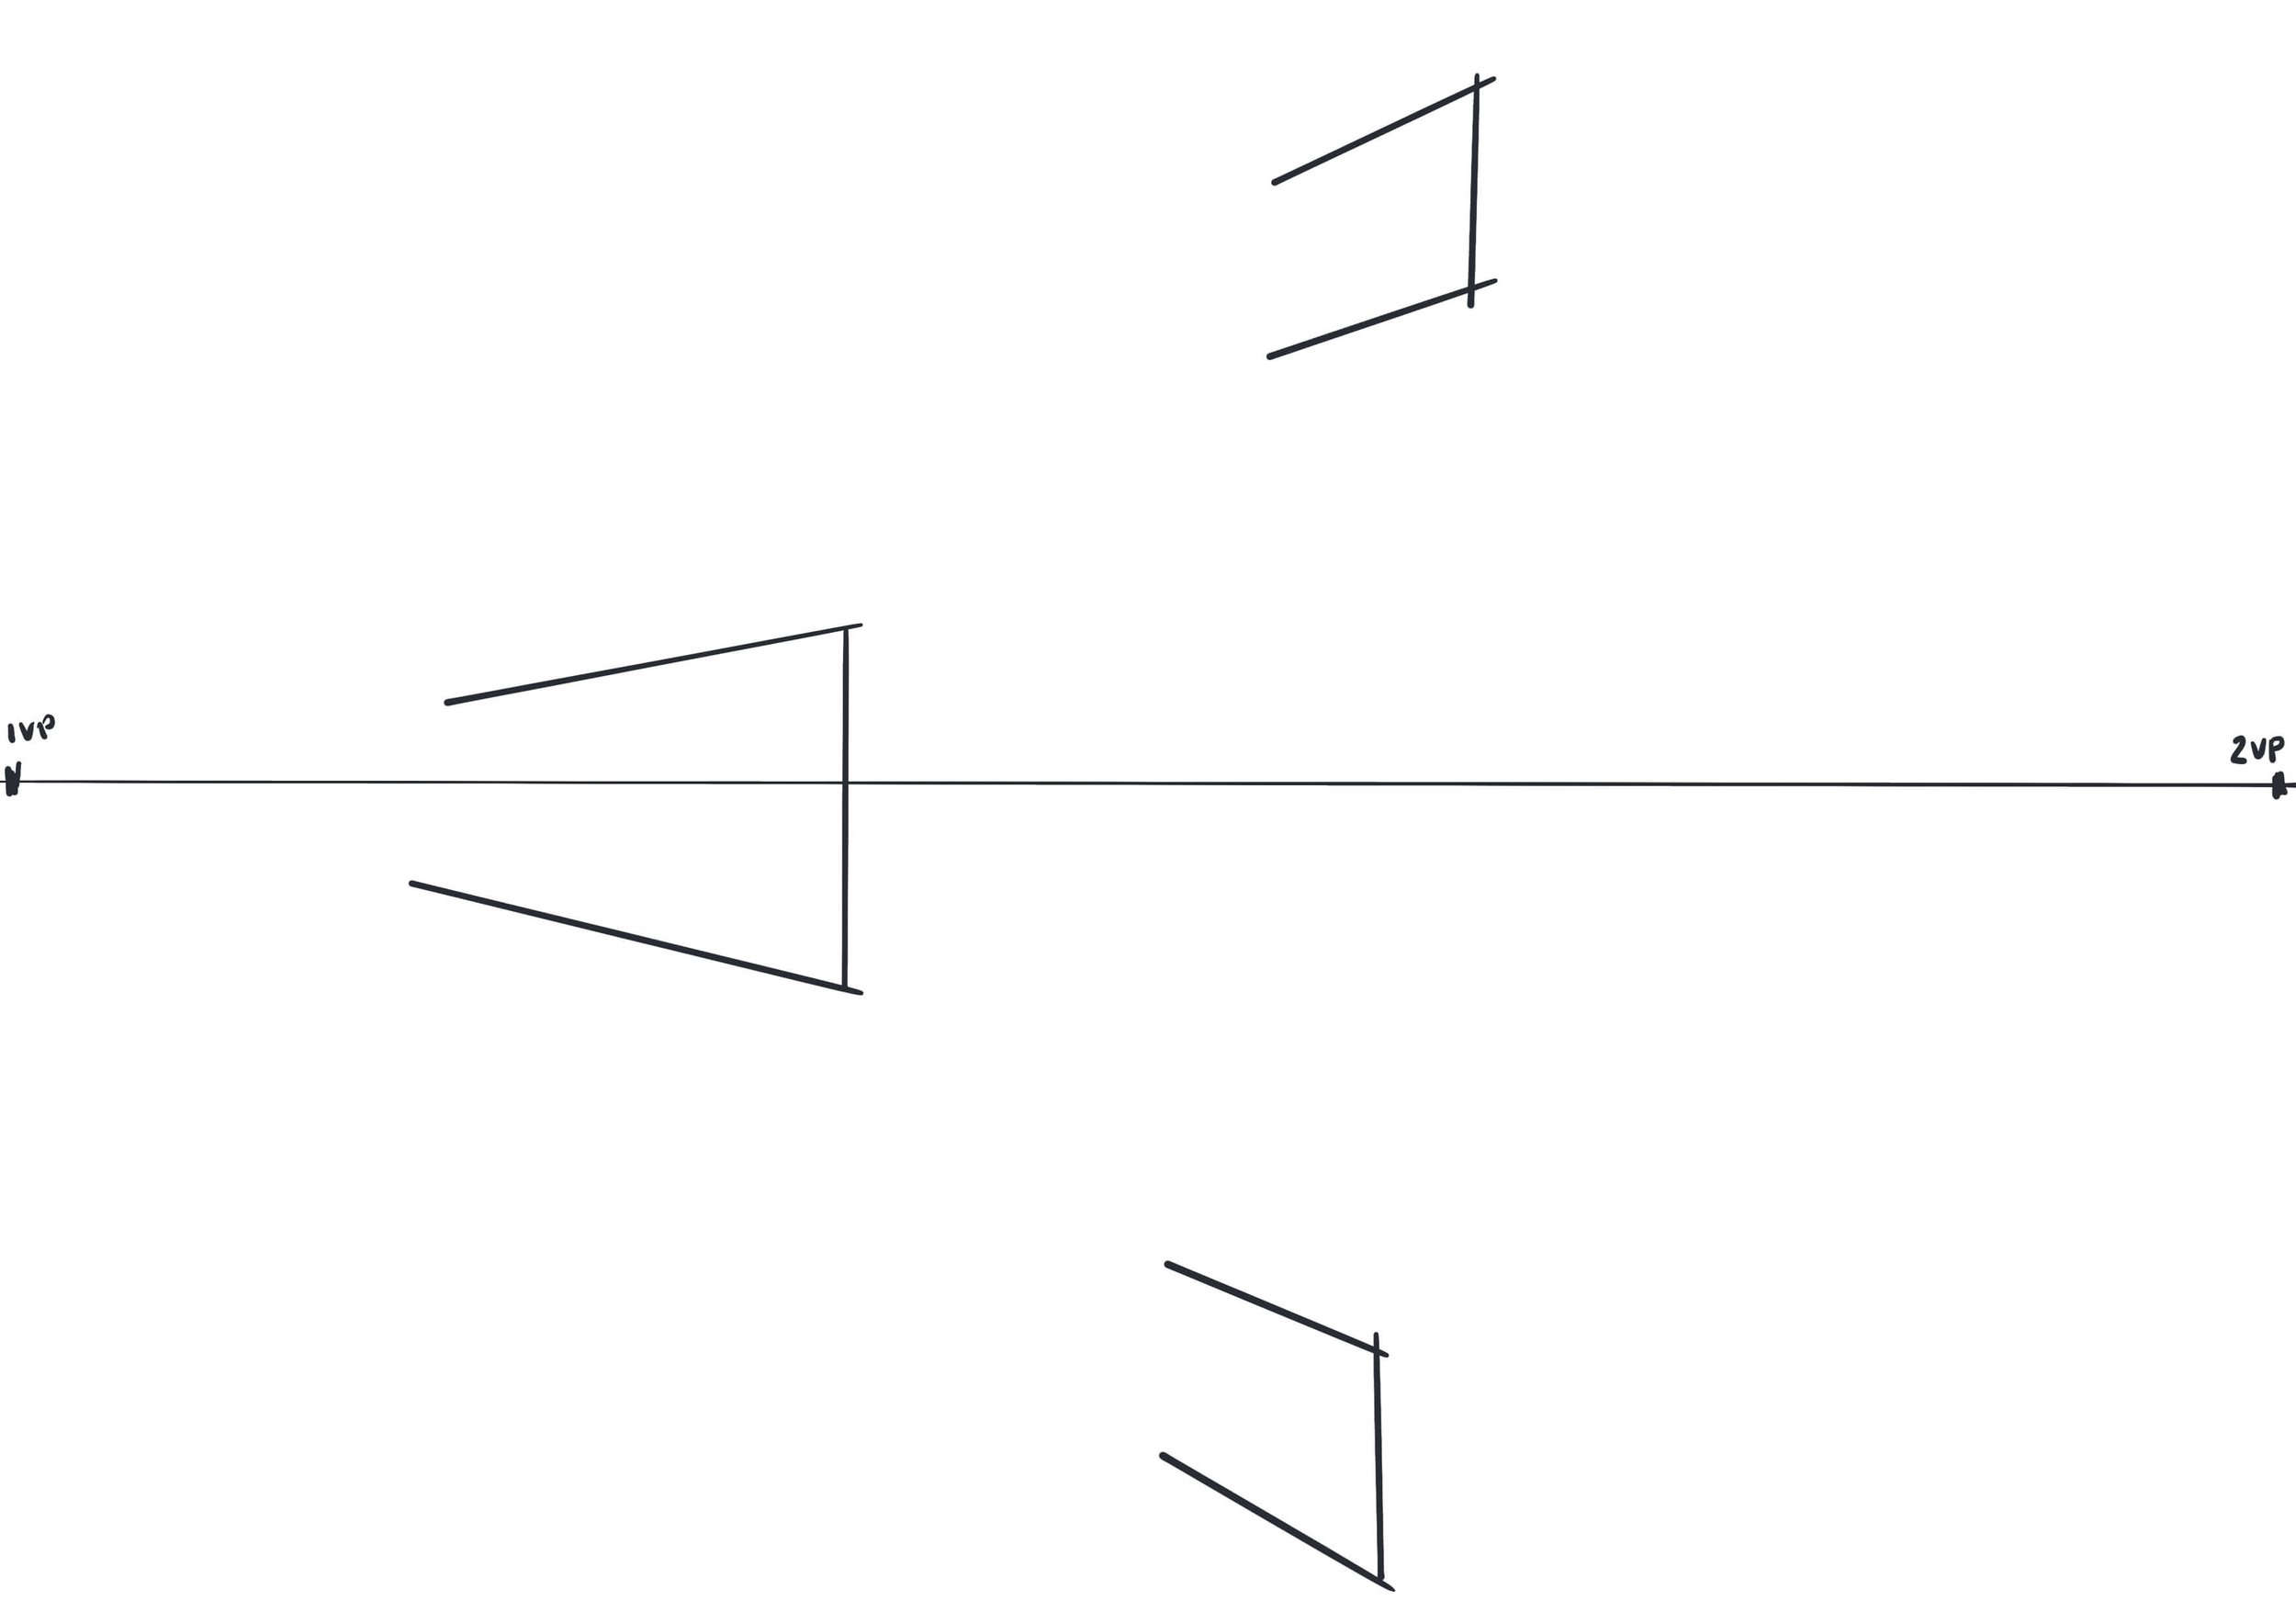
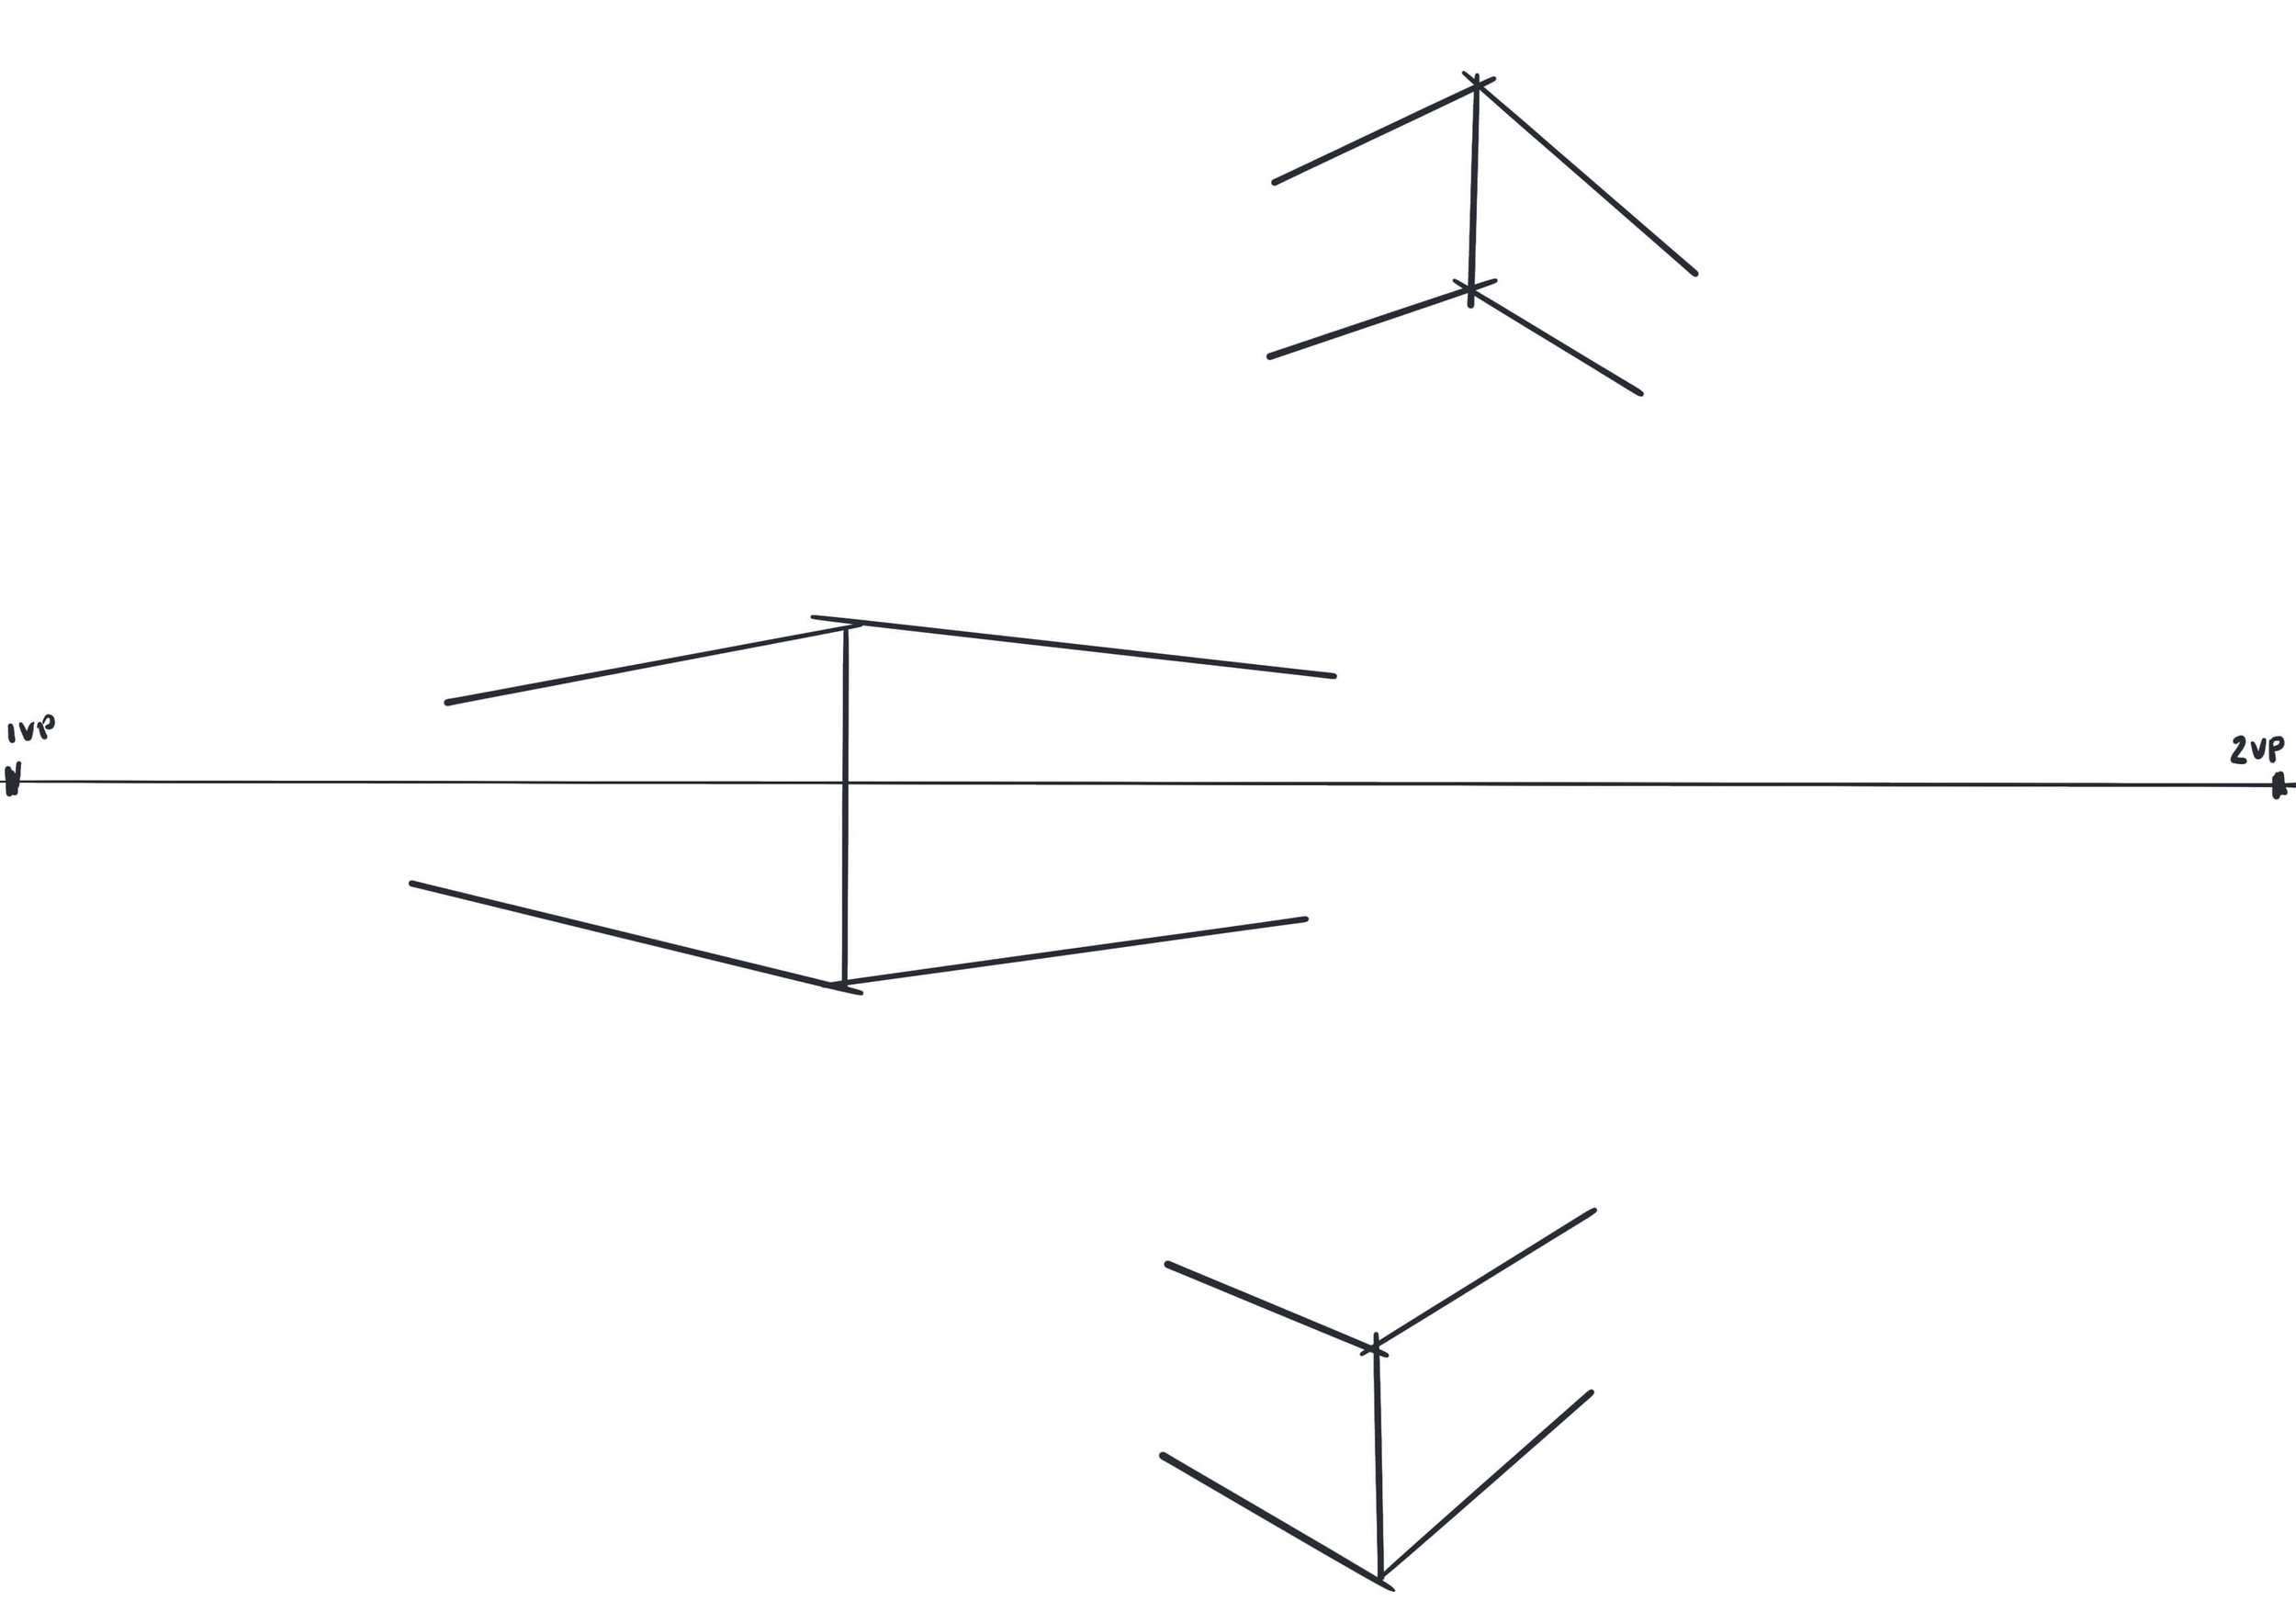
Line up your ruler with the 1VP (left) and draw lines from the top of the corner of the box back to 1VP, and the same for the bottom of the box. This will form the left side of the box. Do the same, but draw the lines back to 2VP to create the right side of the box.
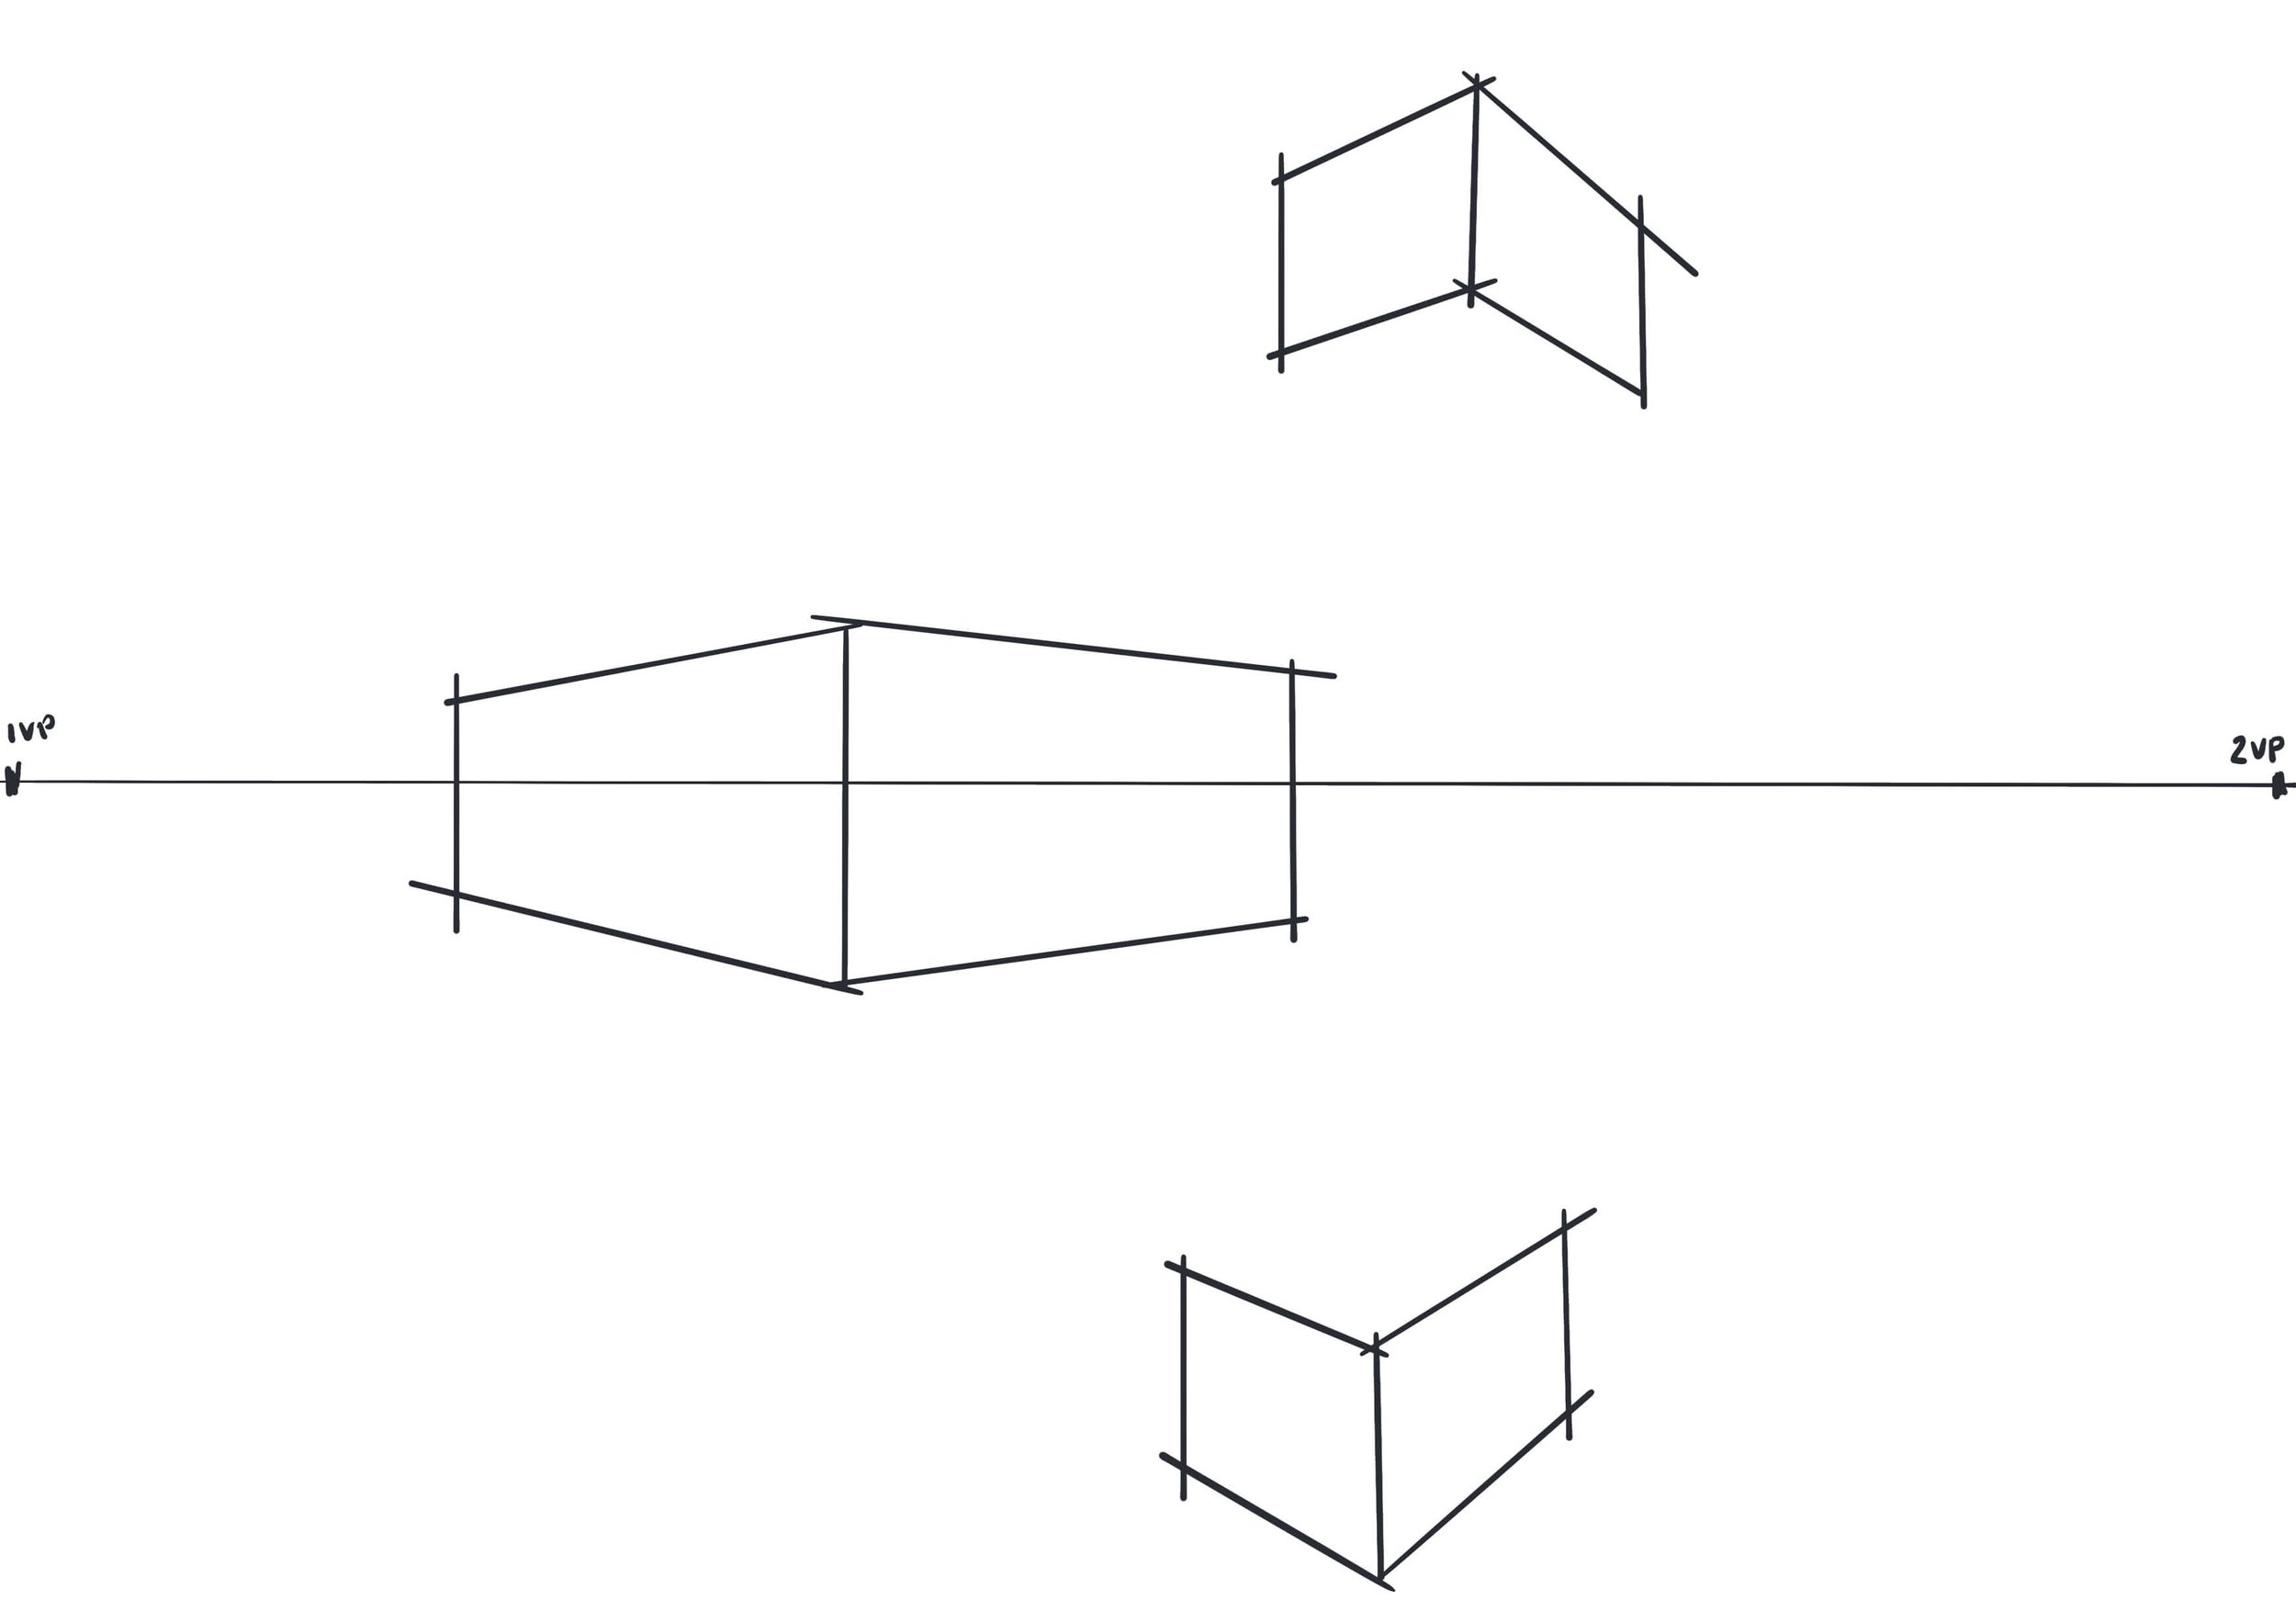
Now draw a vertical line (the back left corner of the box) to the left side of your boxes to give them a thickness (the left side of the box), and then do the same on the right-hand side - the boxes can be as long or short as you like, experiment with this. Close the cube by drawing in the top or bottom of the box. These lines go to the opposite VPs, so the right side goes to 1VP and the left to 2VP.
Step 5: Add Detail, Depth and Shadow
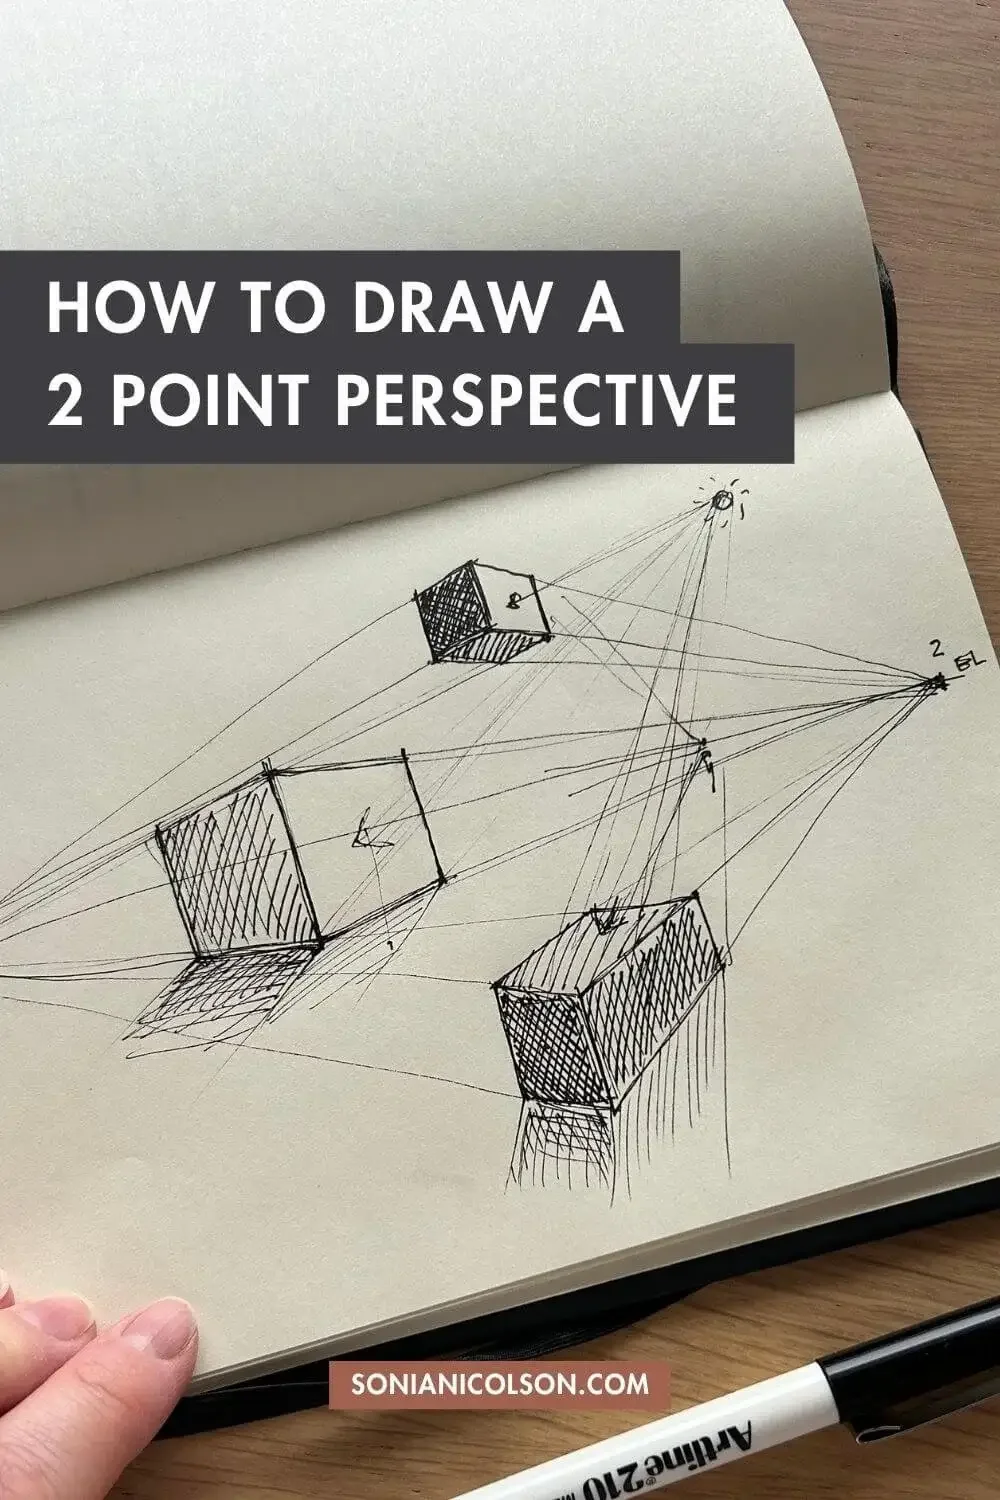
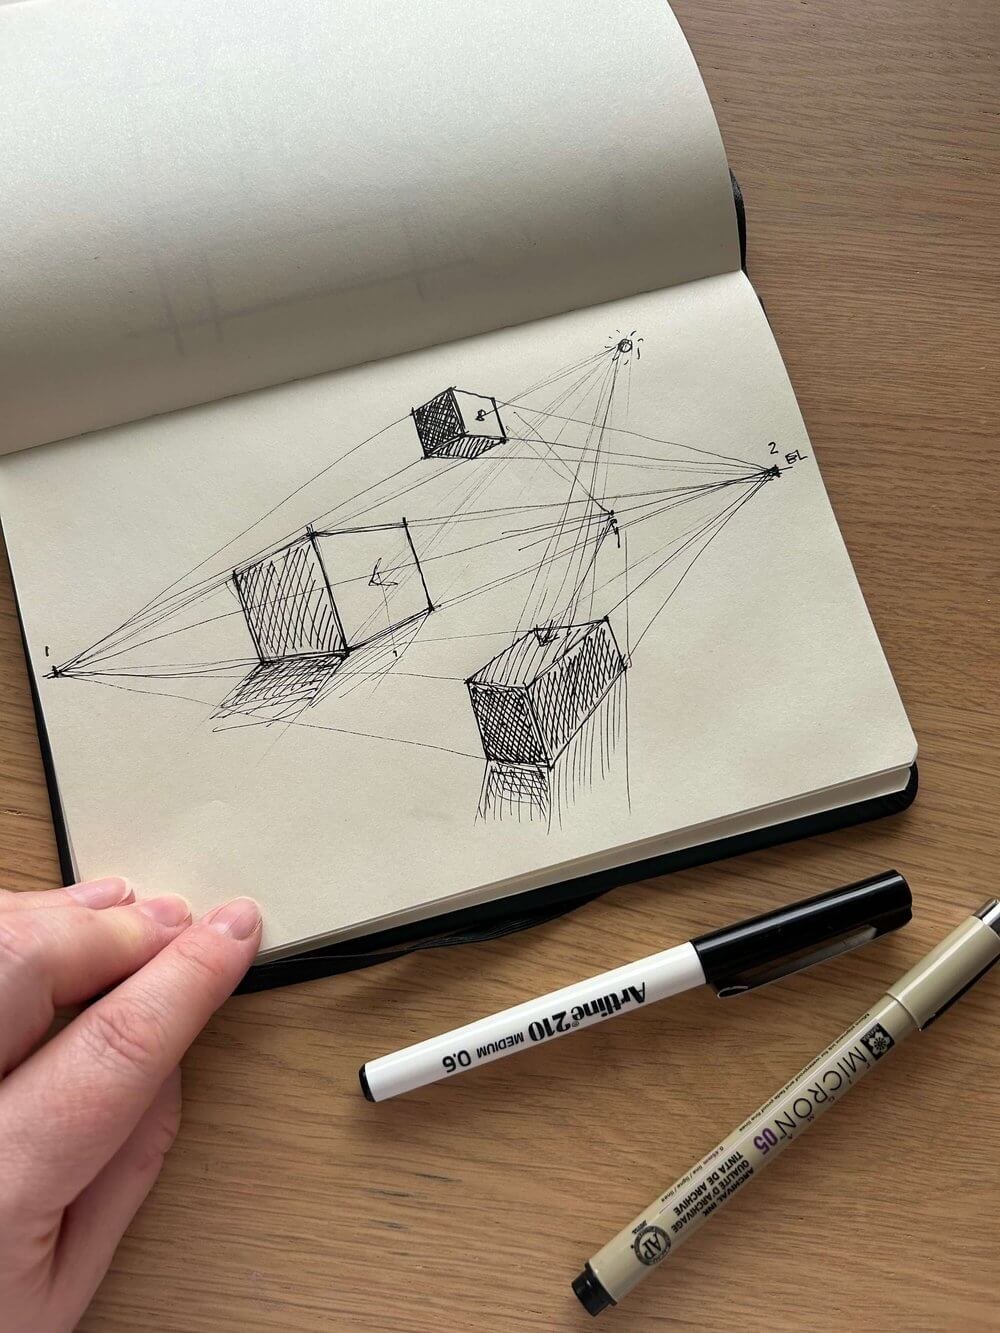
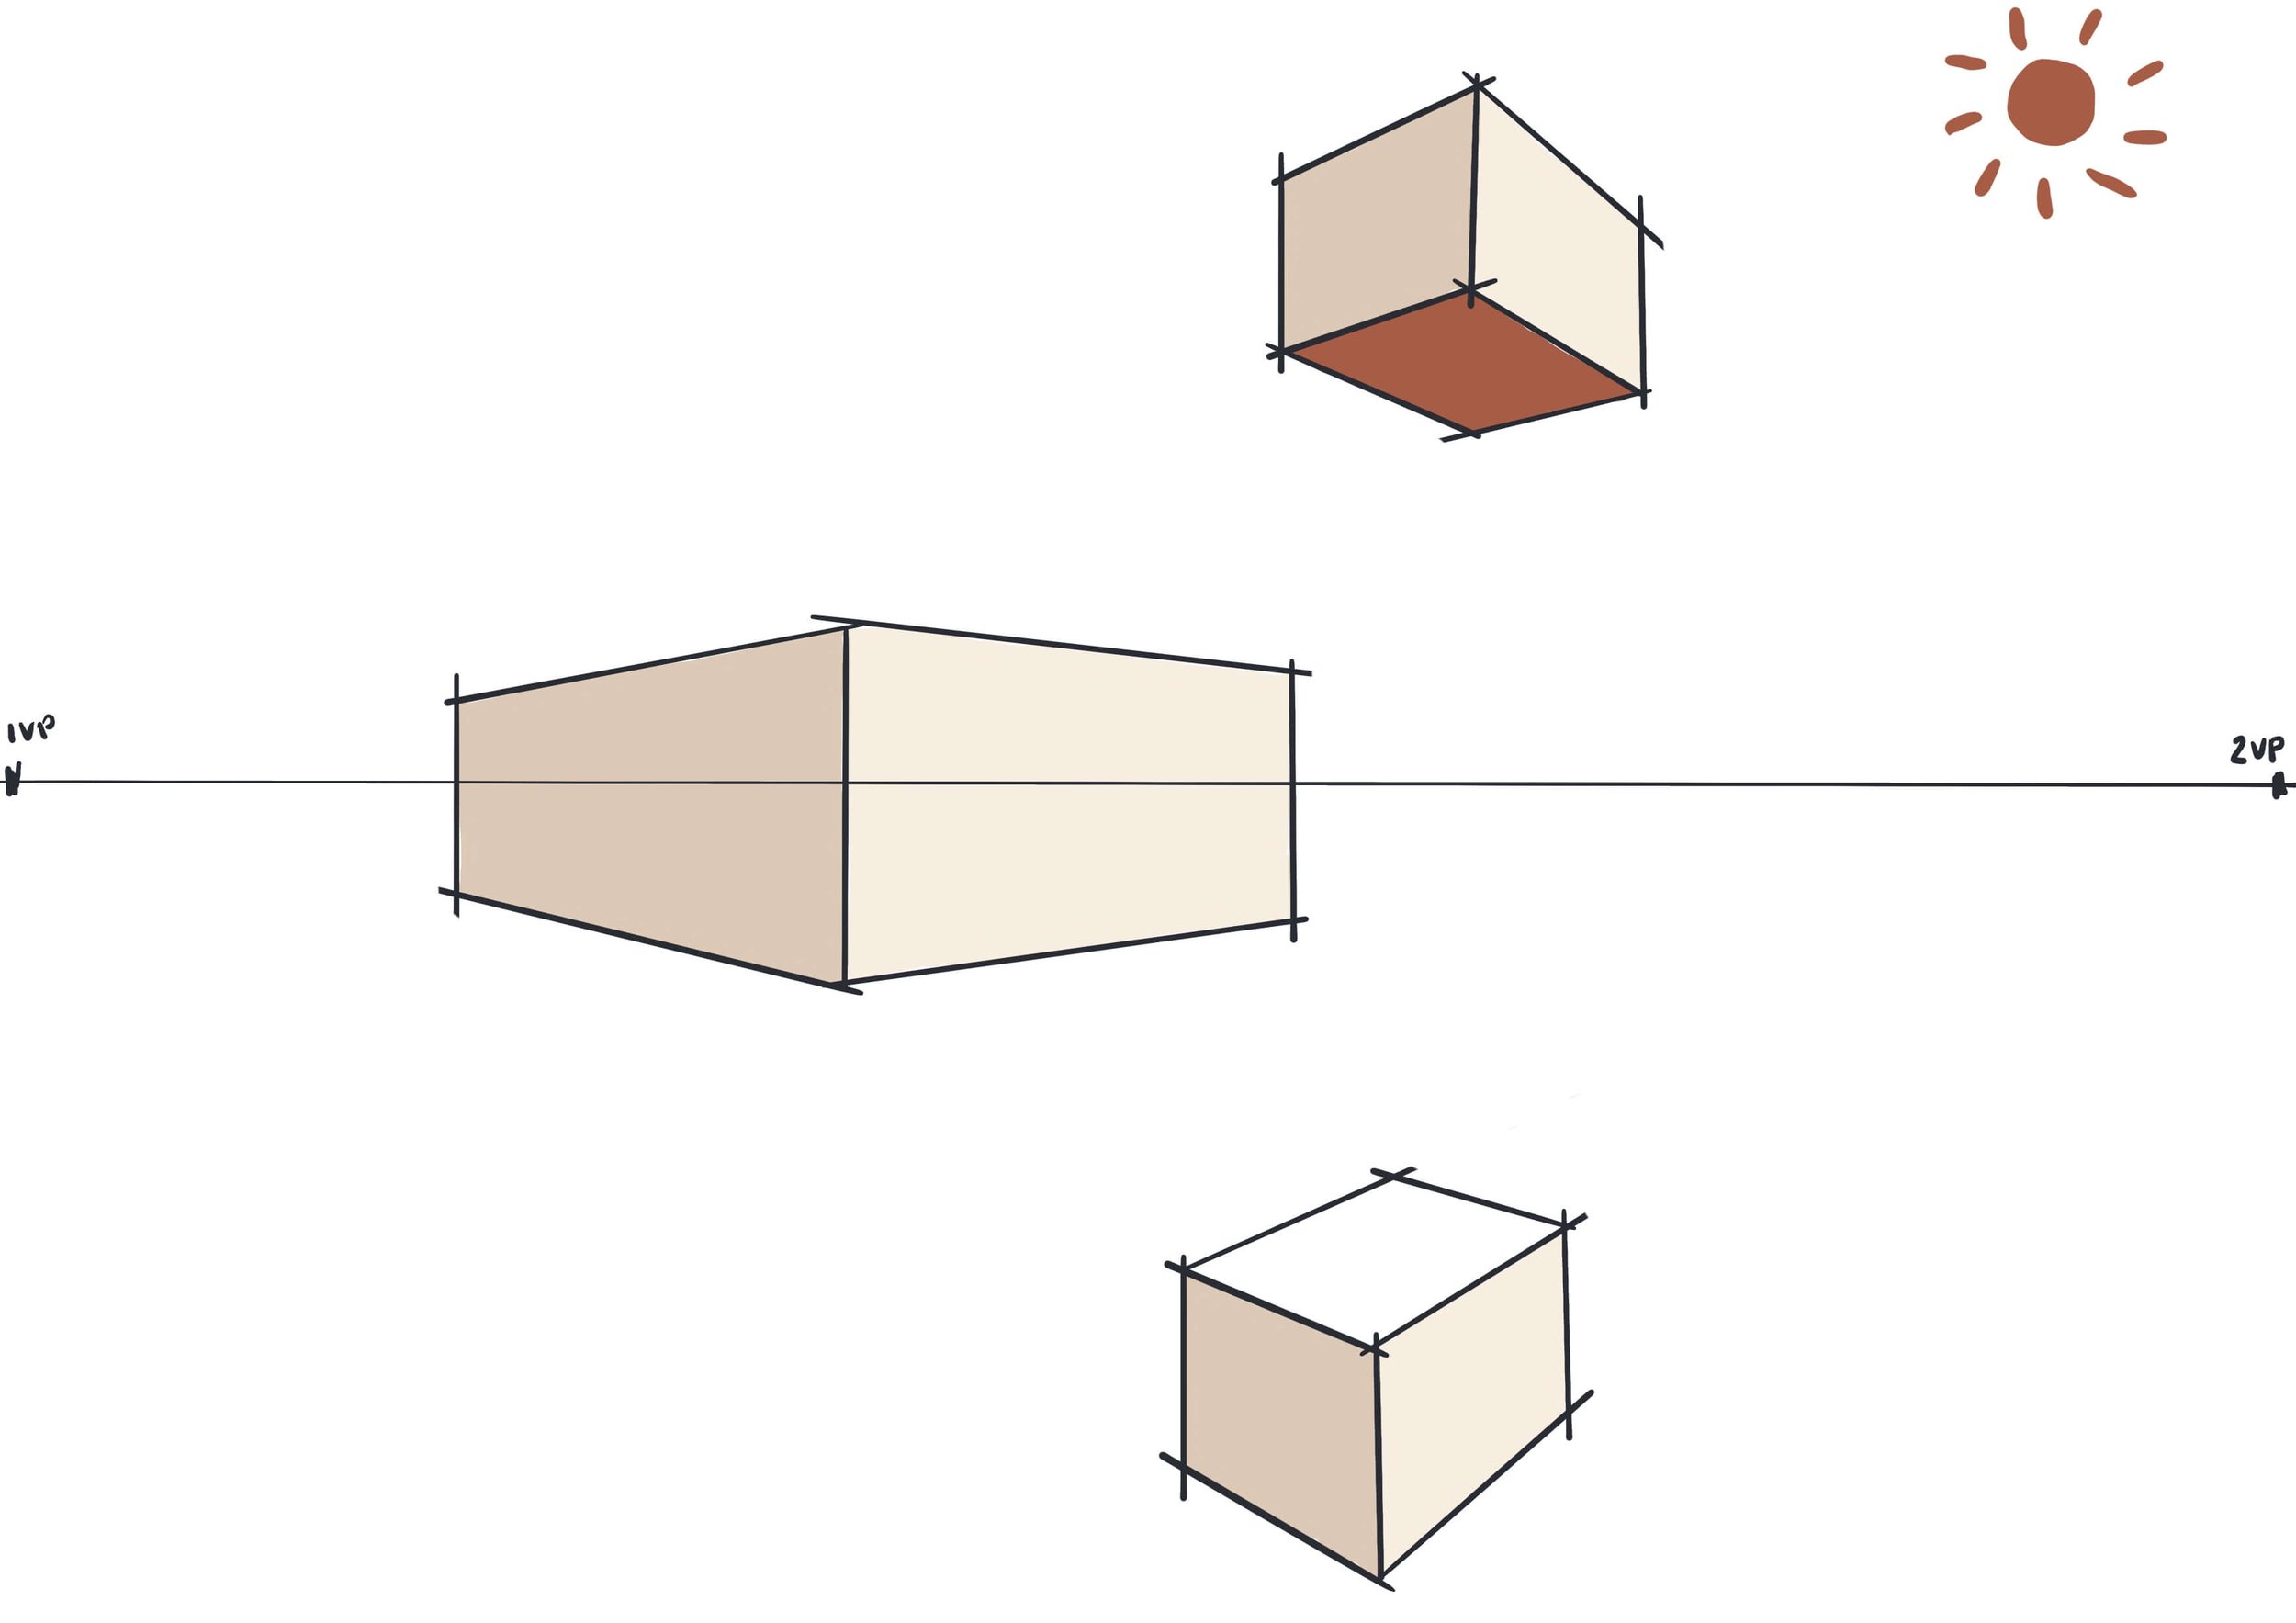
Refine the shapes and turn them into whatever it is you are drawing (a building, room, item of furniture, etc) by adding in details such as windows, doors, and so on. For our example, we are adding a light source (the sun) and creating shadows to help communicate that these are 3D boxes. The light from the sun hits the side of the box it faces; the side of the box underneath or facing away would then be in shadow.
At this stage, you can also draw inside the box to show a wireframe. To do this, draw in the opposite direction so the inside left side of the box goes back to 2VP and the right side goes back to 1VP. Boxes above the horizon/eye level are drawn above, so we can see the underside of the box. Boxes below the horizon show us the top of the box.
Want to learn perspective properly?
If this helped, but you want more guidance and practice, my Perspective Drawing Guide takes you through one-point and two-point perspective step by step, with explanations, exercises and practice designed specifically for architecture and interior design students.

Stop copying perspective tutorials. Start understanding why the lines go where they go.
If you can follow a perspective tutorial while you're watching it, but struggle to recreate the drawing on your own, you're not alone.
Perspective can feel complicated when you've been shown what to draw without being taught why you're drawing it.
“...allowed it to finally click.”- Kayla, Architecture Student, USA
“Something I had struggled with felt much more manageable.” - Kshaf, BA (Hons) Architecture, UK
“The explanations are simple and easy to understand...the exercises helped me practise and understand perspective more clearly.” - Vinesh Mistry, India
This book breaks perspective down into a clear, visual, step-by-step system so you can understand the rules, practise them, and start constructing perspective drawings for yourself.
Perspective is a system you can learn.
Drawing is a skill, not a talent.
Frequently Asked Questions
-
Two-point perspective is a drawing method that uses two vanishing points on the horizon line to create the illusion of depth. It's commonly used when you're looking at the corner of a building, rather than facing it straight on. Once you understand how the two vanishing points work together, your drawings will start to feel much more three-dimensional.
-
As architects, we're constantly drawing buildings from an angle rather than looking directly at the front of them. That's why two-point perspective is such an important skill to learn.
When I was teaching architecture students, this was often the point where they started seeing buildings differently. Instead of copying what they thought they could see, they began understanding how the forms related to the horizon line and vanishing points.
-
It can feel that way at first because you're working with two vanishing points instead of one.
The good news is that the principles are exactly the same. If you've already learnt one-point perspective, you're simply adding another vanishing point rather than learning a completely new system.
-
Use one-point perspective when you're looking directly at the front of a space, such as a corridor or room.
Use two-point perspective when you're looking towards the corner of a building or object. This creates a more natural view and is the perspective you'll use most often when sketching architecture outdoors.
-
The biggest mistake I see is students forgetting that each side of the object must recede towards its own vanishing point.
Another common mistake is placing the vanishing points too close together, which makes buildings look distorted. Giving the vanishing points more space usually creates a much more natural-looking drawing.
-
Absolutely. Many students think two-point perspective is only for advanced artists, but that's simply not true. Like one-point perspective, it's a logical process that becomes much easier once you understand the basic principles. With practice, it quickly becomes second nature.
Common Mistakes
Vanishing points placed too close together
Receding lines not meeting the correct vanishing point
Vertical lines leaning
The horizon line changes halfway through the drawing
Both sides of a building converge to the same vanishing point
Practice drawing various scenes and objects in 2-point perspective to improve your skills and build confidence. Join our email list to access our Perspective Practice Sheets to help you develop your drawing skills.
Where to Go Next
If you're building your architecture drawing skills, I'd recommend learning in this order:
Two-Point Perspective
Line Weights
TAG ME IN YOUR DRAWINGS @SONIANICOLSON
I’d love to see how they turn out


Architectural lettering is the professional handwriting style used on drawings, plans, and portfolios. In this guide, you’ll learn the simple rules architects use for clean, consistent lettering - plus download free practice worksheets (PDF) to improve fast.